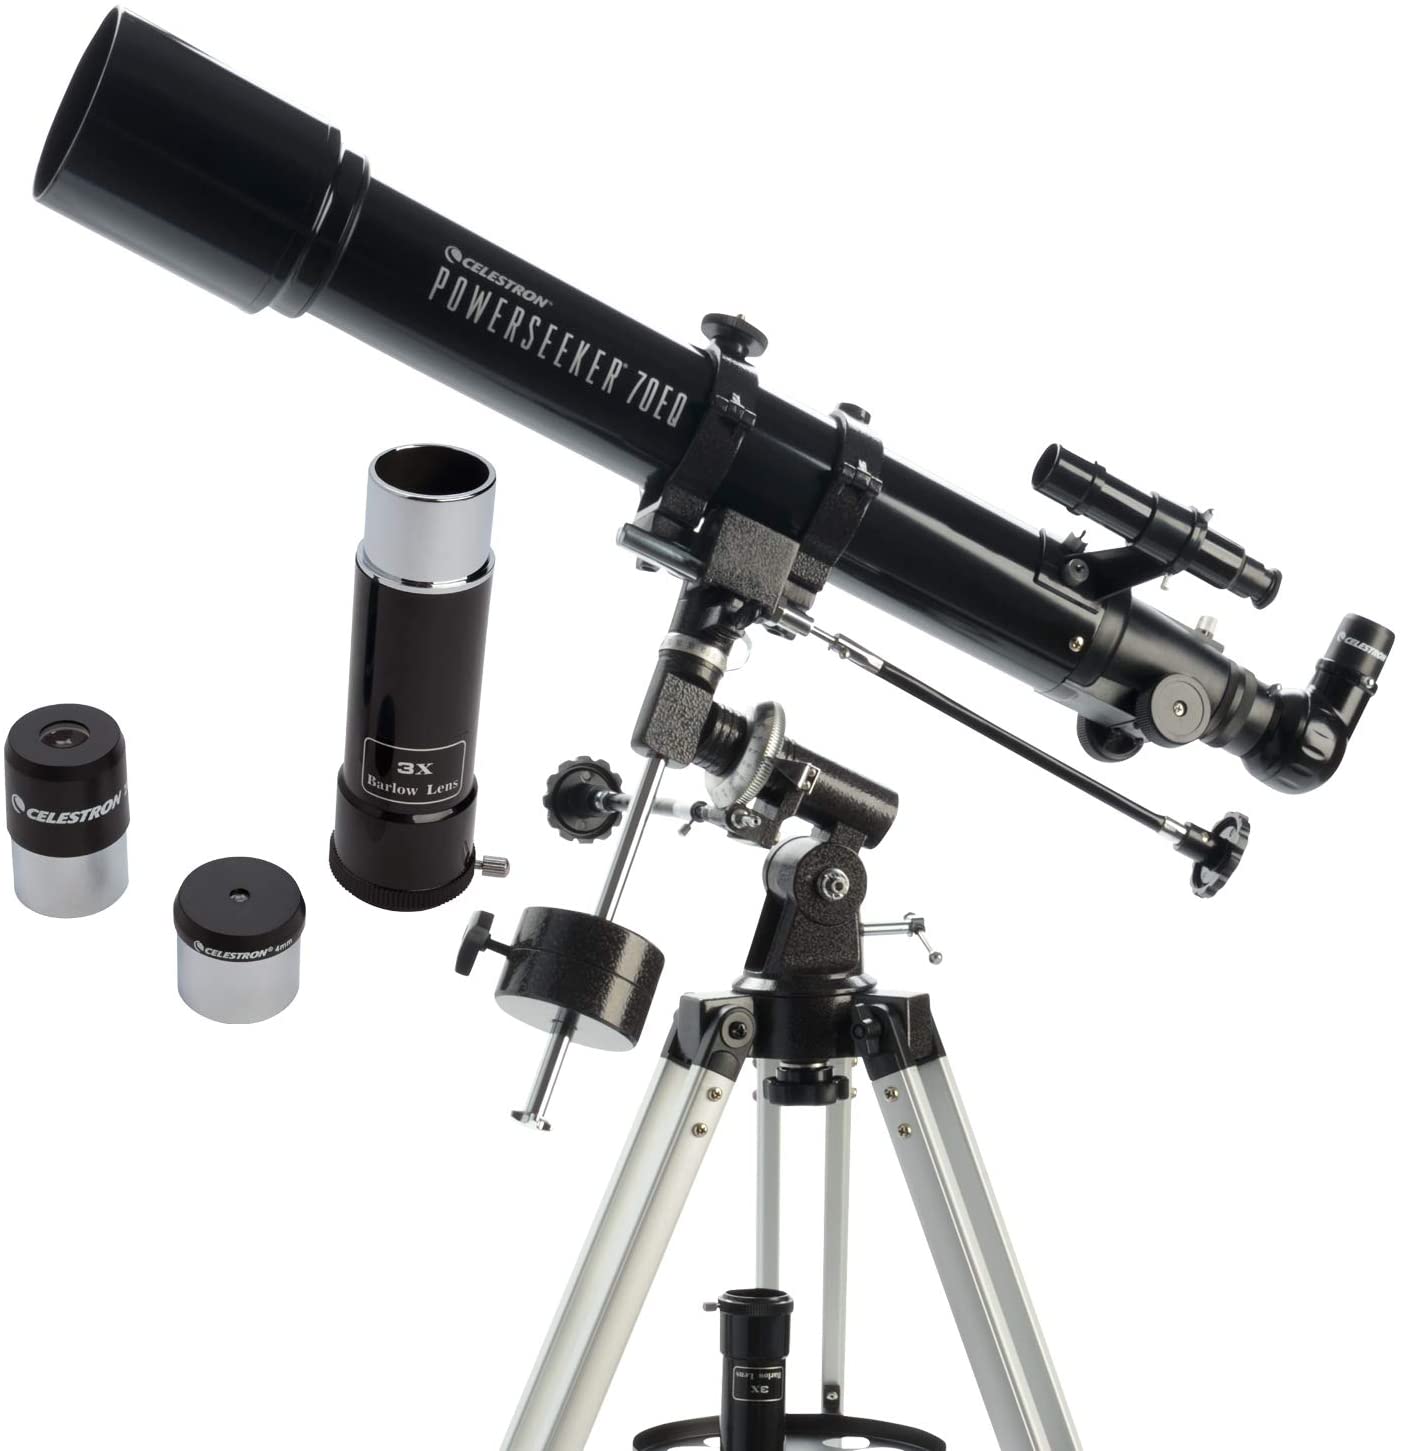
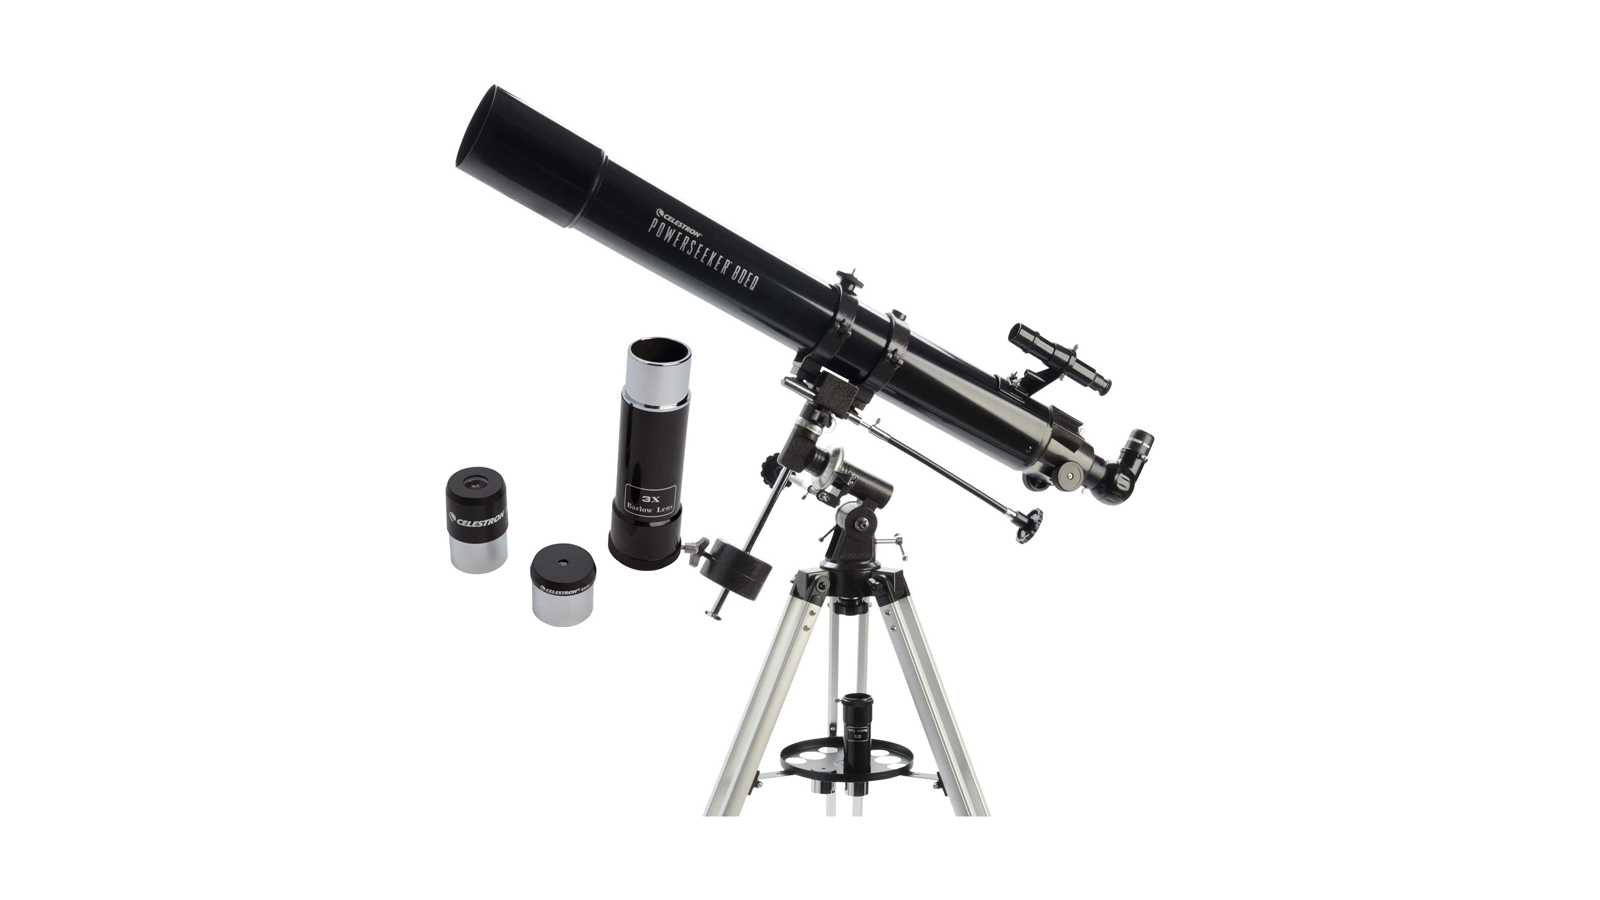
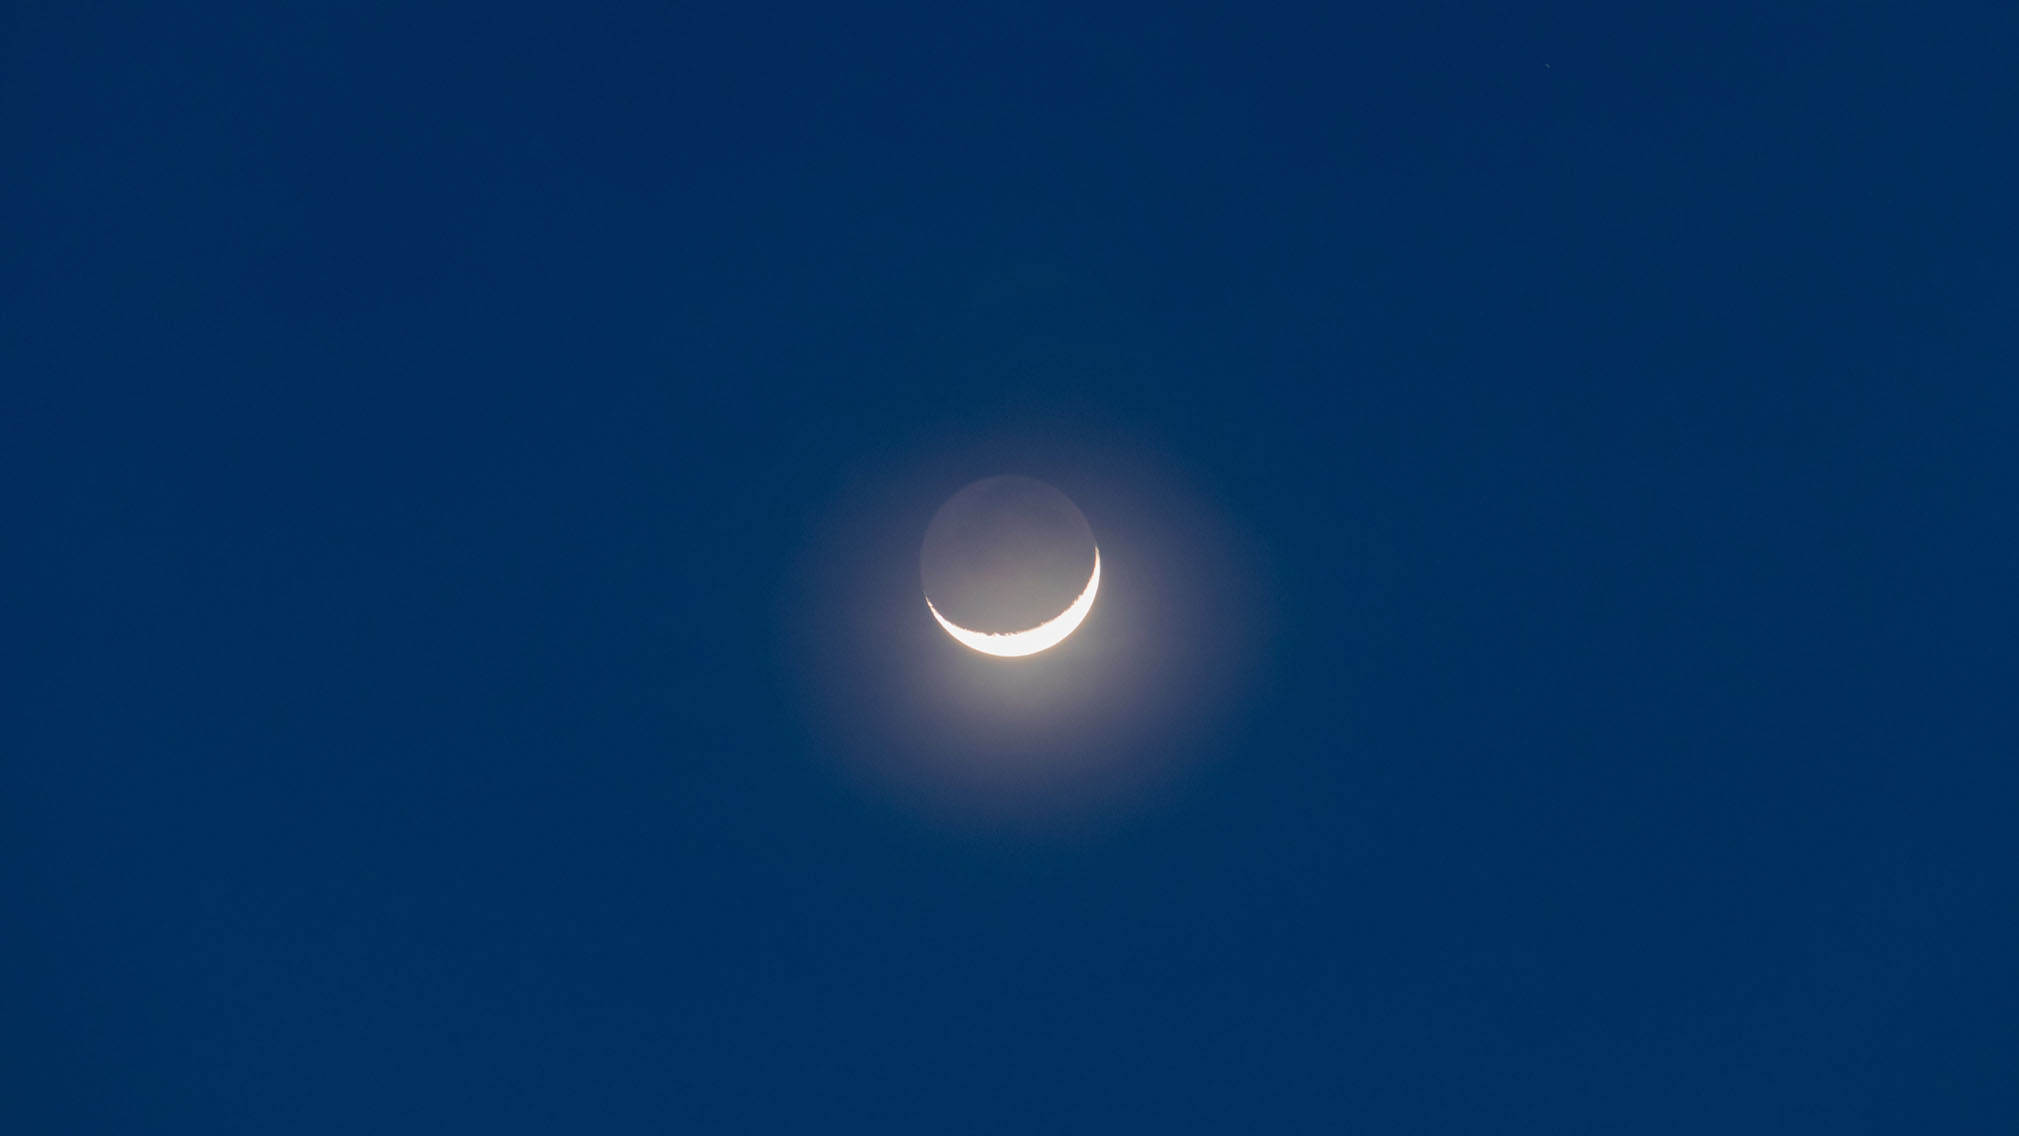
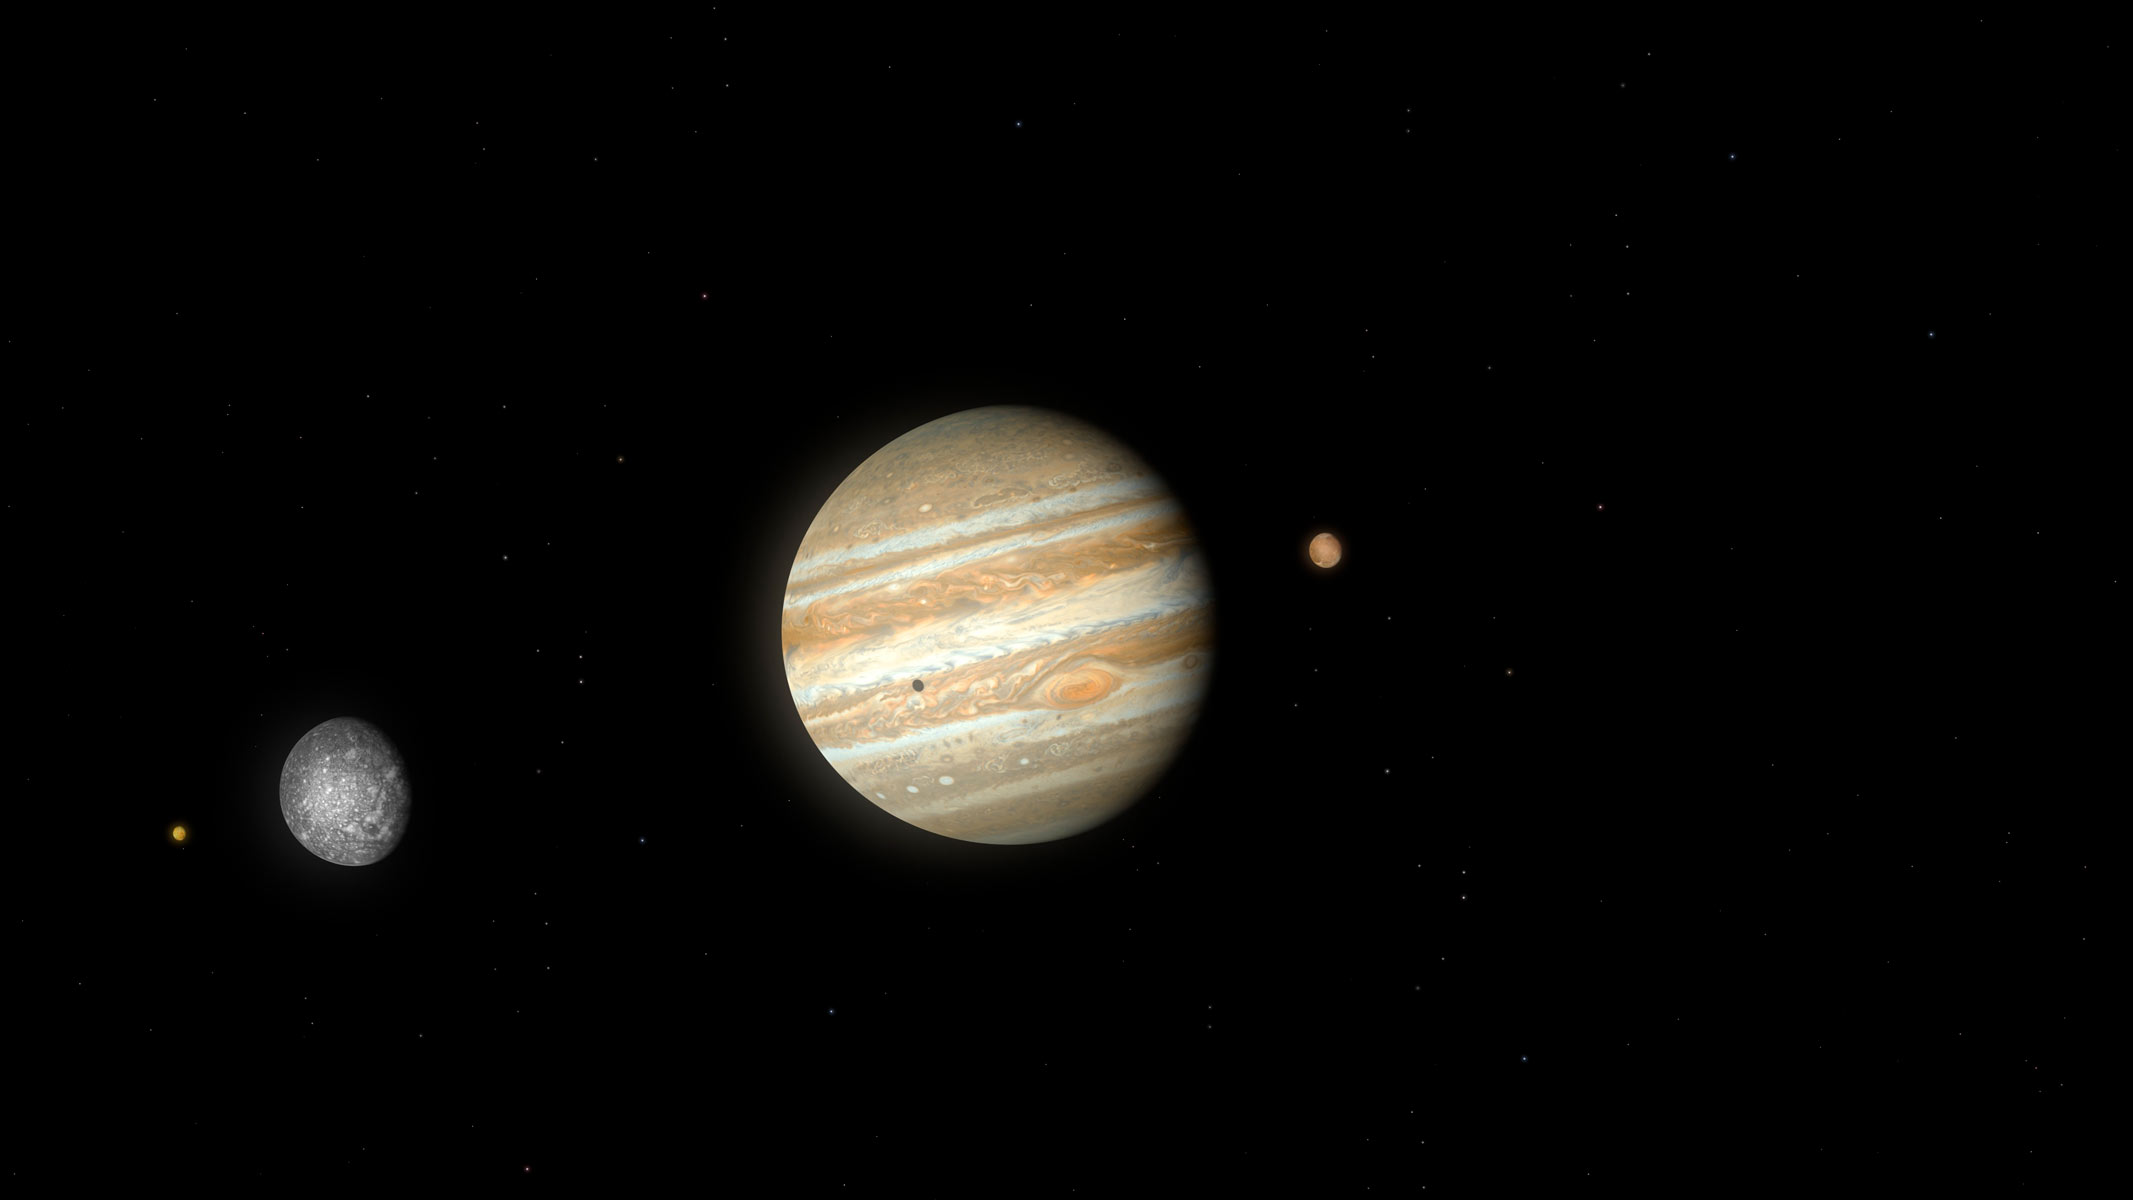
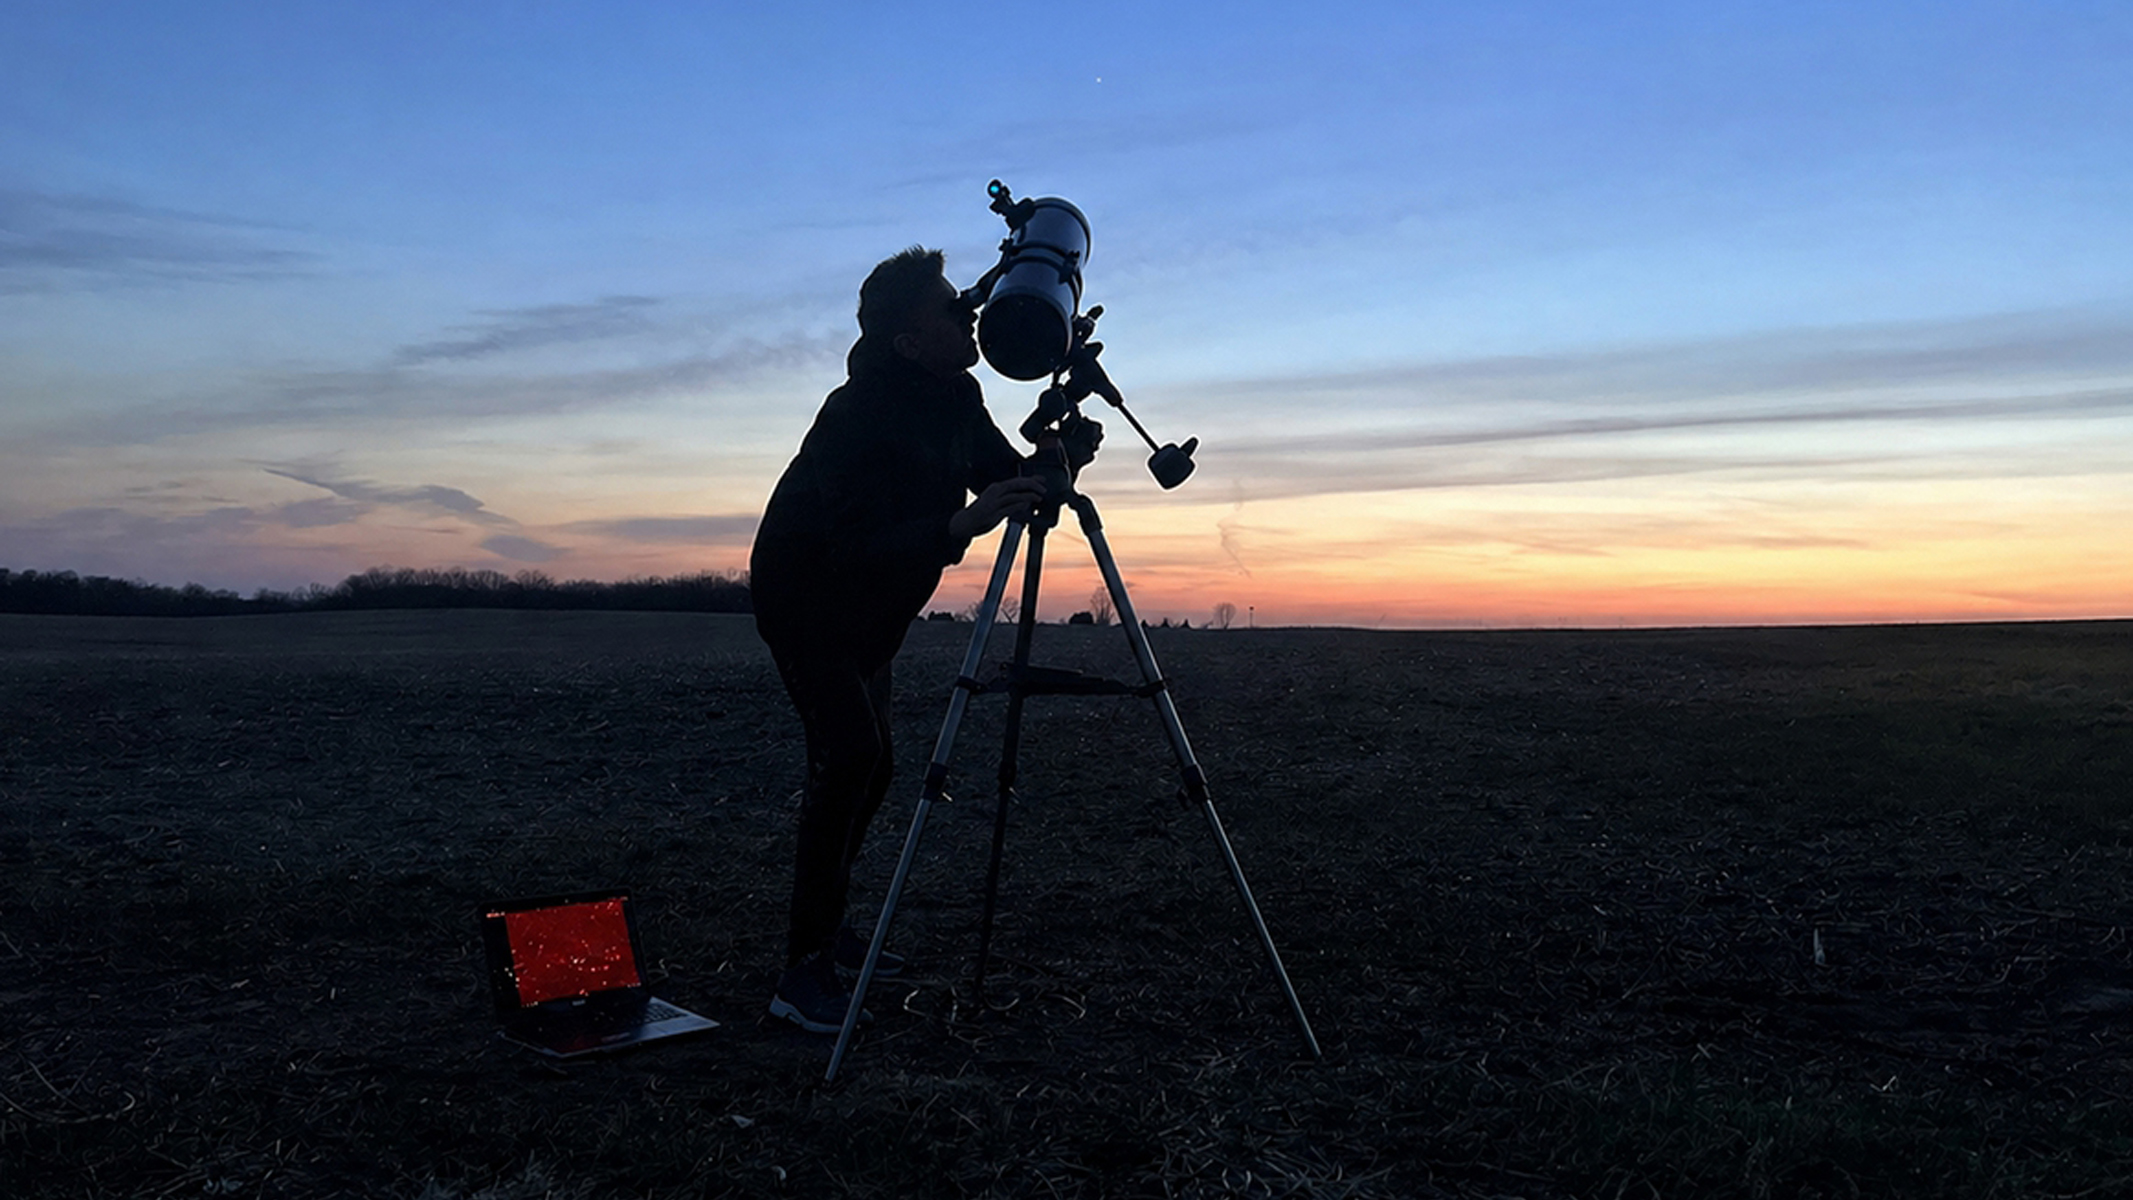
A partial lunar eclipse takes place this Aug. 27-28 and this beginner-friendly Celestron PowerSeeker 80EQ telescope, nearly $50 off at Walmart, will let you zoom in on what promises to be a stunning sight.
Ideal for exploring our own solar system, the Celestron PowerSeeker 80EQ comes with 20mm and 4mm eyepieces, a 3x Barlow lens, a German equatorial mount, finderscope and Starry Night astronomy software. In short, it has everything you need to get stargazing.
It's perfect for newcomers to the hobby, adults and children alike, or those on a budget. And, this October 4, it'll let you experience Saturnat opposition, when the planet is at its brightest.
Save $49 on a beginner-friendly telescope that's suitable for moon-gazing or exploring our planetary neighbors. View Deal
The Celestron PowerSeeker 80EQ is a great entry-level telescope, and this deal makes it an even more appealing prospect. (Image credit: Amazon)
Where do you start if you want to get into astronomy? This Celestron PowerSeeker 80EQ telescope is a good jumping-on point, particularly if you're on a budget. At $150, it's ideal for beginners and older children and, with some supervision, young stargazers.
It has everything you need to get started; the 20mm and 4mm eyepieces will provide magnifications of 45x and 225x respectively, enough to pick out the moon's major craters and zoom in on the planets in our solar system.
As a refractor telescope, it won't invert the image, so you can also use it for nature watching. And while the Barlow lens will likely push the telescope's practical limits, it's a neat bonus, as is Celestron's Starry Night software, which contains over 36,000 objects to explore.
Key features: 80mm objective, manual EQ mount and tripod, 20mm, 4mm and 3x Barlow lenses, 13.9 lbs (6.3 kg) weight
Price history: This is the cheapest the Celestron PowerSeeker 80EQ has been in nearly two years.
Review consensus: The Celestron PowerSeeker 80EQ has been well received by purchasers, with Amazon reviews praising how beginner-friendly it is, suitable for spotting the Moon and planets.
✅ Buy it if: You want a beginner-friendly telescope that won't break the bank.
❌ Don't buy it if: You want to look beyond our solar system. Instead, consider one of the best deep space telescopes.
Top 5 things to see in the night sky with binoculars — ranked by an expert
Beyond simple naked-eye observing, a pair of the best binoculars are the most accessible way to experience the night sky. They are affordable (although pricier models are available), very easy to use compared to telescopes and they offer a wide range of celestial sights, from our solar system neighbors to distant deep-sky objects. They are great for both beginners, casual observers and even veteran stargazers who want to grab a quick look or spend time sweeping through the Milky Way.
So what are the best night-sky targets for binocular users? There are so many, but we’ve done our best to whittle them down to five of the best that provide a good sense of what can be seen through binoculars. We’ve also accounted for different apertures and magnifications to make sure there’s something for everyone, even kids
The moon
Binoculars can get you great views of the moon. (Image credit: Getty Images)
The moon is the ideal starting point for observing with binoculars. As a large target full of intricate features that appear differently depending upon the illumination, the moon rewards return visits, and you’ll never grow bored.
Even low-magnification, smaller-aperture binoculars will show some interesting details. Small 8x40 or 7x50 binoculars are sufficient; you certainly wouldn’t want to go as low as, say, 8x25 because the moon would appear small. While larger magnifications can improve the view, unless you have the binocular mounted on a tripod, the shake from jittery hands can look like moonquakes. If you don’t have a tripod, an alternate solution is to use image-stabilized (IS) binoculars, where the binoculars’ internal electronics are able to remove the jitter from the image, making the view more static.
The illumination on the moon changes across a 29.5-day cycle as the sun rises and sets over the lunar landscape, with phases cycling from new to first quarter, then to full and last quarter and finally back to new again. Often, the best time to observe a particular feature on the moon is when it is dawn or dusk at that location, and the sun angle is low, casting stark shadows. Otherwise, it is difficult to see the relief when the sun is overhead.
Jupiter’s moons
Jupiter and (some) of its moons in orbit. Through binoculars views will be less detailed and smaller, but the moons are still visible. (Image credit: Getty Images)
Earth’s moon isn’t the only moon in the solar system that can be seen through binoculars.
A simple pair of 8x40s or 10x50s will be sufficient to watch the four largest moons of Jupiter — Io, Europa, Ganymede and Callisto — circle around the Jovian giant. Unfortunately, these binoculars won’t be enough to show you the belts of Jupiter or its Great Red Spot, but its four large moons, known as the Galilean moons, because they were discovered by Galileo, will appear as pinpricks of light on either side of Jupiter.
It’s fun to follow in Galileo’s footsteps and watch the moons orbiting Jupiter, sometimes disappearing from view as they move behind the giant planet, or pass in front of it. Binoculars will not be powerful enough to show the moons transiting against the face of Jupiter, though — Jupiter is too bright, and the contrast is not great enough. The other 91 moons of Jupiter are far too small and faint to be seen in binoculars.
Mizar and Alcor
The Big Dipper constellation houses the stars Mizar and Alcor. (Image credit: Spike Silvernail/Getty Images)
In the handle of the pan-shaped Big Dipper (part of Ursa Major) is the pair of stars called Mizar and Alcor. They make a lovely visual double, easily seen with the naked eye, and they really pop when viewed through 10x50 binoculars, with Mizar the brightest at magnitude 2 and Alcor a little fainter at magnitude 4.
Some double stars are just visual doubles, meaning they are many light-years apart and unrelated, but they just happen to be very close to each other on the night sky as seen from our line of sight. Not so with Mizar and Alcor, which are physically bound by gravity as they orbit each other. However, view Mizar and Alcor through binoculars, and you will get a glimpse of the true magnificence of this system. Large binoculars will show that Mizar is also a double star. Resolving Mizar as two stars is probably pushing it in 10x50s, but a pair of 20x80 binoculars will give you a better chance of splitting them, with image-stabilized binoculars, if you have them, giving you the edge.
There’s even more in the Mizar and Alcor system than what binoculars can show. Both stars in the Mizar system are also doubles, as is Alcor, making this a six-star system in total! Sadly, these extra companions are so close together that not even telescopes can split them. But there are plenty of other doubles for you to hunt down with binoculars. The trick is to find double stars that have a wide enough separation to be resolvable by 10x50 binoculars. Try also Epsilon Lyrae and Alpha Librae, also called Zubenelgenubi, meaning ‘southern claw’, as it was once associated with the constellation Scorpius the Scorpion, before being moved into Libra the Scales.
Auriga’s open clusters
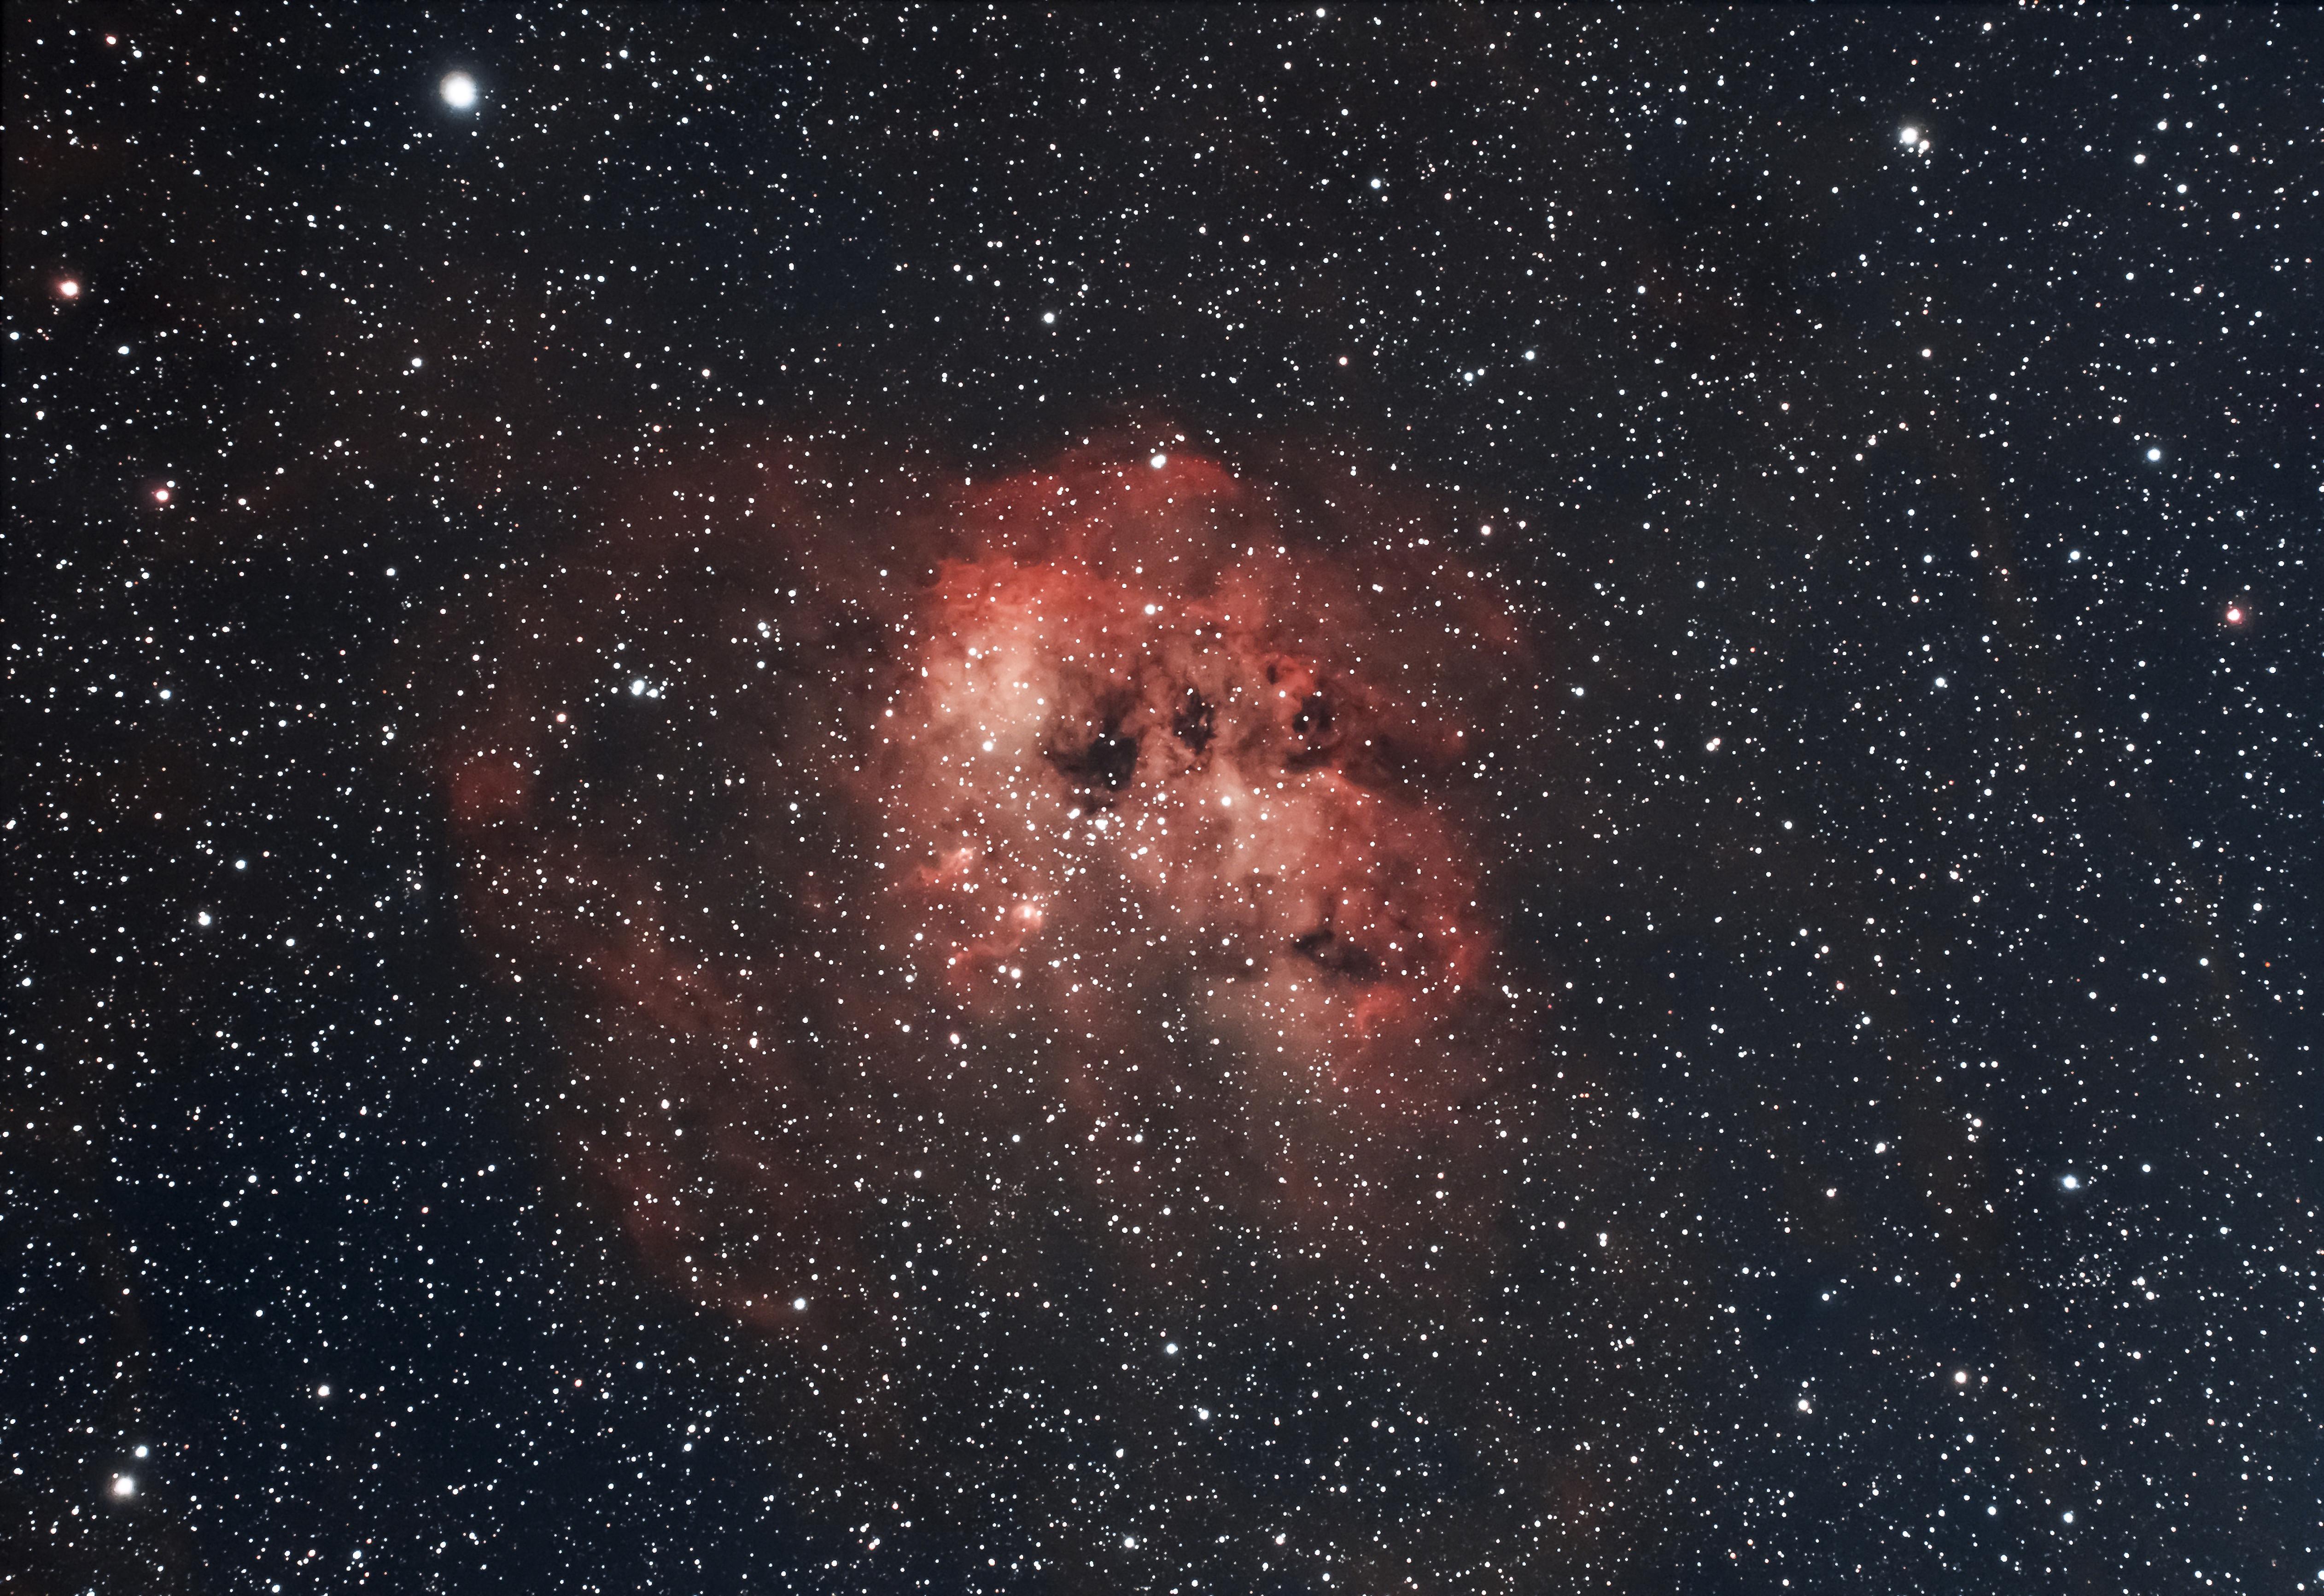
The tadpole nebula, IC 410, in the constellation Auriga. Averted vision, powerful magnification and a tripod are a must to see this with binoculars. (Image credit: Getty Images)
Auriga the Charioteer is a constellation famed for two things: its brilliant yellow star Capella (the sixth brightest in the entire night sky), and its array of magnificent open clusters, notably Messier 36, 37 and 38.
Open clusters are young clusters of stars that were born together and are now gradually dispersing, and Auriga’s open clusters are some of the best and brightest of their kind in the night sky.
A pair of 10x50 binoculars can have a field of view between 5 and 7 degrees, depending upon the model. For the larger field, it’s possible to squeeze all three of Auriga’s open clusters into the same view!
To find the clusters, first drop down from Capella to alight on the bright star Elnath, which is actually Beta Taurii in the constellation of Taurus the Bull. You can find Elnath easily with the unaided eye. Switching to binoculars, look about three-quarters of the way along the line between Capella and Elnath. You should see six fainter stars of magnitude 6 forming a curve. Follow that curve west, and you’ll come across two other magnitude 6 stars close to M38, which appear as a hazy patch whose diffuse light is made from a multitude of faint stars. This is the case for all three clusters. Most of M38’s stars are not resolvable in binoculars, but some certainly are in 10x50s, and switching to larger aperture binoculars or an image-stabilized model will help to reveal more.
Just 2.5 degrees to the south-east is the next cluster, M36, which overall is brighter than M38. Through 10x50s look for eight or ten stars; again, large binoculars will reveal more.
Finally, M37 is located a little further away. The constellation of Auriga has an obvious five-sided shape marked by its main stars and Elnath. Draw an imaginary line between Elnath and Auriga’s bright star at its lower left, magnitude 2.6 Theta Aurigae. Messier 37 is found about halfway along and just outside of this line. Another hazy patch, it is the densest of the three clusters, but most of its individual stars are fainter than in M36 and M38, so M37 will need larger binoculars, say 25x100, to get the best out of it.
After spending time looking at the three clusters, sweep your binoculars along the splendor of the winter Milky Way, in which Auriga sits. Through binoculars, the vast star fields of the Milky Way are spellbinding.
The Andromeda Galaxy M31
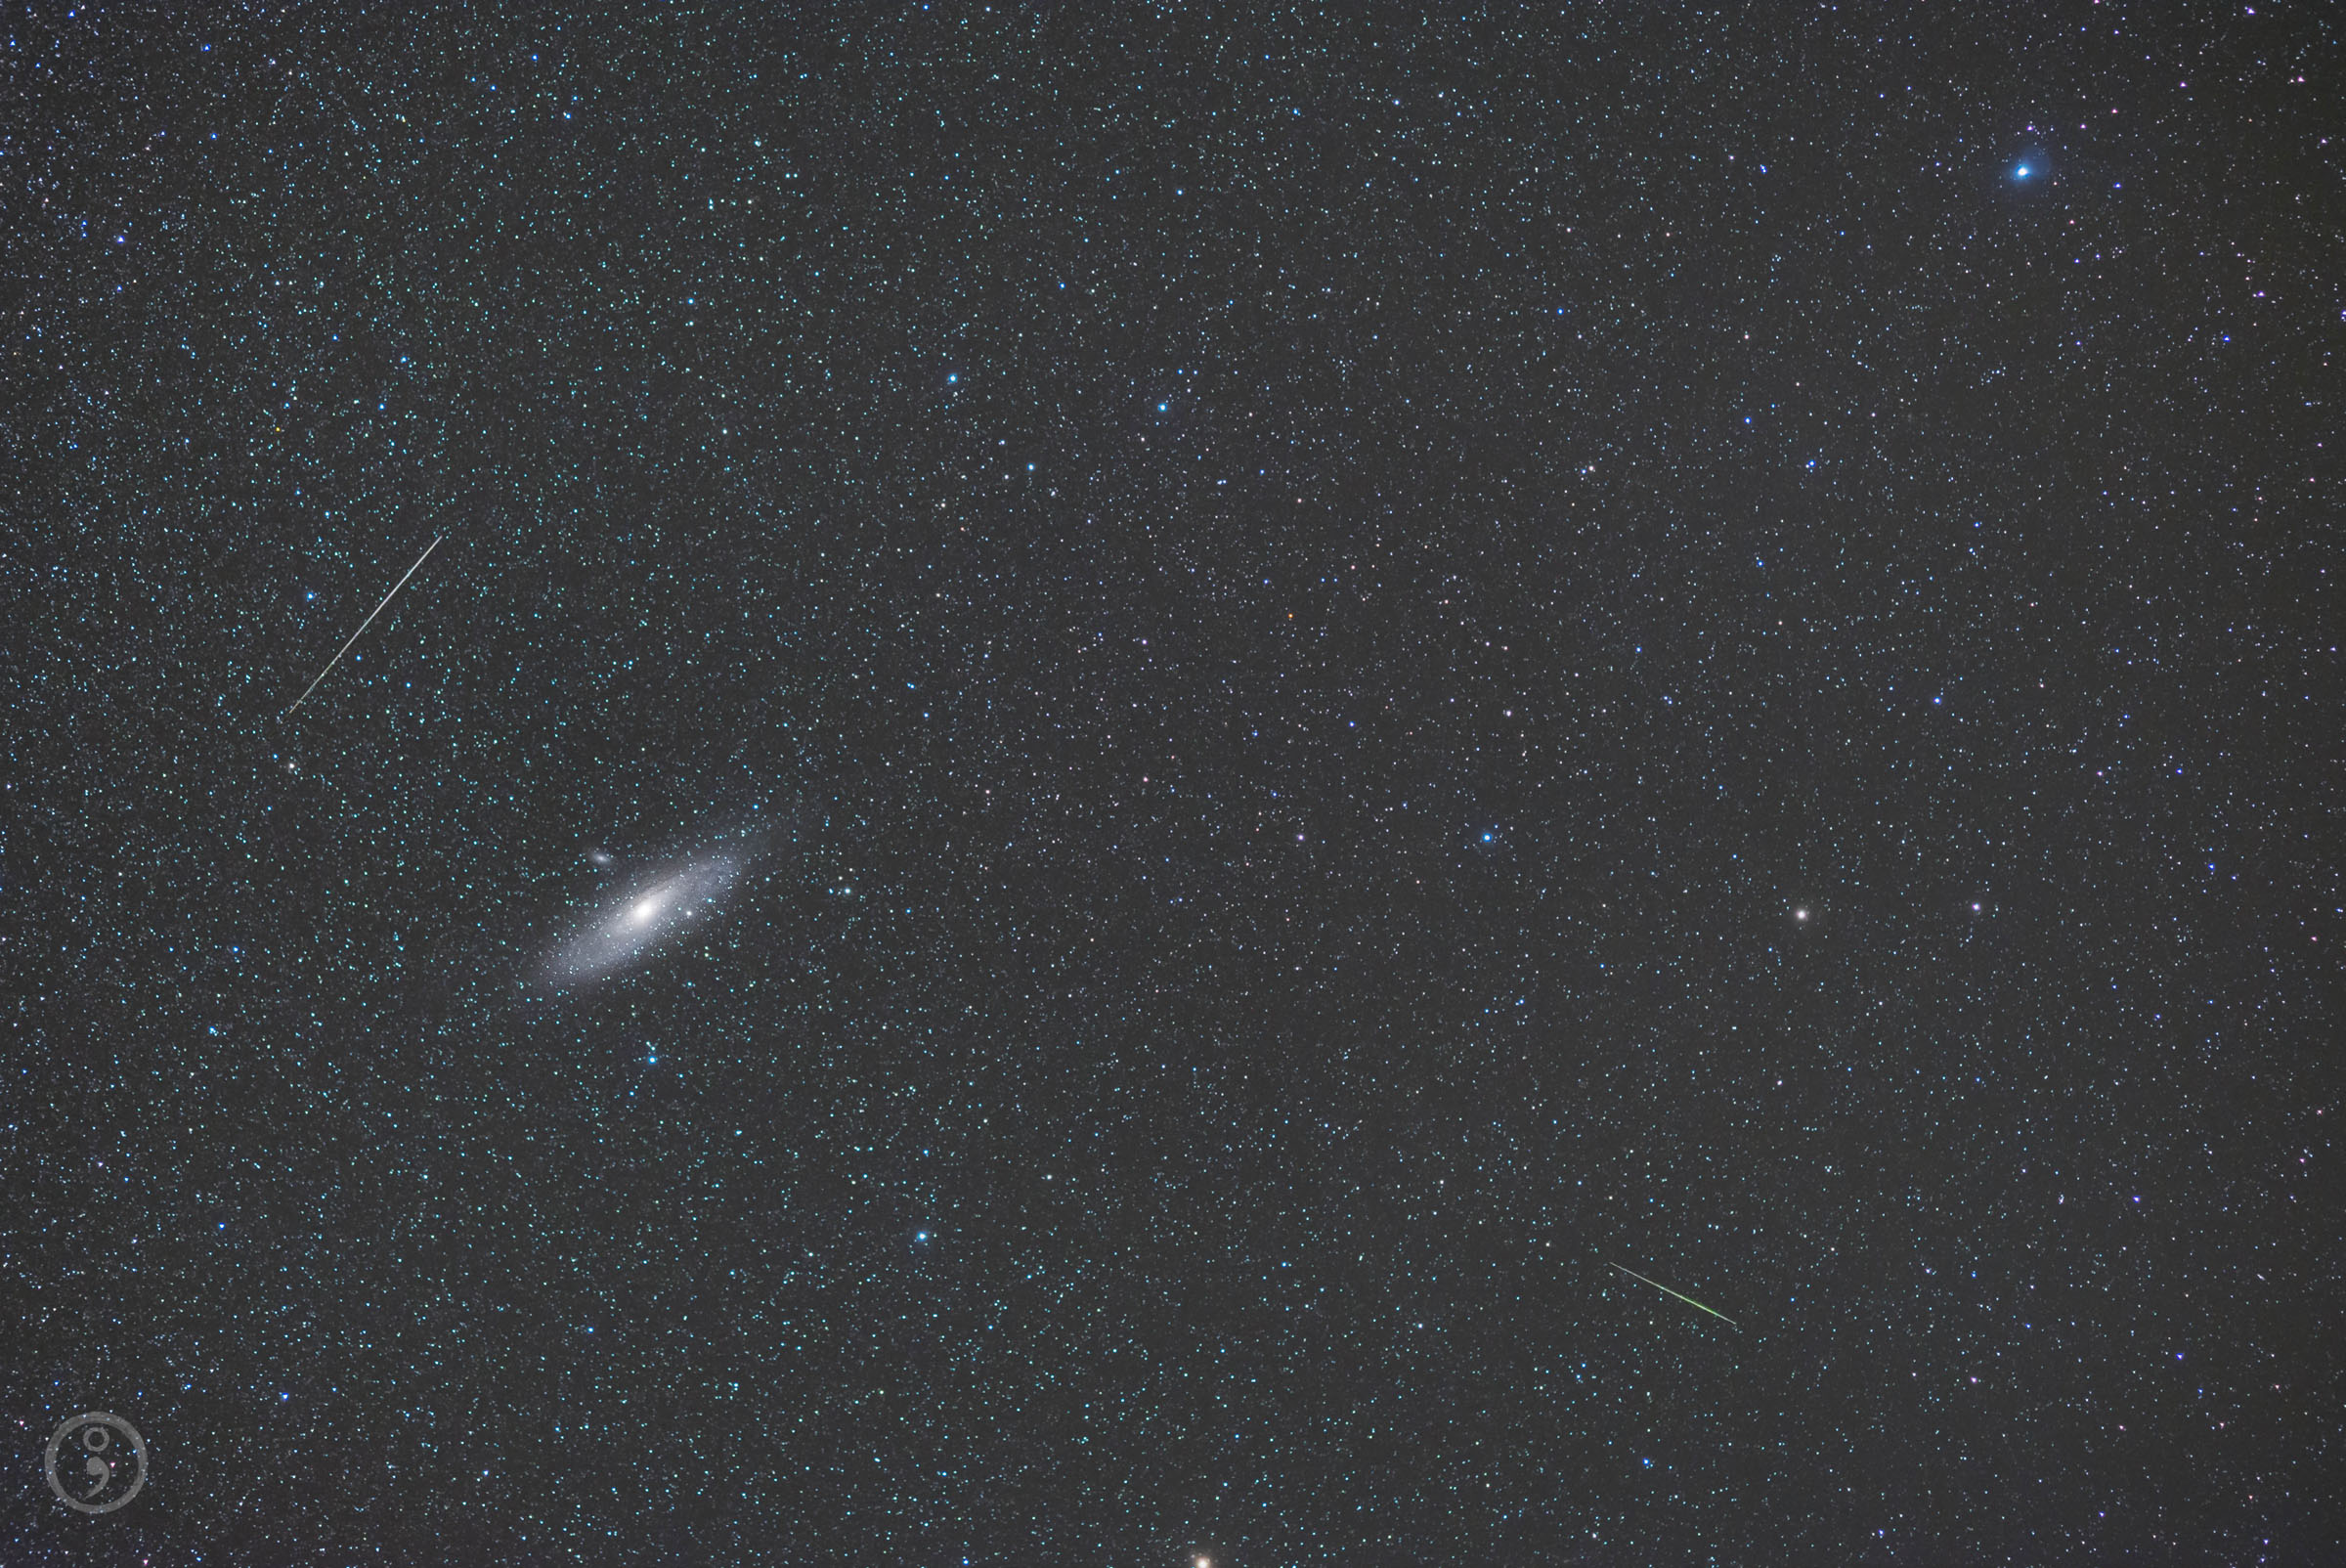
This is a typical view of the Andromeda galaxy (M31) that you can easily achieve with binoculars, but dark skies and averted vision aid detail. (Image credit: Omid Qadrdan)
The Andromeda Galaxy (Messier 31) is the closest large spiral galaxy to our Milky Way galaxy, located 2.5 million light-years away. That means it is large and relatively bright in our night sky, making it a great target for binocular users. If you are observing from a dark site away from city lights, you will probably be able to see it with the naked eye.
If you can’t or are having trouble knowing where to look: - Use the stars of the nearby constellation Cassiopeia to find it. Cassiopeia has the shape of the letter ‘W’. Use the bottom star on the right of the W — the brightest star in Cassiopeia, Alpha Cassiopeiae or Schedar — to... - Point down towards Andromeda and its bright star Beta Andromedae, or Mirach. - Now using 10x50 binoculars, move north-west until Mirach is at the bottom-left of your field of view and the star Mu Andromedae is at the top-right. - Then move your binoculars the same distance in the same direction again, and you should find the Andromeda Galaxy.
While you won’t be able to resolve its spiral arms, you will see a smudge of light that is its disk, and a brighter core. Also look out for its two companion galaxies, M32 beneath it and M110 to the top-right. Both appear as fuzzy stars and, depending on how dark your observing site is, you may need to use averted vision to see them (looking at them out of the corner of your eye). Larger binoculars, say 25x100, will show M31 and its companions much more easily, though you’ll need a tripod to take their weight.
The night sky is not an impenetrable “blanket of stars.” There is depth and detail that can be navigated and known, probed and plundered for rewards — and the best way to do all of that is with a manual telescope. Sure, you can get a motorized computerized “go-to” telescope and even one of the best smart telescopes that self-align and do all the work for you. Arguably, they also take much of the reward and leave you none the wiser. Can users of smart telescopes find Polaris, the North Star? Probably not. Do they know where the fabulous images of nebulae they produce actually come from? It’s doubtful.
Manual telescopes don’t find celestial objects for you — you find them yourself. However, it’s the only way to build sky literacy. Observing manually connects you to a long tradition of stargazers who learned the patterns of the sky by heart.
The learning curve can be steep, even with one of the best beginner telescopes. Knowing where to point a manual telescope is a challenge for beginners. With narrow fields of view, it’s easy to miss even bright targets unless you understand where objects are, how to navigate the sky and how to move your telescope.
All telescopes use lenses and/or mirrors to collect and focus light. There are several types of telescope — the main two being refractors and reflectors — as well as Dobsonians and catadioptrics (Schmidt-Cassegrains and Maksutov-Cassegrains). Let’s assume you already have one of the best telescopes. How does it move? There are two mount types — alt-azimuth and equatorial — each of which moves differently and has its own learning curve.
To lessen any confusion, here’s everything a beginner needs to know about observing the night sky with a manual telescope, and a glossary of telescope terms.
1. Understand the night sky
A reflector telescope is ideal for observing deep-sky objects. (Image credit: Getty)
The night sky is not static. Thinks of it as a celestial sphere surrounding a rotating globe; as Earth rotates, the stars appear to move across the sky — rising in the east and setting in the west, just like the sun — which is why objects drift out of a telescope’s field of view over time.
Since it’s not static, the celestial sphere requires two coordinate systems to help you understand this movement and find objects in the night sky:
Altitude and azimuth: typically shortened to Alt-Az, these describe where something is based on your position, with altitude meaning how far up in the sky an object is, and azimuth, where it is from left to right.
Right ascension and declination: typically shortened to RA/Dec, these are fixed coordinates that rotate with the celestial sphere, similar to longitude and latitude on Earth.
2. Manual telescope mounts and how to use them
This Skywatcher 200P is a powerful tool for surveying the night sky. (Image credit: Josh Dury)
A mount allows you to manually move and position a telescope. They come in two primary flavors: alt-azimuth (alt-az) and equatorial (EQ). However, pointing a telescope at the night sky and hoping you hit on something will not work because a telescope’s narrow field of view makes even very bright objects hard to see unless they’re precisely centered. Here’s why both mounts exist and how best to use them.
Alt-Azimuth mounts: Best for beginners and found on almost all low-cost models, these are simple (alt-az) mounts that move a scope up and down and left and right. Intuitive, easy to use and quick to set up, the constant adjustments required to track an object make it less accurate. That said, you could easily use an alt-az mount your entire life and never notice.
Locate a bright object, such as the moon, a planet or a bright star like Rigel, Vega or Arcturus, then use the finder scope or red-dot finder to roughly align the telescope.
Begin with your lowest magnification eyepiece‚ typically 25mm on a beginner’s model, for the widest field of view. Once your target is centered, you can switch to higher magnification, such as 10mm.
Move the telescope ever so slightly every few minutes to keep the object centred. If the object is drifting through the field of view from left to right, place it on the far left to keep it in view for as long as possible.
Use a manual telescope as a stargazing tool. (Image credit: Getty Images)
Equatorial mounts: A step-up choice, EQ mounts follow the sky’s natural motion. With one axis tilted to align with Polaris, the North Star (in the Northern Hemisphere), an EQ mount hence moves in sync with Earth’s rotation. While EQ mounts allow smoother tracking, particularly at high magnification, they are nevertheless complicated (and somewhat intimidating) to set up and typically include a counterweight, making them heavy and more expensive.
Understand that perfect polar alignment is not necessary for visual observing — getting as close as you can is fine.
In the Northern Hemisphere, point the telescope mount roughly north and set the mount’s tilt to match your location's latitude, using Polaris, the North Star, as a rough guide to true north.
Once aligned, track objects with a single slow-motion control, which keeps them centered for much longer and makes high-magnification viewing much easier.
3. Using a manual telescope for the first time
Once you've mastered viewing the night sky, astrophotography could be your next step. (Image credit: Getty Images)
Taking a telescope outside for the first time is as much about learning about the night sky as it is about your telescope. Assemble it indoors in daylight and test your finder scope or red dot finder on a distant object. Once it’s dark, place the lowest-power eyepiece (say, 25 mm) on your telescope, which will give you the widest field of view. Here is what — and what not — to do:
Standing still is how to get cold, so you’ll likely need to dress more warmly than you think.
Let your eyes adjust to the dark (which takes about 20 minutes), then preserve your night vision by using a red flashlight and avoiding smartphone screens (though some stargazing apps have a red light mode).
Be unambitious: Set aside a few hours to learn the absolute basics of using your finderscope, pointing the scope and centering and tracking objects.
Be patient, resisting the temptation to use too much magnification too quickly.
Don’t give up on faint objects, using the averted vision technique (looking to the side of an object) to help your eyes collect more light.
4. How to find objects with a manual telescope
You can minimise light pollution by seeking out countryside, fields and other less inhabited areas. (Image credit: Damian Peach)
You’re a stargazer interested in the night sky, not telescopes. Look at the night sky. Find a bright anchor star or constellation — maybe the moon, Saturn, Jupiter, Vega, Sirius, Orion’s Belt or the Big Dipper — then, using a simple star chart or astronomy app in night mode, trace a visual path to your target. Don’t feel bad about just stargazing for 15 minutes while you figure out where you are — that’s why you’re here. Know where you’re going to move the telescope before you touch it. Navigating from bright stars to fainter objects is how to be a successful manual observer. With practice, even the faint fuzzies will be within your reach; many manual observers with moderate experience can tell you exactly where, say, the Andromeda Galaxy is in the night sky, even though they can’t actually see it with their own eyes.
With just a few sessions, your skills will improve quickly, and you’ll recognize stars, constellations and patterns more easily — and every object you get in the crosshairs of your manual telescope will feel like your own discovery.
A quick telescope glossary
There are some terms every telescope user needs to know to appreciate how they work and why they’re designed as they are.
Term
Description
Aperture
The diameter of a telescope’s primary lens or mirror. A larger aperture means more light.
Eyepiece
The lens you look through; swap between them to change magnification.
Field of view
The visible area in the eyepiece; wider is better for finding objects.
Finder scope
The small, low-power scope mounted on the side of the telescope tube, which helps aim your telescope (also called a red dot finder).
Focal length
The distance light travels inside the telescope, which affects magnification.
Magnification
The mistaken obsession among beginners. Technically, it’s the focal length of the telescope divided by the focal length of the eyepiece. However, higher magnification isn’t always better, especially when you’re trying to locate and track an object. Start wide, then zoom in.
Slow-motion controls
Knobs or cables that let you finely adjust the telescope’s aim once you’ve roughly located an object.
It's a good time to be a Lego Star Wars fan. Not only are there a bunch of Mandalorian movie tie-in sets to look forward to, but there are eight brand new sets out, as part of Lego's new Smart Play system. Aimed at kids, these new Smart Play sets are designed to make play more interactive than ever before by introducing light and sound effects without the need for app support.
The key element of these Smart Play sets is an interactive, audio- and light-equipped Smart Brick. The Smart Brick responds to printed tags on other bricks and minifigures. If a particular tag is in range, it will interact with it, making the appropriate sounds or light actions that the tag tells it to. So you can have this Lego Smart Play Throne Room Duel & A-Wing set playing the Imperial March.
Sounds cool? It absolutely is, which is why it's frustrating that Lego has yet to give us any Lego Marvel Smart Play sets. Marvel's Guardians of the Galaxy alone is packed with quotable lines and effects; who wouldn't want a tiny Lego Groot that spoke with Vin Diesel's voice? You could pitch Captain Marvel against Galactus, with Ralph Ineson's voice booming out of a Smart Brick.
Instead, Lego has pivoted to Pokémon. Where's the Infinity Gauntlet when you need it? The good news is that the eight currently available Lego Star Wars Smart Play sets offer plenty in the way of fun.
Smart Play All-in-One Sets
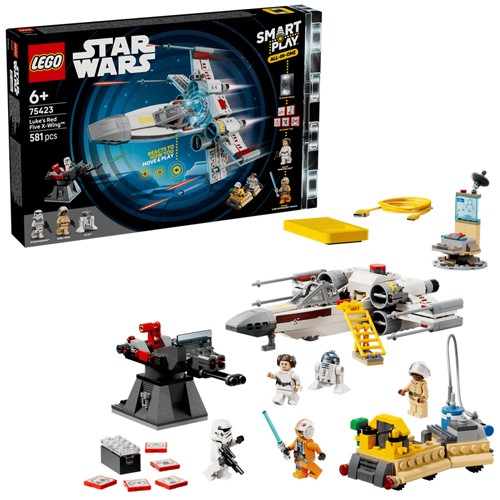
Lego Star Wars Smart Play: Luke’s Red Five X-Wing: $89.99 Aimed at kids aged six and above, Luke's Red Five X-Wing is pure playset territory. While the X-Wing is the feature here, it also comes with lots of smaller builds, including a command center, a refueling station and an Imperial turret. Along with the Smart Brick and charter, it also comes with five Smart Tags and two Smart Minifigures (Luke Skywalker and Princess Leia). There's also a Stormtrooper minifigure, a Rebel Crew member and R2-D2, although these don't have Smart functionality.
The X-Wing will make sounds and light up when it's flown through the air, and with a Smart Brick in situ, the turret will make appropriate battle sounds. Providing you move the Smart Brick around, the command center and refuel station can make sounds, too.View Deal
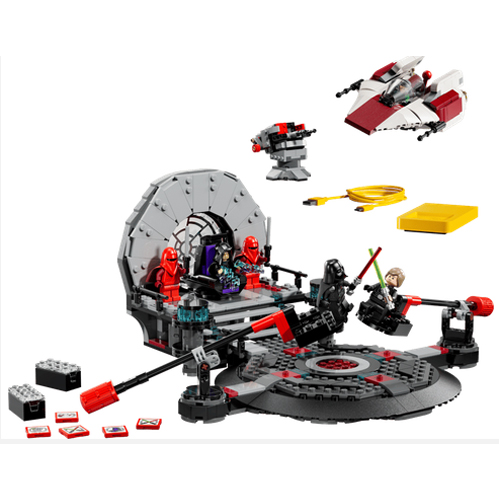
Lego Star Wars Smart Play: Throne Room Duel & A-Wing: $159.99 The Throne Room Duel is the most expensive Smart Play set yet, but that's because it comes with not one, but two Smart Bricks. There are also three Smart Minifigures (Luke Skywalker, Darth Vader and Emperor Palpatine), five Smart Tags and the necessary charging stand and cable combo. At $159.99 / £139.99, it's a little on the pricey side, but I think this offers the best, most comprehensive use of the Smart Brick, with a wealth of interactive features baked into the set.
The Throne Room Duel & A-Wing comes with two battle podiums, where the Luke Skywalker and Darth Vader minifigures can be placed to have an epic lightsaber duel. Thanks to the Smart Brick, you can enjoy realistic battle sounds as they fight. The A-Wing can also make blaster sounds as it attacks, but my favorite feature here is the throne, which will play the Imperial March.View Deal
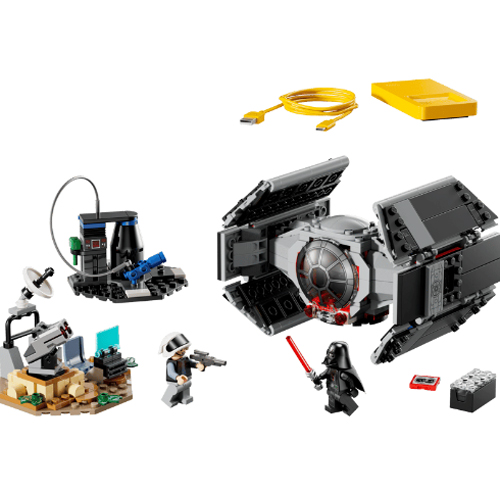
Lego Star Wars Smart Play: Darth Vader’s TIE Fighter: $69.99 At $69.99 / £59.99, the Darth Vader’s TIE Fighter is the most inexpensive way to get your hands on an All-in-One Smart Play set, and it's a pretty nice set, too. Aimed at kids aged 8+, it features an iconic TIE Fighter ship, along with a refueling station and a Rebel outpost. The included Darth Vader minifigure is equipped with a Smart tag, too, so he can be interacted with, and there's also a Rebel Fleet Trooper, although he has no Smart functionality.
With the Smart Brick installed in the TIE Fighter, it will make appropriate sounds and display light effects as it's flown through the air, interacting with the way a child moves it around. It will also make refueling sound effects, should you interact with the brick-built refueling station. The TIE Fighter itself has a cockpit with room to sit Darth Vader, and also working stud blasters.View Deal
Smart Play Compatible sets
Lego Star Wars Smart Play: Millennium Falcon: $99.99 Yes, it's yet another Millennium Falcon set. Made up of 885 pieces and costing $99.99 / £89.99, it's a little smaller than the most recent Millennium Falcon playsets we've had, but it's still every bit as eye-catching — and this one comes with the added bonus of Smart Play compatibility. All four of its minifigures (Chewbacca, Han Solo, C-3PO and Luke Skywalker) are Smart-enabled, and it also comes with four Smart Tags that allow the Millennium Falcon itself to make various sounds and light effects, including the sound of the hyperdrive, laser battles, explosions and more.
The roof of the Millennium Falcon can lift off, revealing a full interior, where you'll find space for minifigures to sit, a Holochess board and space to practice Lightsaber skills. On the outside of the ship, you'll find blasters and plenty of detail, which makes this model look every bit like the real thing. Even without a Smart Brick, then, this is a great playset with plenty for youngsters to interact with.View Deal
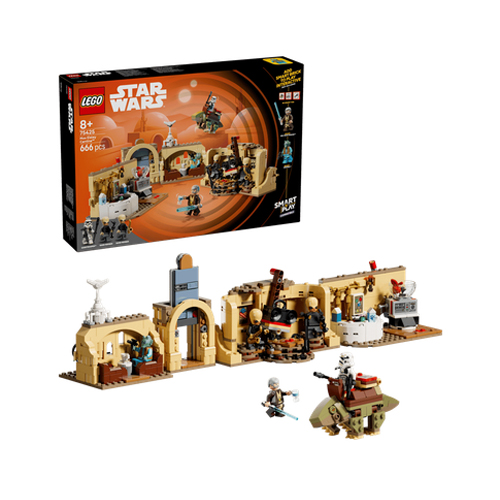
Lego Star Wars Smart Play: Mos Eisley Cantina: $79.99 The Mos Eisley Cantina is undoubtedly one of the most iconic locations in the Star Wars universe. This playset may be considerably scaled down, particularly in comparison to the now-retired UCS Mos Eisley Cantina, but at 666 pieces, it's a good size for a playset aimed at kids eight and above. It features a bar, a seating area, a dance stage and a buildable Dewback — everything needed for some wonderfully imaginative play.
Helping things along are the Smart Play compatible features. Obi-Wan Kenobi and Greedo minifigures are Smart-enabled, three additional Smart Tags allow a wealth of interaction. The Dewback can make walking and sleeping sounds, while the Cantina itself can play music and the sound effects of drinks being mixed.
Lego Star Wars Smart Play: AT-ST Attack on Endor: $49.99 One of the cheaper Smart Play sets to be released, this 347-piece set allows youngsters to build an AT-ST, a speeder bike and three minifigures (Wicket the Ewok, AT-ST Driver and Scout Trooper). Of the three, Wicket features Smart functionality, and there are also two Smart Tags which can bring the AT-ST to life.
Wicket has several moods and reactions that can be played when in range of a Smart Brick, and the AT-ST can make a variety of battle and movement sounds, activated by putting it in motion. Without a Smart Brick, the AT-ST can still be interacted with thanks to an opening cockpit, a moving head and fireable stud shooters.View Deal
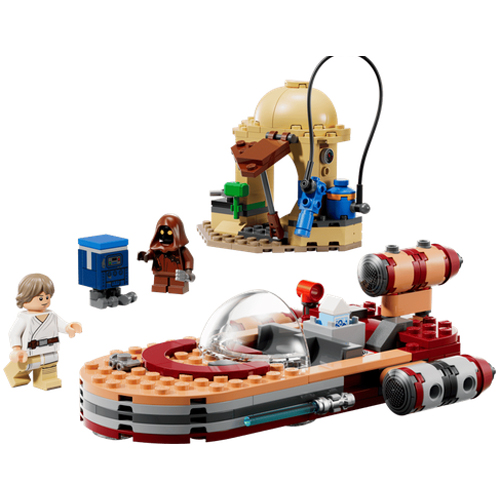
Lego Star Wars Smart Play: Luke’s Landspeeder: $39.99 Costing just $39.99 / £34.99, Luke's Landspeeder is the cheapest of all the Smart Play compatible sets available so far. And it's one of the most iconic builds, with Luke's Landspeeder being immediately recognizable. It's a small set, with only 215 pieces, but with an age rating of 6+, it's an ideal build for younger children who may be new to Lego or less confident builders.
It comes with two minifigures (Luke Skywalker and Jawa), with Luke being Smart Play enabled. There's also one Smart Tag, which allows the Landspeeder to make motion sounds as it's moved, and refuel sounds when kids interact with the included refuel station mini build. Perfectly sized for small hands, Luke's Landspeeder is ideal for swooshing through the air, and even without a Smart Brick to bring it to life, kids can use their imaginations to make this a worthwhile play experience.View Deal
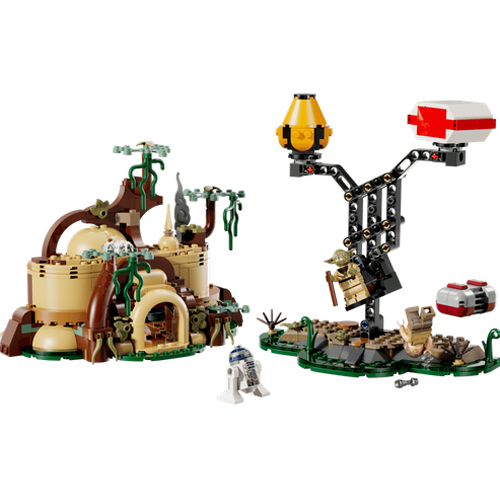
Lego Star Wars Smart Play: Yoda’s Hut and Jedi Training: $69.99 An iconic set from Star Wars: The Empire Strikes Back, and something we've seen in numerous Star Wars titles since, we love Yoda's Hut. Its natural appearance, covered in trees and hidden in the swamp, makes it stand out from the usual industrial appearance of Star Wars' ships and buildings. And it's the home of everyone's favorite Yoda: what's not to like? The last time we had a Yoda’s Hut playset was back in 2018, so it's a well overdue release.
The included Yoda and Luke Skywalker minifigures are Smart-enabled, and there's also an R2-D2 minifigure included to complete the trio. Smart Tags within the set allow for cooking sounds to come from Yoda's hut, while kids can enjoy 'force' sounds as Yoda and Luke complete their Jedi training. It's a very nice-looking set, and I'd wager that adults will enjoy this as a display piece if they aren't interested in interacting with the Smart Play functionality — but you may be missing out if you don't enjoy the many interactive sounds that the set can produce with a Smart Brick present.View Deal
When it comes to space exploration, rockets are probably one of the coolest things you'll learn about as a kid. Zooming off into space, traveling to new planets and searching for potential life are all things that feel like they should be impossible. For any age of space enthusiast, it's pretty darn cool. For kids, though, learning about rockets can mark an amazing introduction, sparking a lifelong love of space. But, while real rockets aren't really obtainable, kids can always start out with model rocketry.
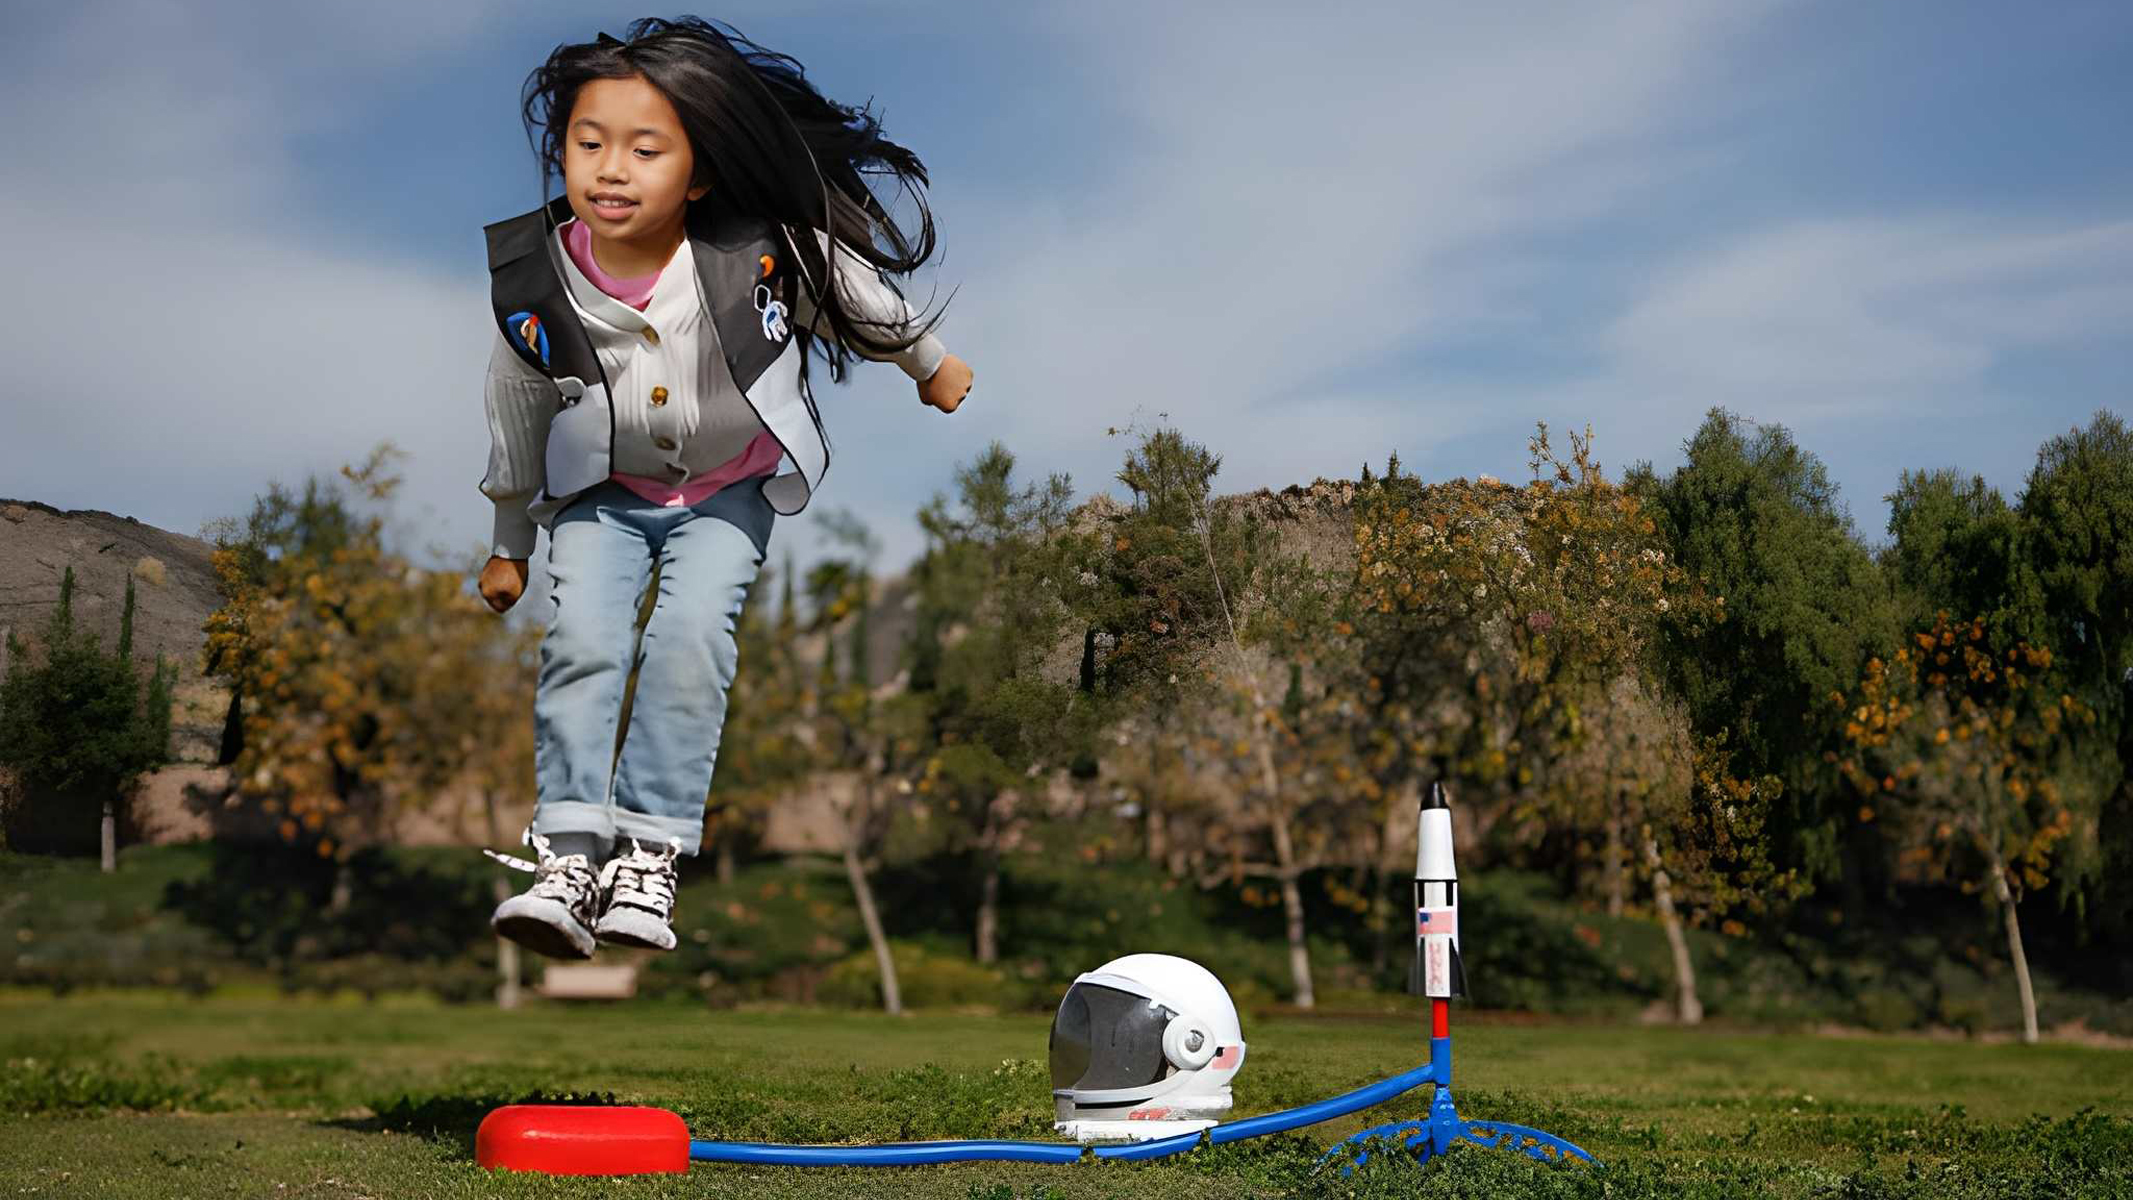
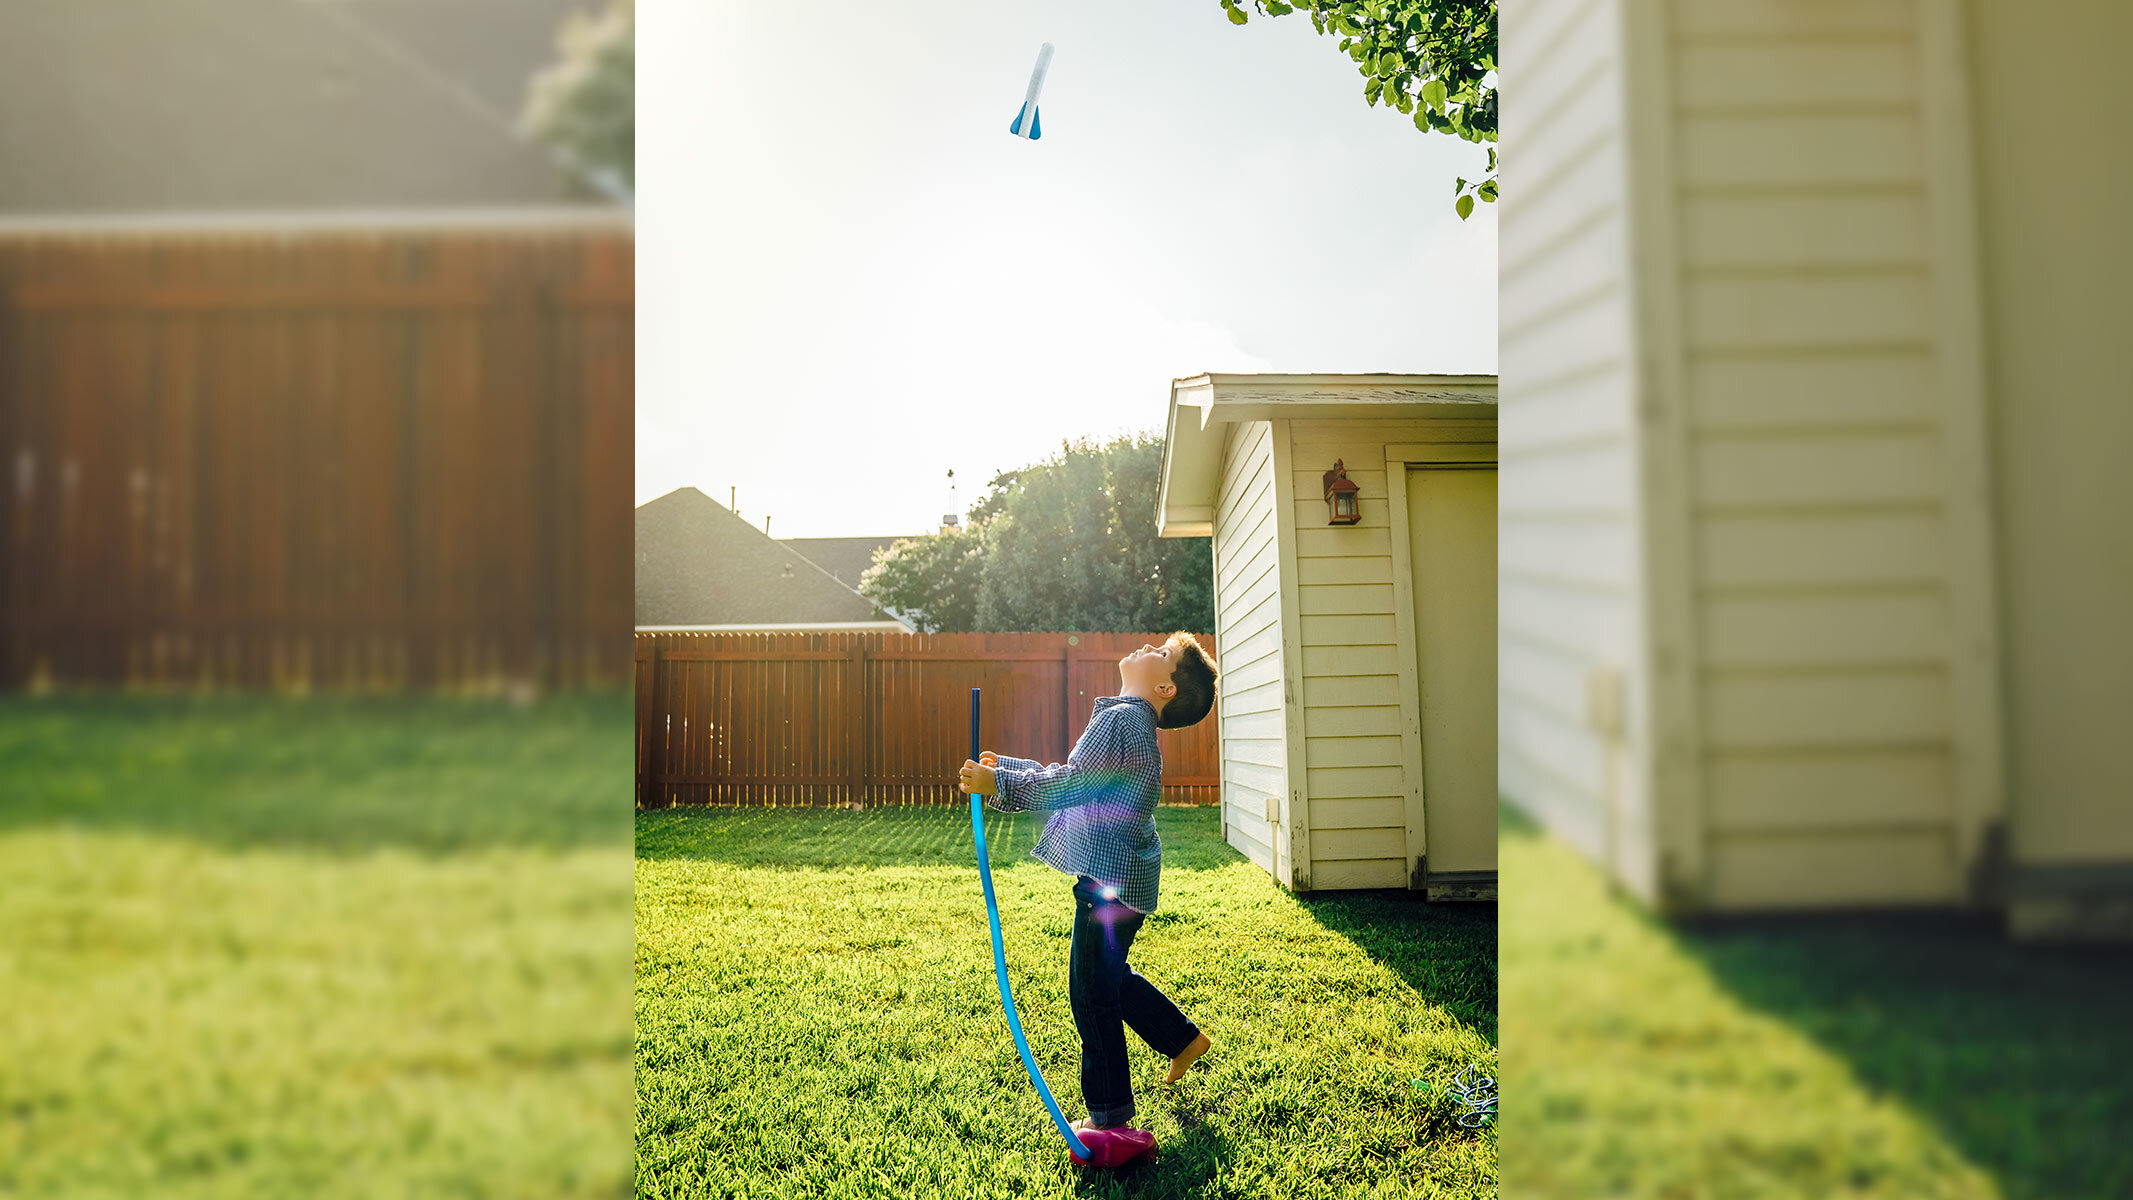
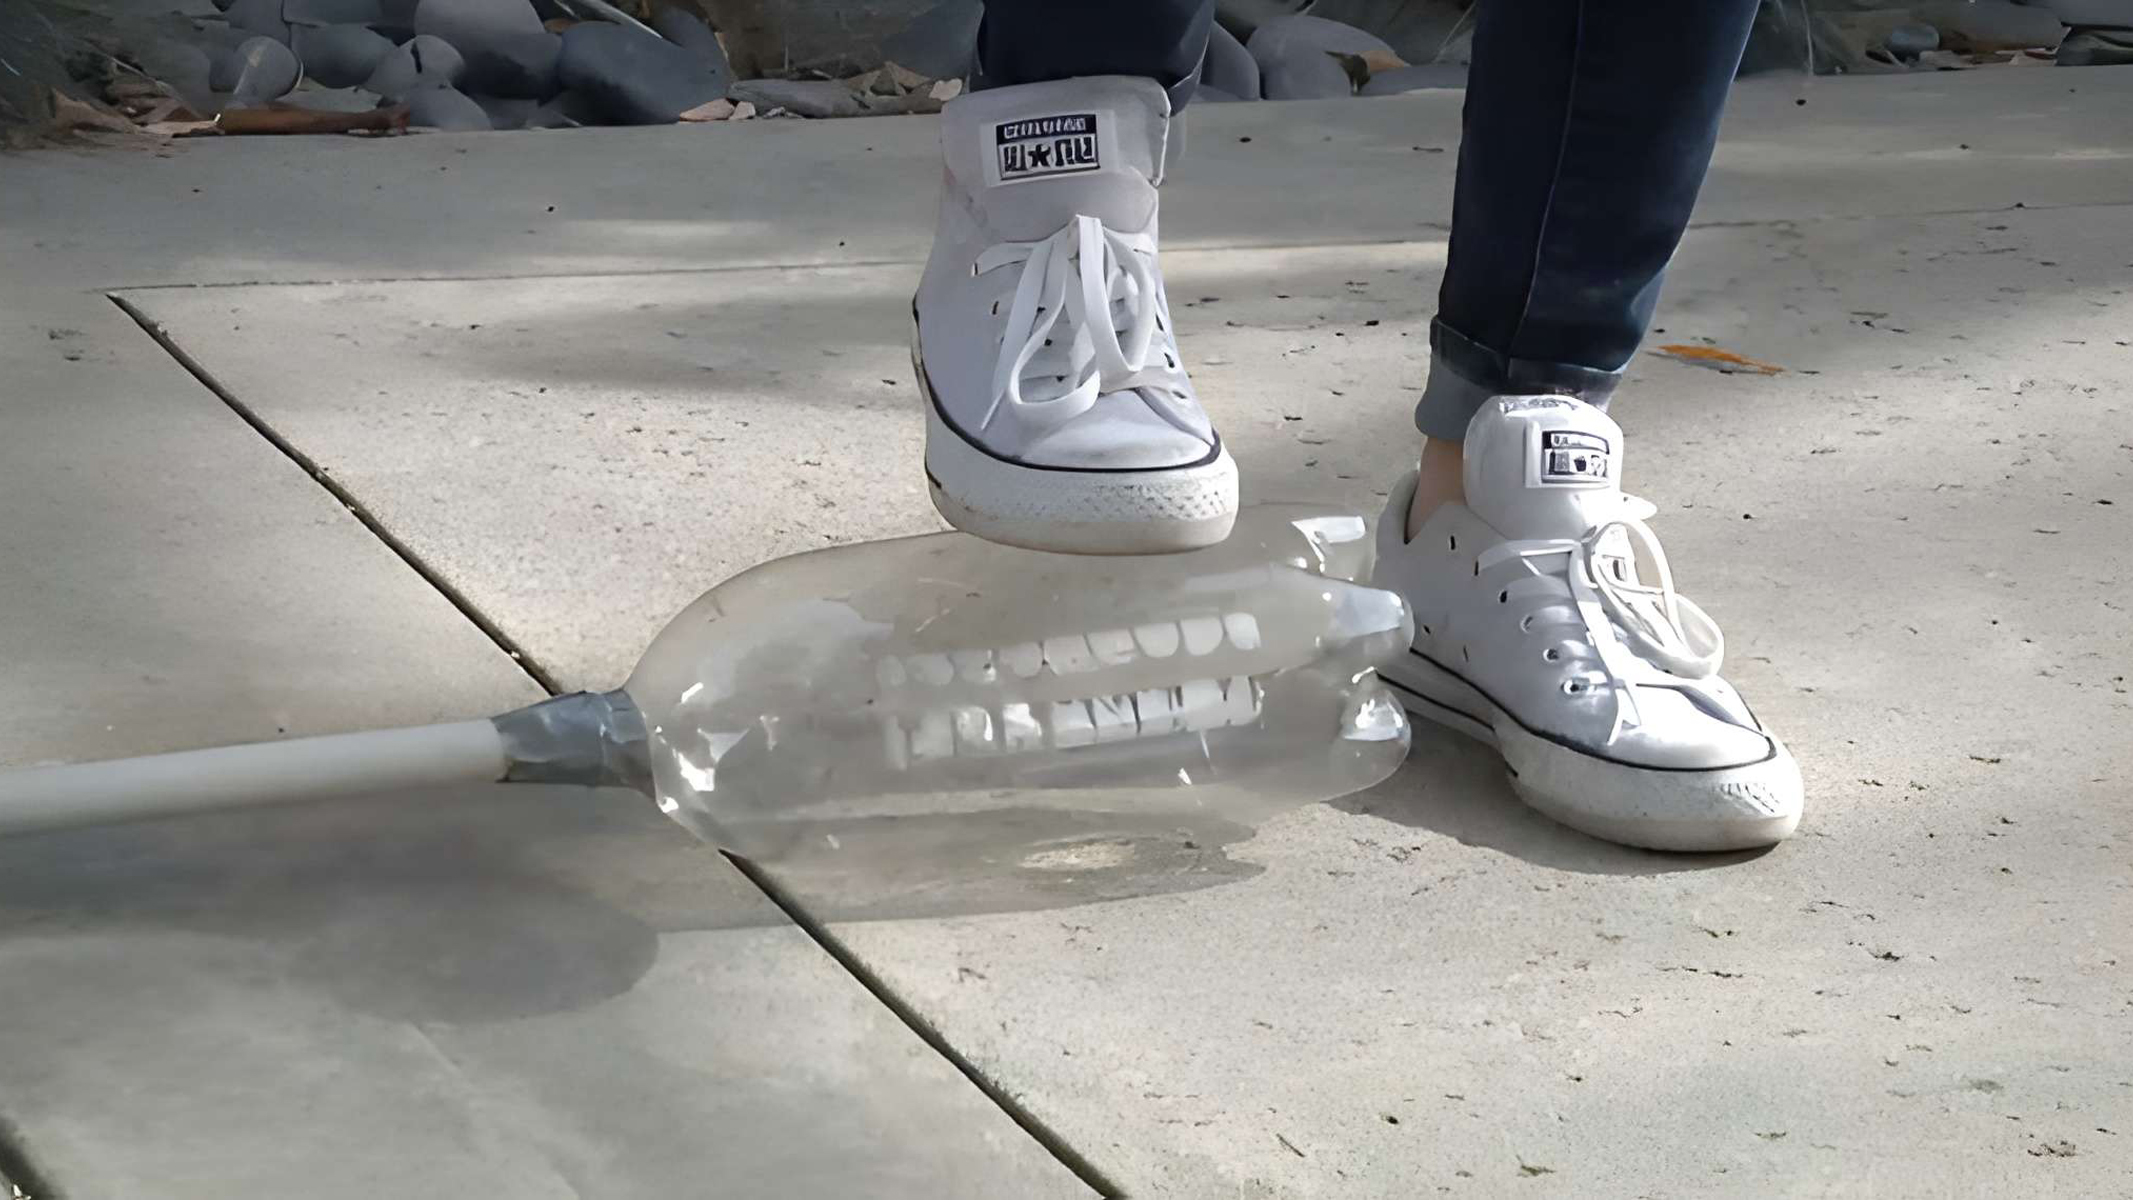
One of the most child-friendly, affordable and safest ways to get into this hobby, though, is by trying out Stomp Rockets. These toy rockets can be propelled into the air by a simple stomp onto a launcher, hence the name. Attached with a flexible hose, when you compress the launcher, it releases the air into the rocket and makes it fly. A fairly simple concept, but one that can be a lot of fun for kids and very educational (without feeling like you're learning).
Best stomp rockets you can buy today
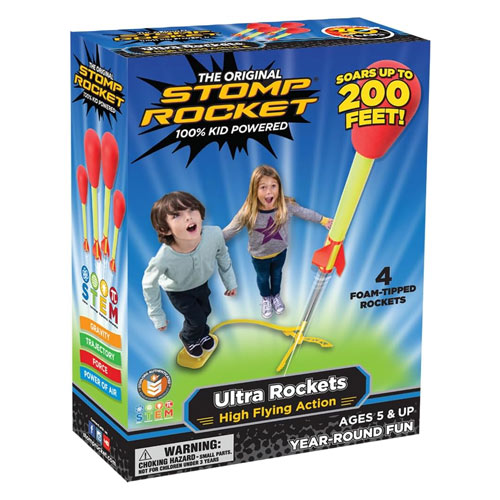
Stomp Rocket Ultra Rocket Launcher: $19.99 For slightly older kids, aged 5 and up, the Stomp Rocket Ultra can reach heights of up to 200 feet. This time, they lose the cone nose of usual rockets, adopting a foam-tipped rounded tip to make sure they don’t hurt anybody when flying back down to the ground.View Deal
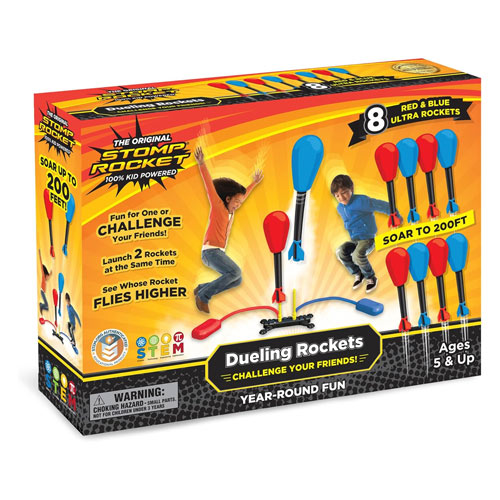
Stomp Rocket Original Dueling Rocket Launcher: $29.99 If playing with Stomp Rockets with friends and family is on the agenda, then the Original Dueling Set comes with eight rockets ready to battle. You can launch two rockets at the same time and compete on who gets theirs the highest. And they can reach heights of up to 200 feet if you stomp them hard enough, which is almost 20 stories high.View Deal
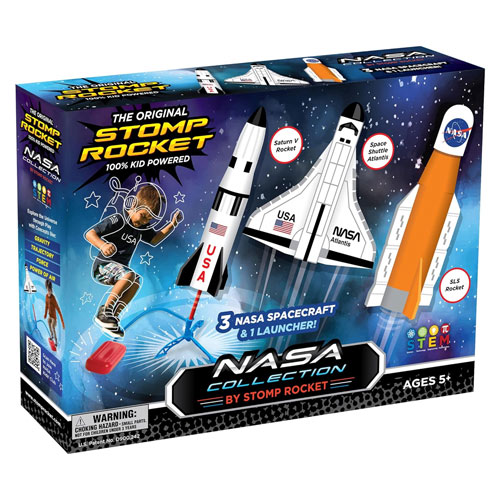
Stomp Rocket NASA Space Collection Rocket Launcher: $29.99 If your kid is a big fan of NASA, then this Stomp Rocket Space Collection comes with three NASA rockets styled like the Saturn V Rocket, Space Shuttle Atlantis and SLS Rocket. Plus, the adjustable launch stand lets kids experiment with different trajectories and forces, creating their own experiments.View Deal
Stomp Rocket Super High-Performance X-Treme Rocket Launcher: $19.99 This set is recommended for ages 9-13 because of just how high it’s capable of going, which isn’t all that surprising to hear since it’s considered to be the ‘Super High-Performance X-Treme’ version. It even comes with its own special X-Treme rockets to reach heights of up to 400 feet.View Deal
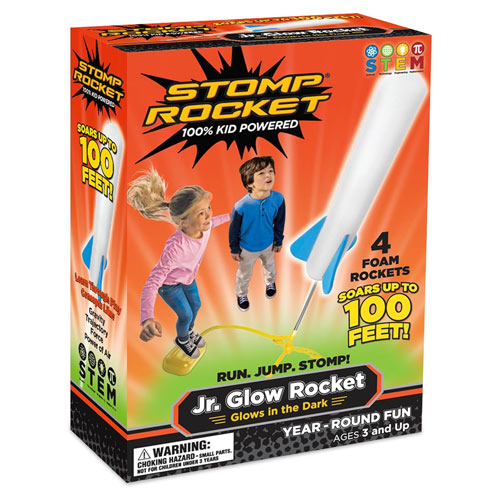
Stomp Rocket Jr Glow Rocket Launcher: $17.99 Part of the Jr range, the Glow Rockets come in a pack of four, reaching up to 100 feet in the air. You can also pay an extra $2 to secure three more rockets in the next size up. Listed as the number one bestseller in Toy Foam Blaster Sets on Amazon, they’re a lot of fun and carry that same 100% kid-powered tagline.View Deal
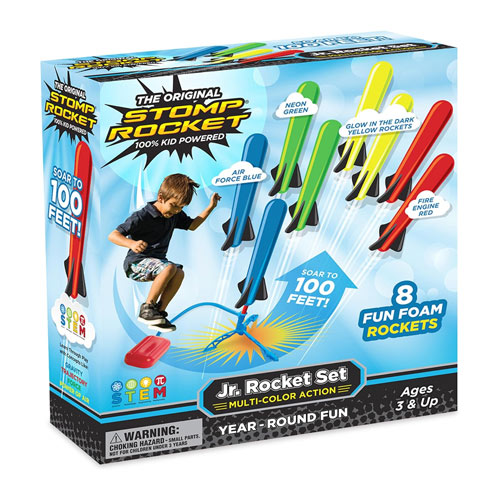
Stomp Rocket Jr Multi-Color Rocket Launcher: $27.99 Part of the Original Stomp Rocket collection, these Jr Multi-Color Rockets are the best starter rockets for kids aged 3 and up. You get eight rockets in the pack and four different colors: Air Force blue, neon green, glow-in-the-dark yellow and fire engine red. A great introduction to experimenting with gravity and force without having to spend more than $30. View Deal
With such simple mechanics behind it and no need for batteries, electronics or even assembly, it's a lot of fun without having to put in too much effort. So, when it comes to kids getting into it, it's a pretty perfect combination.
Model rocketry as a hobby can range anywhere from building your very own rocket from scratch to wiring up an actual engine to make it fly. And, while there are plenty of the best model rocket sets, these may be too advanced for children. So, before you hit the more advanced stages of model rocketry, it's best to find a place to start that feels more beginner-friendly. And there's a variety of different Stomp Rockets you can buy, like the NASA collection Rocket Launcher for $29.99 and the Super High-Performance X-Treme Rocket Launcher for $26.99. We'll jump into exactly what's great about Stomp Rockets below.
They are easy to use
Stomp rockets are a great way to kindle your child's interest in STEM. (Image credit: Getty Images)
The first thing to talk about when it comes to Stomp Rockets is how easy they are to use. Each Stomp Rocket kit usually comes with the rocket, a launch stand, a flexible hose and a launcher — and that's about it. There's no need for batteries, cords or plugs, meaning using them outside is super streamlined and not at all technical. Plus, you'll be urging your kids to get outside to play because, depending on how hard you stomp, rockets can reach up pretty high into the air, sometimes up to 400 feet (depending on age suitability).
Stomp Rockets are also 100% kid-powered, which is a huge deal for little kids who want to practise independence and feel confident in what they're learning about. To help with this, each box comes with a selection of rockets to stomp with. If kids lose any of them, or if they just want to load them up and stomp them over and over again without having to run around picking them up first, then it's easy.
In comparison, other model rocketry can come with an abundance of intricate pieces that can feel overwhelming or too complicated, or there are ignition-based model rockets, like the ones found amongst the best model rocket sets, that can be very technical.
While that's great for model rocketry hobbyists as they get older, the Stomp Rockets are a great place to start for younger kids because of how truly simple they are. Plus, they also encourage a lot of activity from your kids, jumping and running about to blast off. And if there's one thing we know for sure about kids, they've got a lot of energy!
They're about as safe as it gets
Stomp rockets are completely kid-powered and don't require batteries, special fuel or anything that might need adult supervision. (Image credit: D&L Company)
One of the biggest draws to Stomp Rockets is how safe they are to use. As I already mentioned, they're so safe in fact that kids can power them all by themselves. As the Original Stomp Rocket Jr. Rocket Set for $27.99 puts it directly on the box: “100% Kid Powered”.
There's no assembly required; the rockets and accompanying accessories are often made from simple foam and plastic, and the height they travel tends to vary depending on the age on the box. All solid reasons that your kid can play and experiment with them without adults needing to get too involved. For the Jr. Rocket Set, for example, it's suitable for 3 years and up, traveling to heights of 100 feet. For something more advanced, but still accessible, the Stomp Rocket Original Dueling Rockets is for ages 5 and up, reaching up to 200 feet in the air.
You'll notice that the only safety concern with Stomp Rockets seems to relate to how high they launch up into the air. That's why the Super High-Performance X-Treme Rocket Launcher I mentioned earlier recommends use for ages 9-13 only, reaching up to 400 feet. But they also adopt a rounded-out nose, rather than a tip, to ensure safe landing.
As kids get older, they might want to experiment with more advanced model rockets, including those with a launch pad and ignition switch. This is where safety protocol and adult supervision are essential, as they're considered a lot more dangerous. As NASA advises in their Beginner's Guide to Aeronautics: “At NASA, we take safety very seriously in everything that we do. Safety is the first mission in flying, whether it is flying the Space Shuttle, an experimental aircraft, or a model rocket. You must always be aware of the people and things around you that can be harmed by your rocket, or which can harm you or your rocket.”
Stomp rockets are relatively inexpensive
A simple design means stomp rockets are inexpensive and make a great gifts for kids. (Image credit: Getty Images)
Amongst the selection of Stomp Rockets we've researched online, they tend to range between $15-$30 and that's incredibly affordable when it comes to model rocketry. But why are they a lot cheaper? Well, they're a lot simpler and require far fewer parts, especially considering they come fully assembled. If you run out of rockets, you can also purchase refills that'll only cost you around $10-$20, depending on the model and how many you buy.
With more expensive model rockets, the price can jump up when you're buying kits that need to be built. Additionally, you'll be spending more on acquiring extra parts or upgrades to existing model rocket kits. A pack of model rocket engines can cost you as much as a whole kit of Stomp Rockets. Engine starters, igniter plugs, launch pads, and controllers are all things that can cost you money.
When you're just getting started, model rocket kits will also require you to have your own tools to build them. And tools are unlikely to be something you'd have your kids own when they're just learning, and they're only little. So, you can save yourself money there, too (for now).
Don't be surprised by their limitations
Want to extra educational value to the' stomp rocket experience? NASA has instructions on how to build your own. (Image credit: NASA JPL)
Of course, if you're not spending the money on all these additional extras, you're also not getting them. With Stomp Rockets, they're pretty basic kits that don't come with a lot of additional extras and that is one of their limitations. They won't reach incredible heights, they won't deploy parachutes to float safely to the ground, and they certainly won't let out any exhaust when they fly skyward. But they're also incredibly safe and that's why they're better suited for younger children.
If you are missing out on the building perspective of Stomp Rockets, NASA’s Jet Propulsion Laboratory does offer an online lesson for teachers to practice in class, creating the nose cone, fuselage and fins while powering it with a simple empty water bottle. However, this is targeted at grades 4 and up.
They might not always fly as high as you want and they might be susceptible to breaking given their foam construction, but it can't be doubted that they're easy for younger kids to use and a great introduction to model rocketry without stressing about safety, price or fun.
Stomp Rocket Jr Multi-Color Rocket Launcher: $27.99 Part of the Original Stomp Rocket collection, these Jr Multi-Color Rockets are the best starter rockets for kids aged 3 and up. You get eight rockets in the pack and four different colors: Air Force blue, neon green, glow-in-the-dark yellow and fire engine red. A great introduction to experimenting with gravity and force without having to spend more than $30. View Deal
Stomp Rocket Jr Glow Rocket Launcher: $17.99 Part of the Jr range, the Glow Rockets come in a pack of four, reaching up to 100 feet in the air. You can also pay an extra $2 to secure three more rockets in the next size up. Listed as the number one bestseller in Toy Foam Blaster Sets on Amazon, they’re a lot of fun and carry that same 100% kid-powered tagline.View Deal
Stomp Rocket Ultra Rocket Launcher: $19.99 For slightly older kids, aged 5 and up, the Stomp Rocket Ultra can reach heights of up to 200 feet. This time, they lose the cone nose of usual rockets, adopting a foam-tipped rounded tip to make sure they don’t hurt anybody when flying back down to the ground.View Deal
Stomp Rocket Original Dueling Rocket Launcher: $29.99 If playing with Stomp Rockets with friends and family is on the agenda, then the Original Dueling Set comes with eight rockets ready to battle. You can launch two rockets at the same time and compete on who gets theirs the highest. And they can reach heights of up to 200 feet if you stomp them hard enough, which is almost 20 stories high.View Deal
Stomp Rocket NASA Space Collection Rocket Launcher: $29.99 If your kid is a big fan of NASA, then this Stomp Rocket Space Collection comes with three NASA rockets styled like the Saturn V Rocket, Space Shuttle Atlantis and SLS Rocket. Plus, the adjustable launch stand lets kids experiment with different trajectories and forces, creating their own experiments.View Deal
Stomp Rocket Super High-Performance X-Treme Rocket Launcher: $19.99 This set is recommended for ages 9-13 because of just how high it’s capable of going, which isn’t all that surprising to hear since it’s considered to be the ‘Super High-Performance X-Treme’ version. It even comes with its own special X-Treme rockets to reach heights of up to 400 feet.View Deal
Of all the models in the renewed Nikon Action range released in 2026, the Action Zoom 10–22x50 is definitely one of the most attention-getting, with its zoom capability from 10x to 22x magnification.
These are Nikon's third-generation 10-22x50 binoculars, building upon the past designs of 2007's Action VII Zoom XL 10-22x50 and 2013's Aculon 10-22x50 in 2013. The new design features a generous 16.3mm of eye relief, a tough aluminum chassis and updated optics.
We found them to be a versatile pair of binoculars, and used them at 10x magnification to locate objects before zooming in to 22x for a closer look. Changing magnifications is easily done with a lever on the right eyecup, but the optics do suffer from the sacrifices required when producing a binocular with zoom functionality.
Nikon Action Zoom 10-22x50 binoculars review
Nikon Action Zoom 10-22x50 binoculars: Design
Strong aluminum chassis
Easy magnification change
Big focus dial
The Nikon Action 16x50 have a solid but lightweight aluminum chassis. (Image credit: Harry Bennett / Future)
Along with the fixed magnification models in the Action series, the Action Zoom 10-22x50 binoculars have the same strong, lightweight aluminum chassis. This helps to protect the careful arrangement of lenses required for zooming, as well as making the binoculars more durable without adding extra weight.
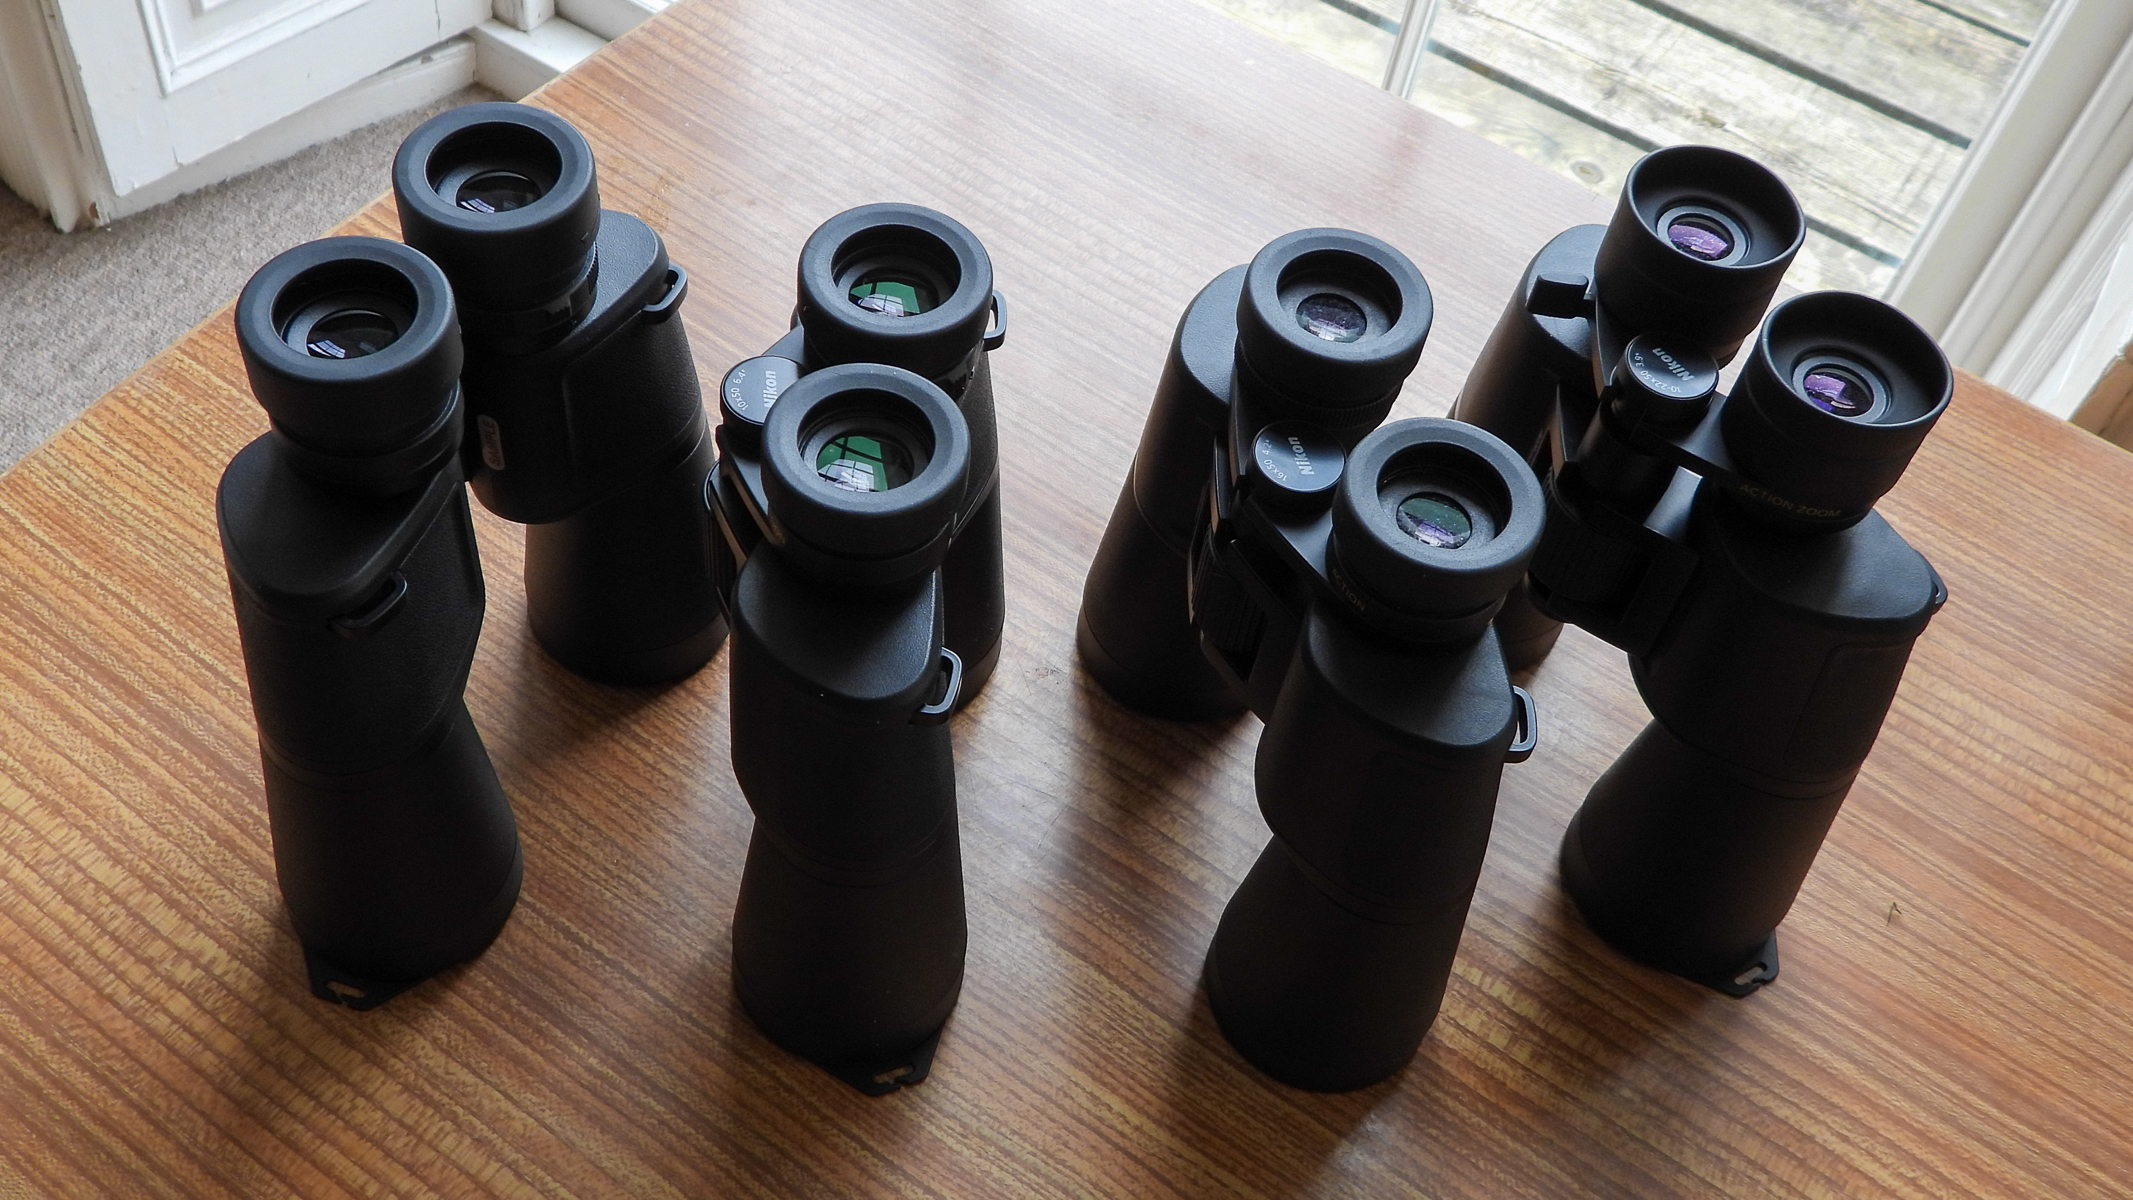
L-R: The Nikon Action 7x50, Nikon Action 10x50, Nikon Action 16x50 and Nikon Action Zoom 10-22x50 binoculars (Image credit: Harry Bennett / Future)
In fact, the 2026 Action Zoom 10-22x50 is 0.4 oz (10 grams) lighter than the previous Aculon model. This is important for the stargazer or hiker who may already have lots of heavy gear to carry, where small amounts can make all the difference.
We found that the higher the Nikon Action Zoom 10-22x50's magnification was, the darker the image. (Image credit: Harry Bennett / Future)
The exterior of the binoculars is covered in a textured rubber armor, which provides good grip while scanning the skies. A chunky focus dial between the barrels is easy to find with your fingers and use, enabling you to adjust focus quickly while observing. Focus touch-ups are usually required when changing magnification.
Specifications
Design: Porro prism
Magnification: 10-22x (zoom)
Objective lens diameter: 50mm
Exit pupil: 5.0mm (10x) - 2.27mm (22x)
Angular field of view: 3.9 degrees (10x)
Eye relief: 16.3 mm
Weight: 2.09 lbs (950 g)
Dimensions: 8.0 x 7.9 x 2.6 in (202 x 200 x 66 mm)
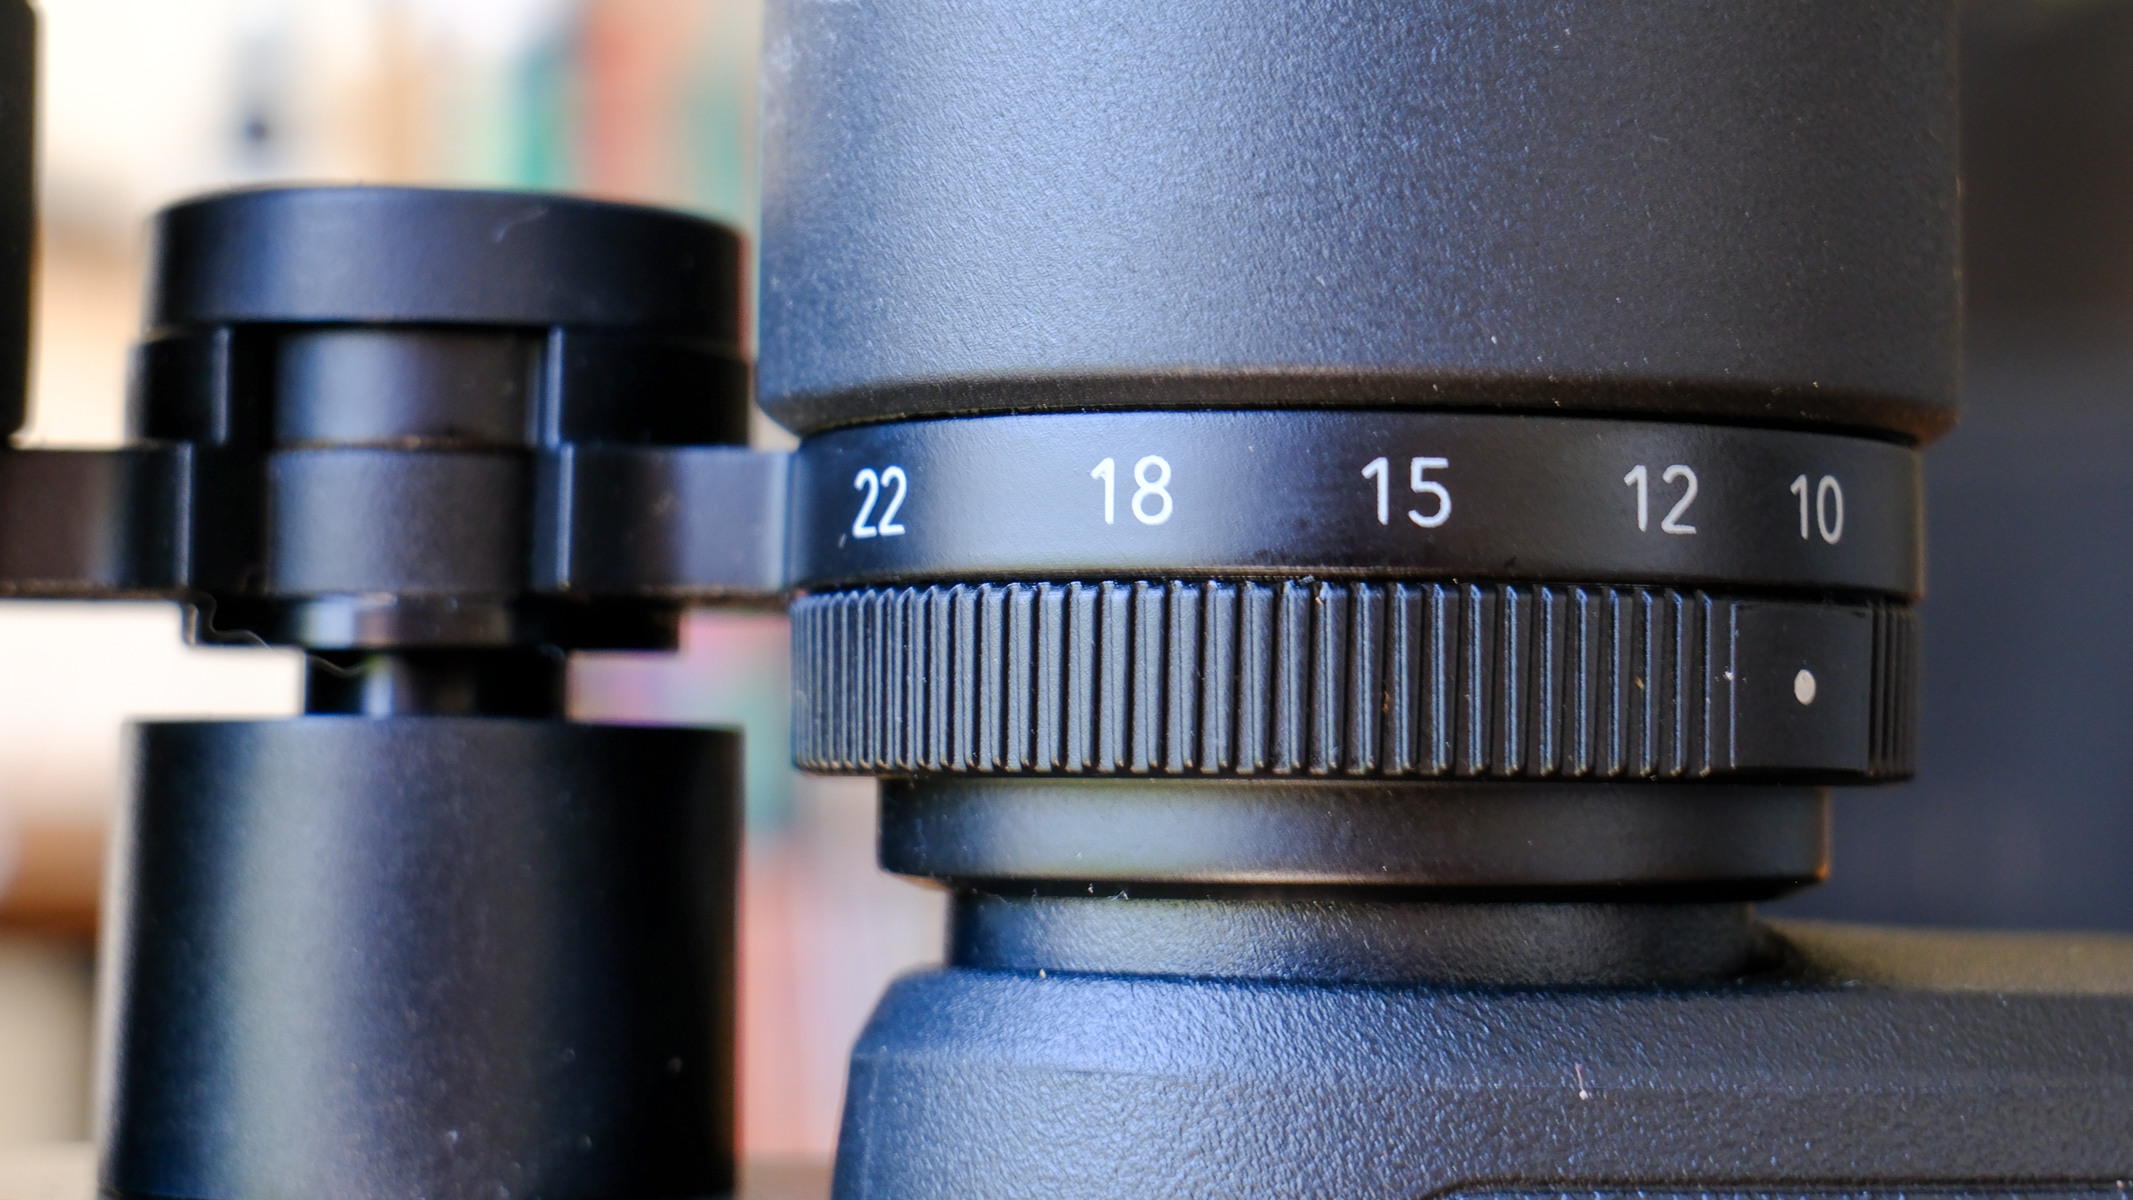
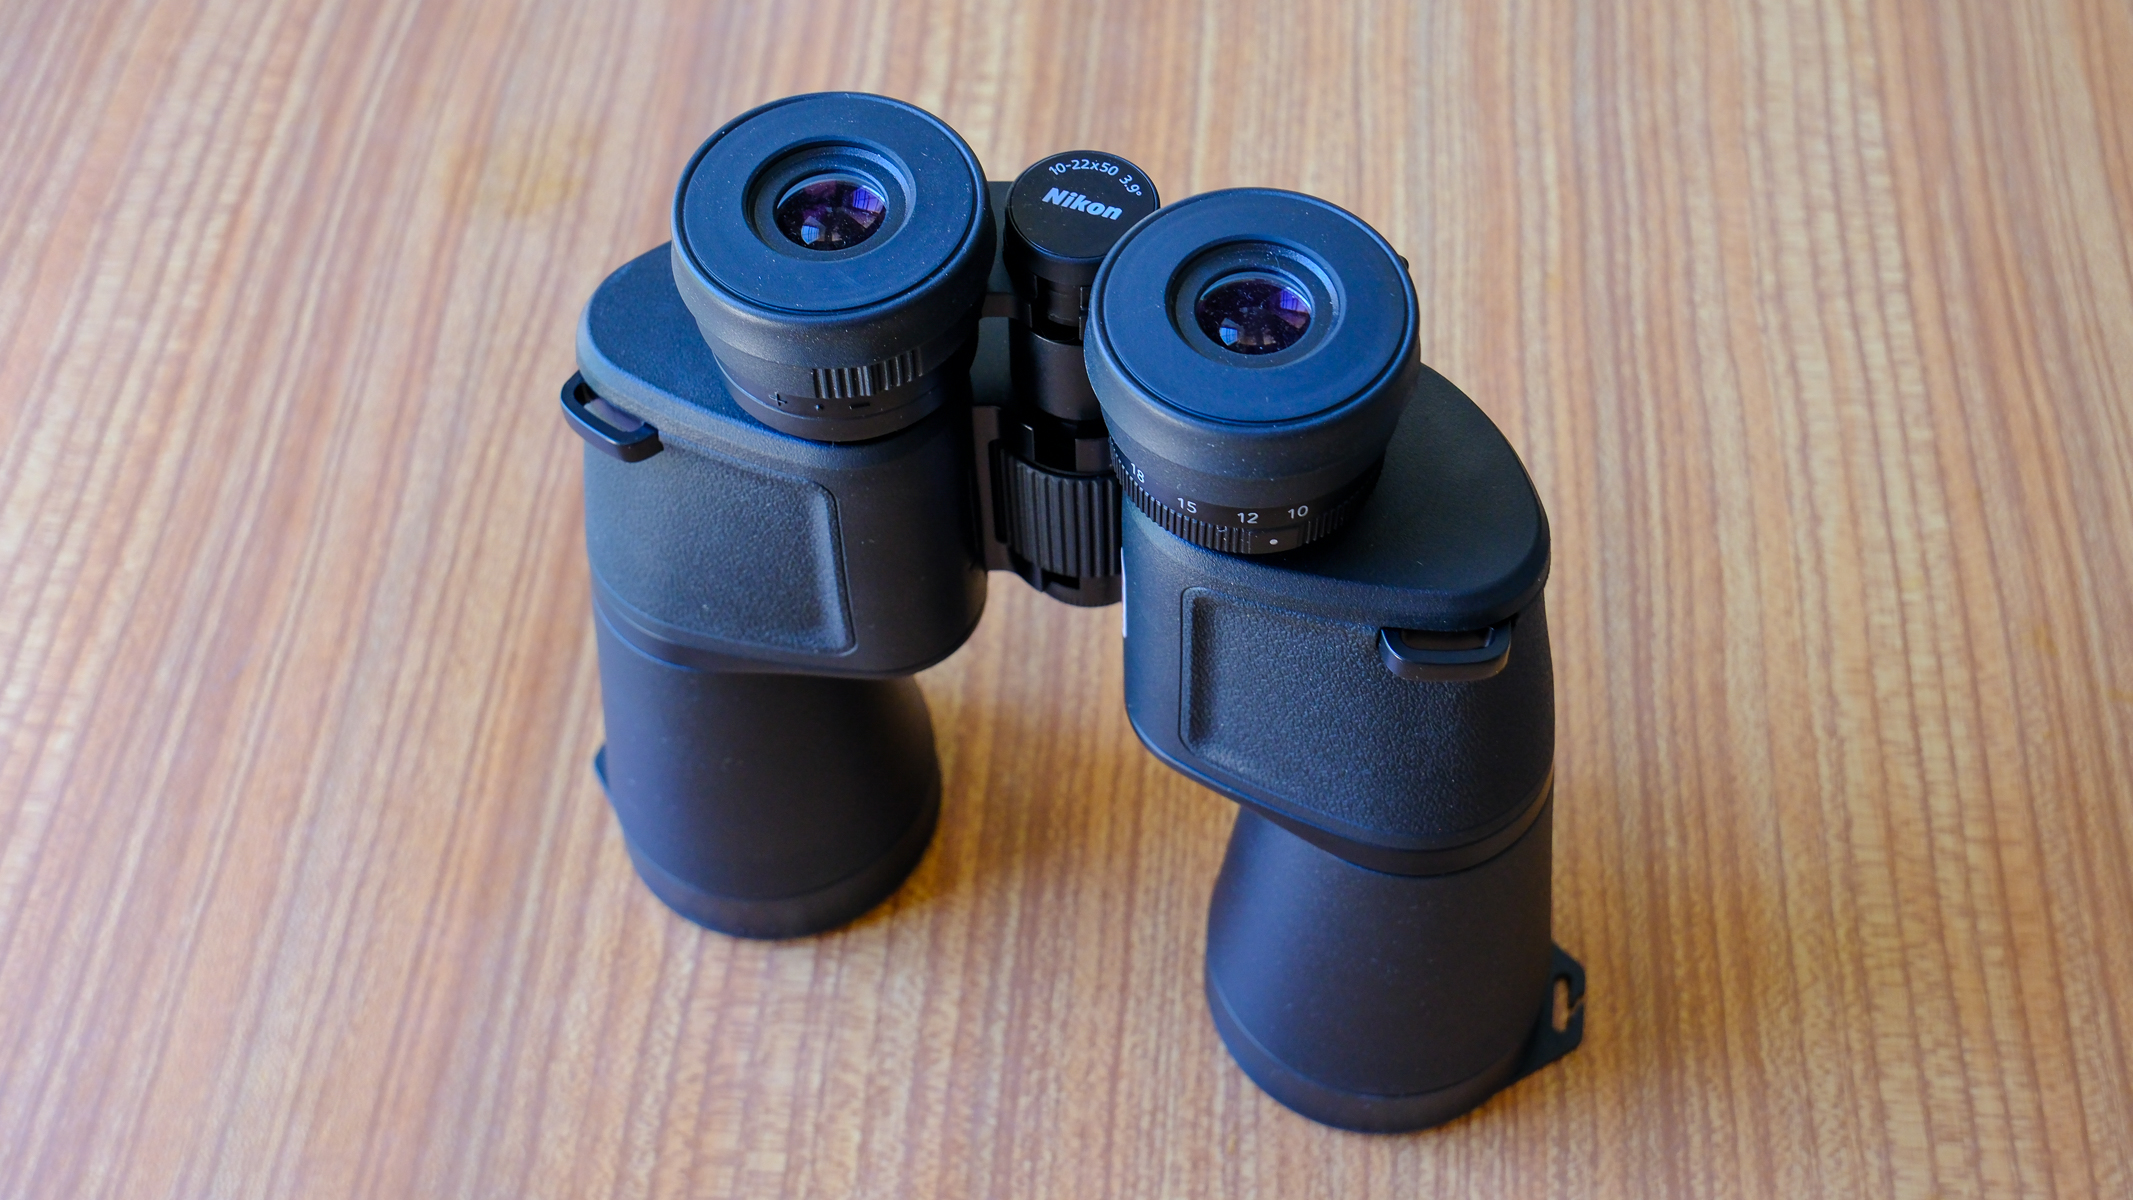
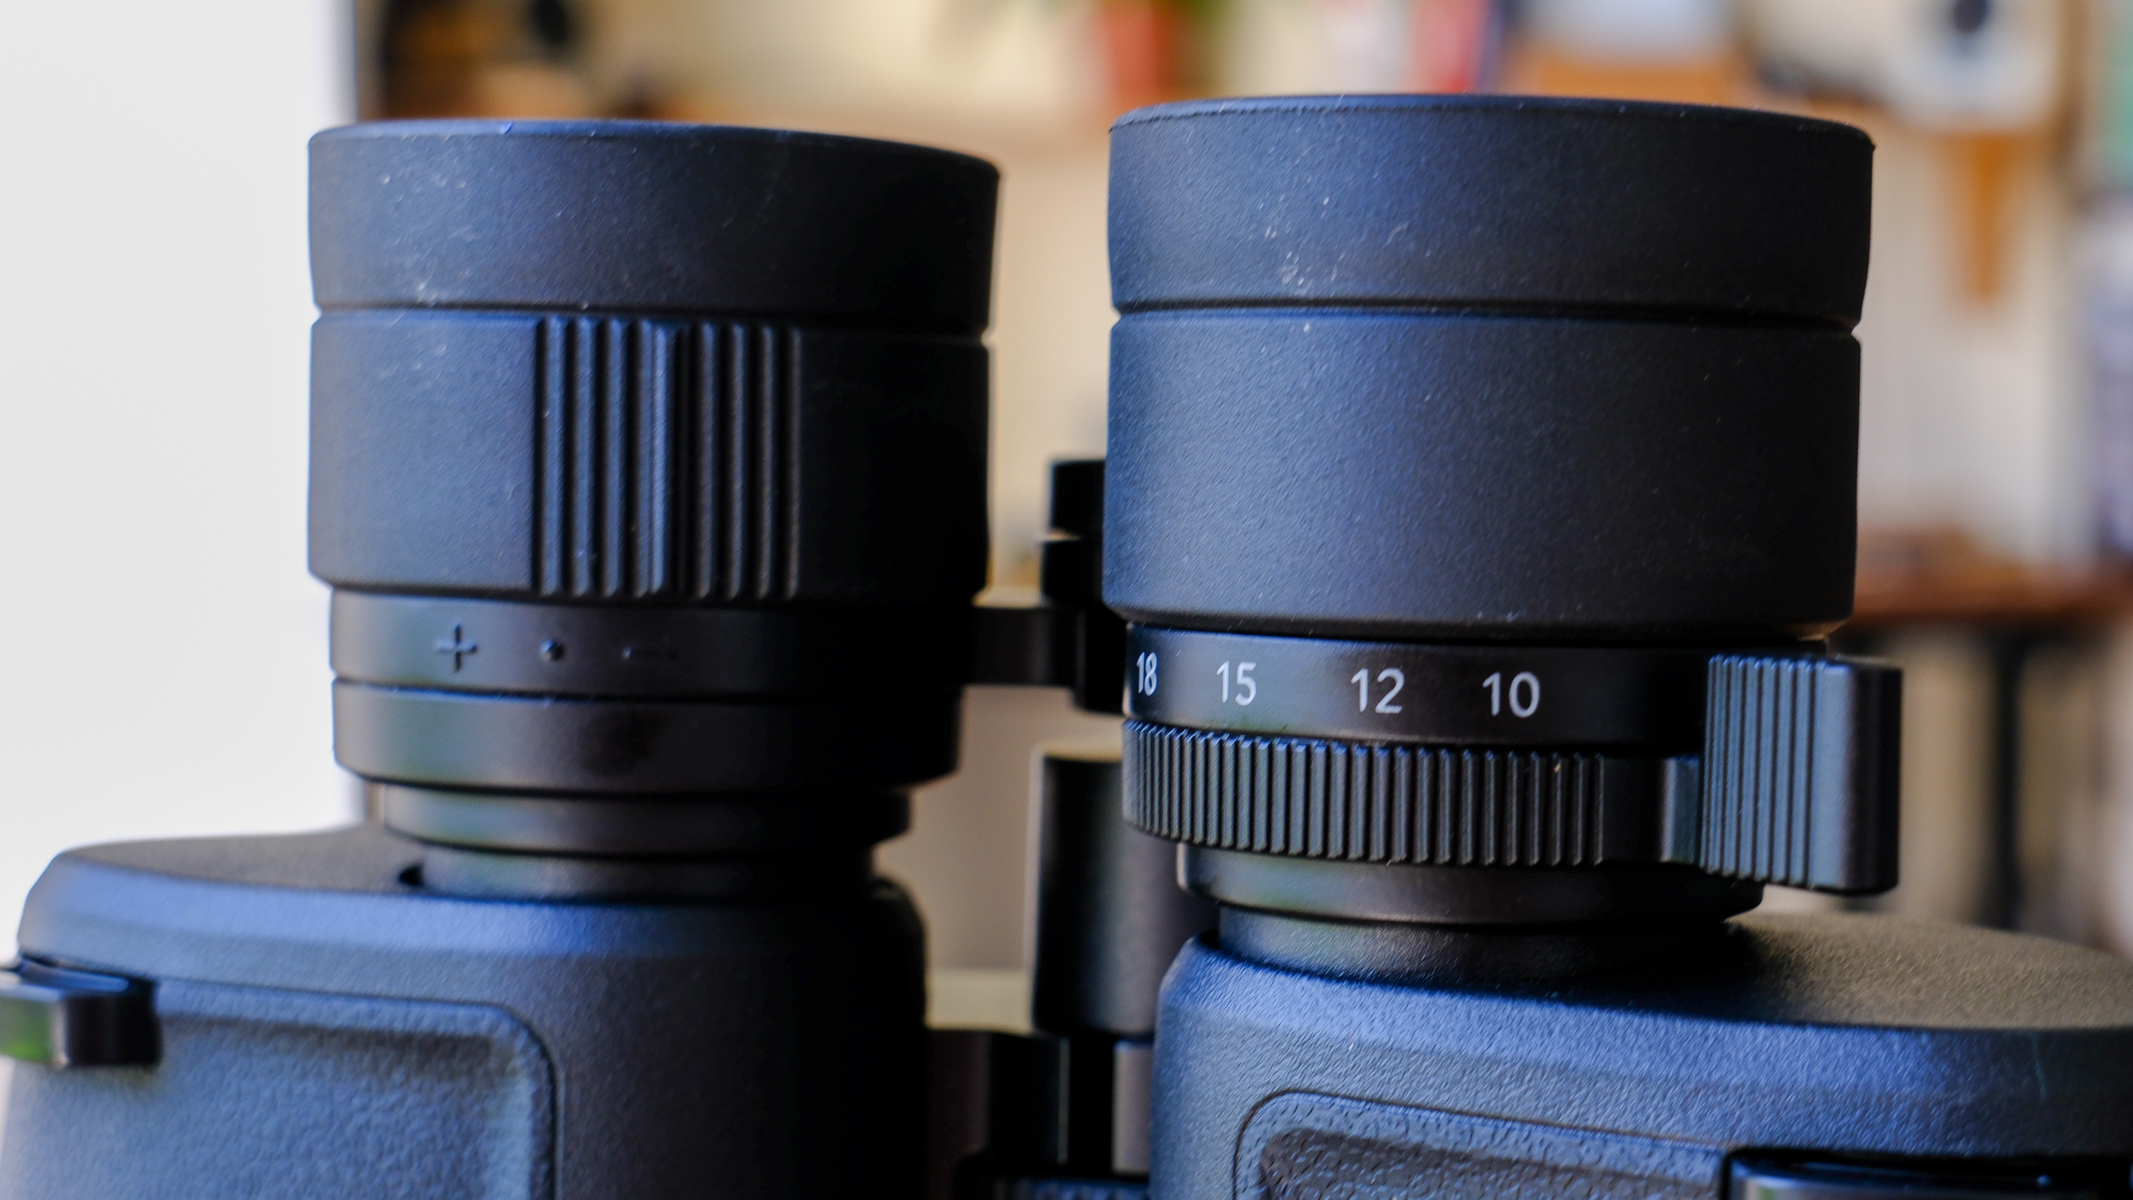
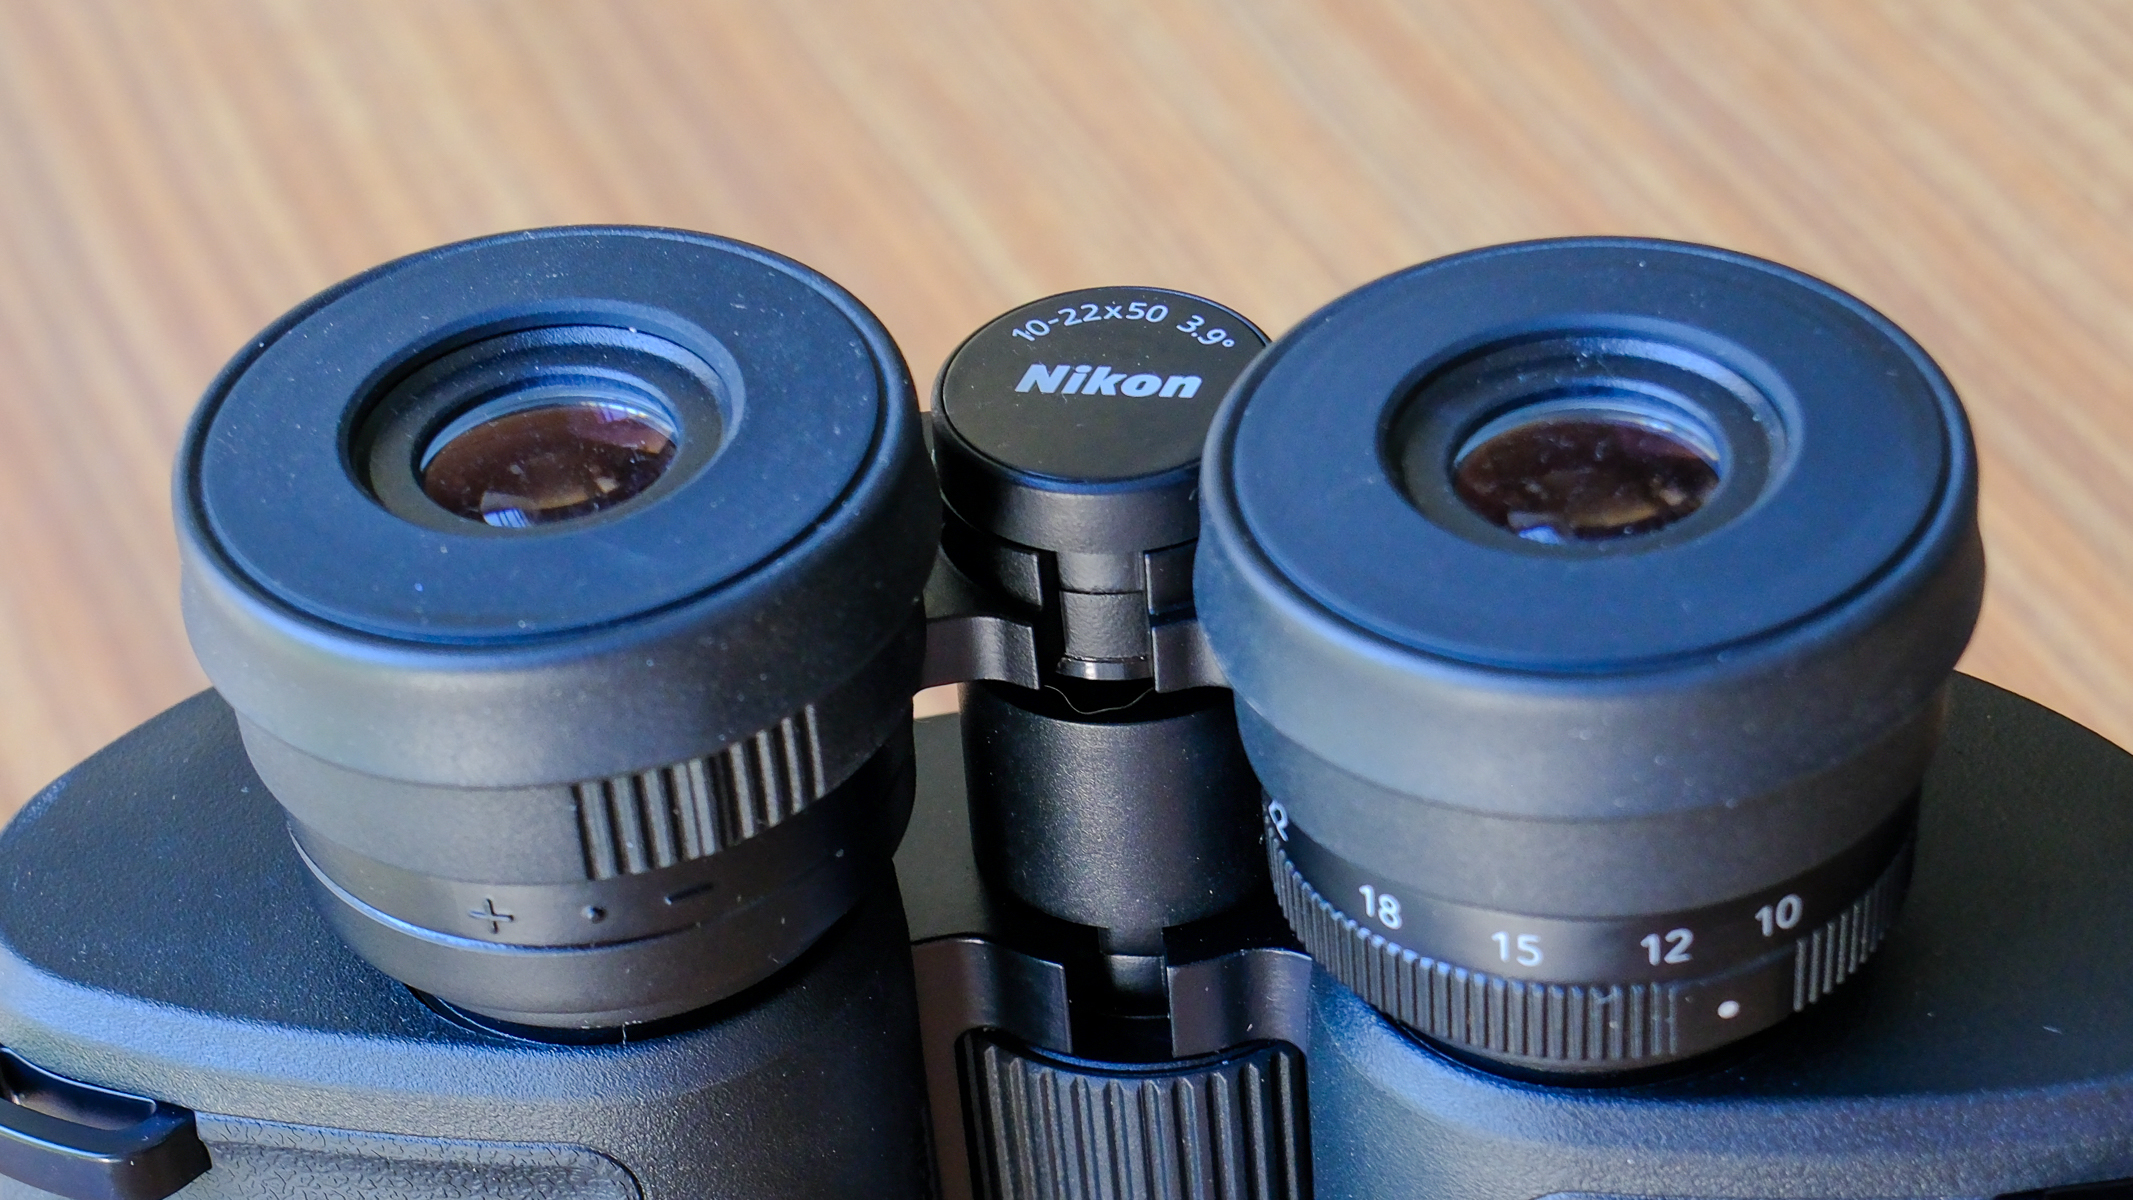
Magnification is easily changed with the right eyecup zoom lever, which is pushed down with the right index finger to move from 10x through to 22x. On the bottom of the right eyecup, there are printed white numbers on the body so that you can also set the magnification precisely at 12x, 15x and 18x. This helps with observing targets that don't require the full 22x zoom, and allows an astronomer to be more precise in their observations.
Not sure what zoom you'll need when you're out and about? The Nikon Action Zoom 10-22x50 binoculars have you covered. (Image credit: Harry Bennett / Future)
When moving the zoom lever, the lenses in the eyepieces slide forward and backward, changing the distance to the objective lenses at the front of the binoculars. This changes the effective focal length and magnification of the binoculars.
The objective lens caps are easy to remove and replace but they're a little loose so you'll need to keep an eye on them. (Image credit: Harry Bennett / Future)
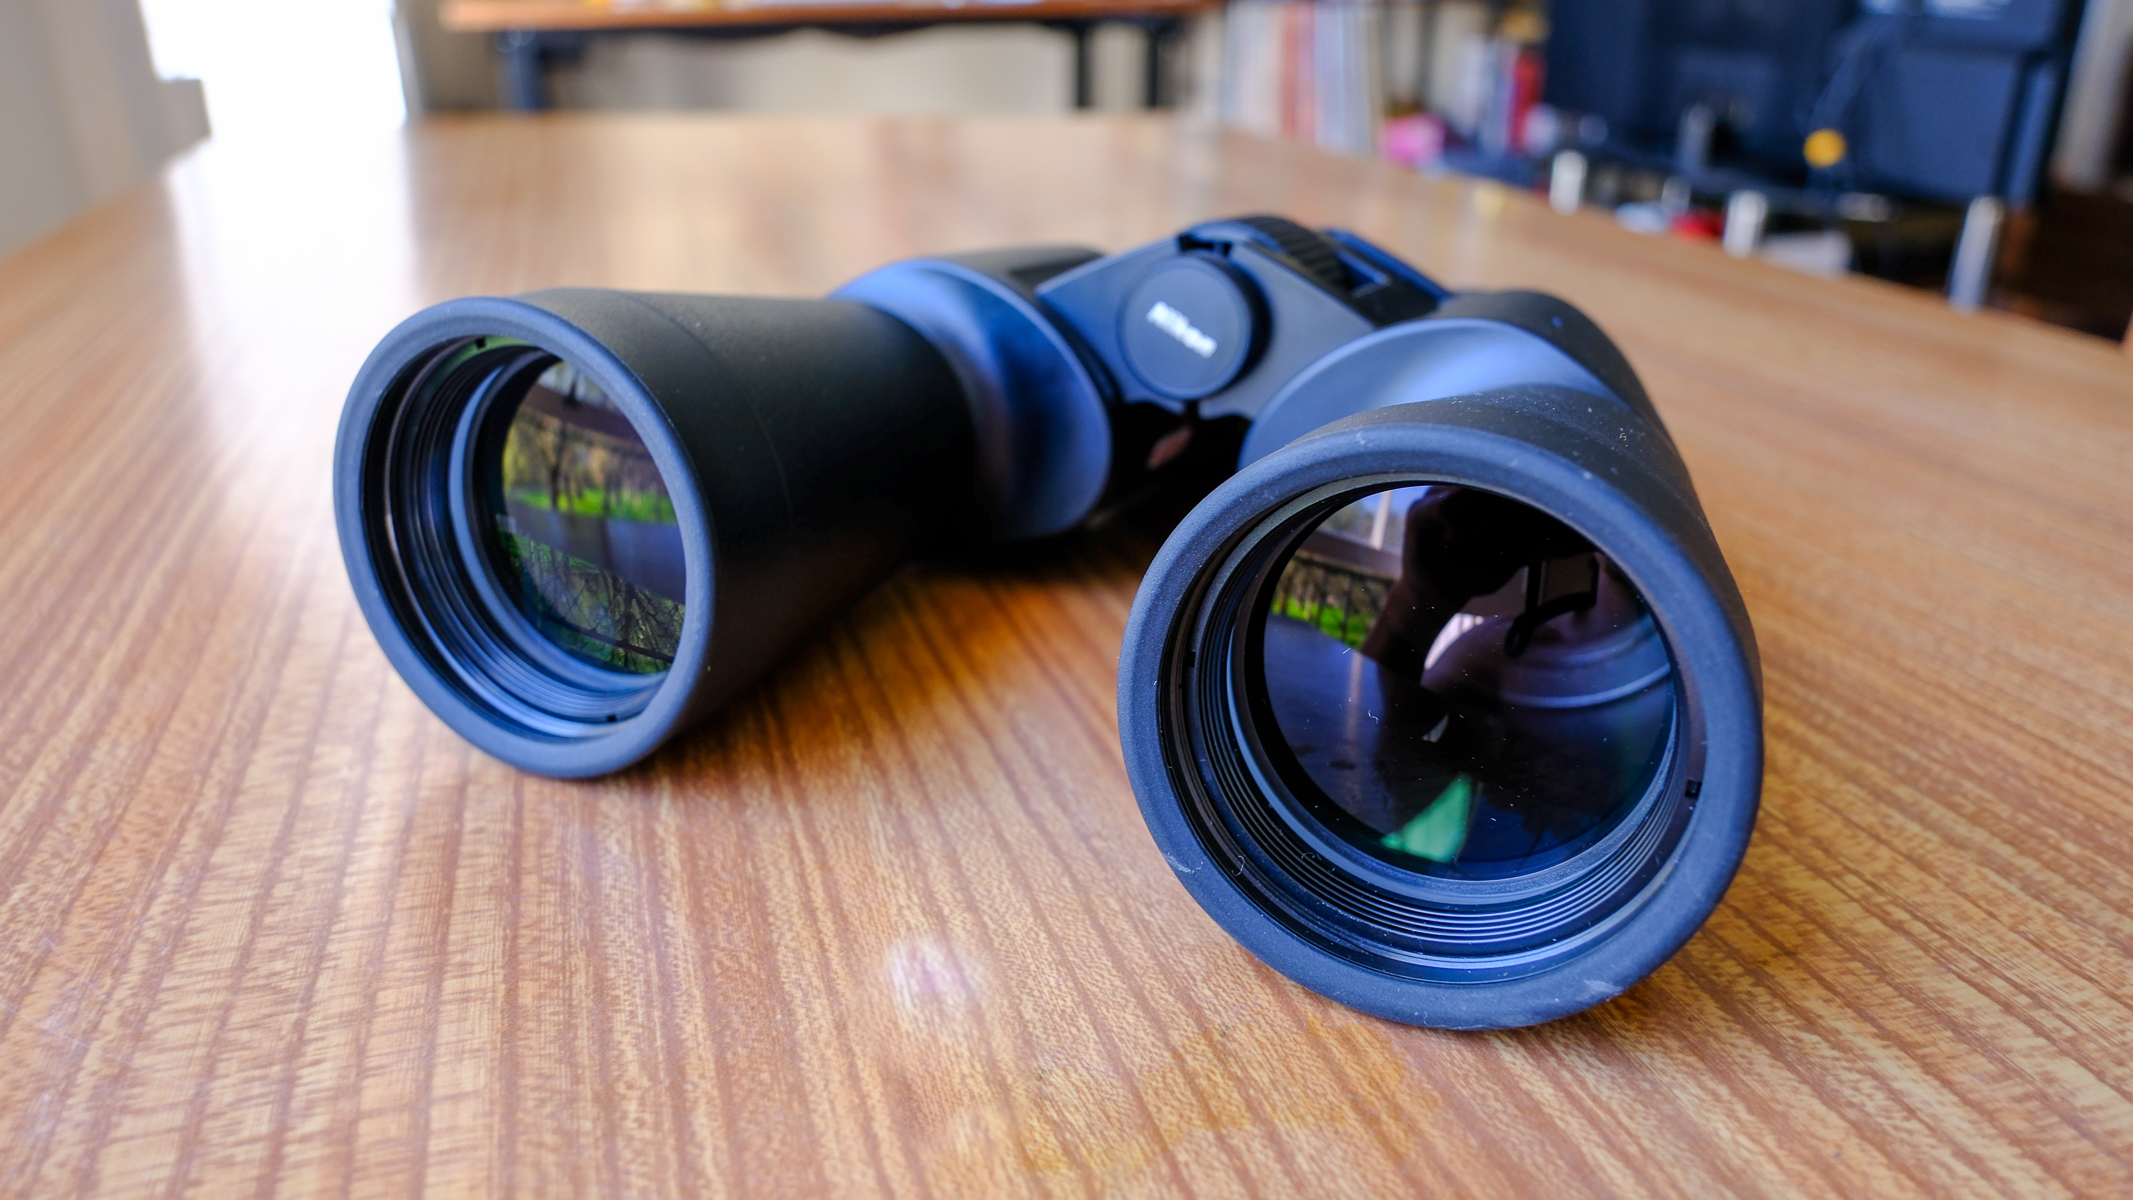
50mm objective lenses let plenty of light through the binoculars when stargazing, delivering a bright image at 10x magnification and helping you to spot faint objects.
For overhead views, we'd recommend you pair the Nikon Action Zoom 10-22x50 binoculars with a tripod. (Image credit: Harry Bennett / Future)
Good for star-hopping then zooming in
Noticeably dimmer at 22x
Needs a tripod for overhead views at 22x
The 22x magnification on the Nikon Action Zoom is the strongest out of the entire range, with the next one down being the 16x50. During handheld observation, the zoom functionality was good for night sky objects that weren't too high overhead or terrestrial observation at horizontal and downward angles.
We were able to see the top portion of the Orion constellation with the magnification at 10x, with a bright Orion's belt and smudgy Orion nebula (M42). Switching to 22x magnification, we got a close-up view of the three stars making up Orion's belt and the dog-star Sirius to its left. At 22x these points of light were much more impressive but the binoculars handled stars much better than diffuse objects such as the Orion Nebula, which looked fairly unimpressive at 22x. We actually got a better view of the Orion Nebula with the NIkon Action 16x50.
The maximum exit pupil on the Action Zoom is 5 mm at 10x magnification, but when fully zoomed in at 22x, the exit pupil drops to 2.3 mm, effectively halving the amount of light your eye is receiving. This makes the view seem dimmer and was especially noticeable when observing Orion's nebula and during terrestrial viewing in daylight.
The Nikon Action Zoom 10-22x50's rubber eyecups are impressively comfortable, more so than twist-up cups. (Image credit: Harry Bennett / Future)
We found the Beehive Cluster by star-hopping from Castor to Pollux and then to the star cluster. We used the 10x magnification for star-hopping before zooming in to get a better view of the Beehive cluster, but it was still disappointing. The wide-field view of the Beehive Cluster within the triangle of Cancer at 10x was much better than the zoomed-in dim view at 22x. Paired with the increased handshake from overhead observation without a tripod, it was less rewarding than observing at lower magnifications.
For beginners we would usually recommend using a tripod or getting an image-stabilized model when using binoculars with 12x magnification or over. It is possible to get sturdy views during handheld viewing by tucking your elbows into your chest or sides, but this only works when observing on the horizontal or downwards. When looking directly overhead, it was very hard to keep the Nikon Action Zoom 10-22x50 still enough to make out any details when fully zoomed in.
These binoculars offer excellent wide-field views of the night sky, letting you focus on objects such as the Beehive Cluster. (Image credit: Harry Bennett / Future)
This was also an issue when observing another overhead observation target, Jupiter. When trying to spot the faint line of its Galilean moons, the resulting observation was just a mess of bright squiggles. This would definitely be remedied with the use of a tripod adapter and tripod, but be aware that these accessories become a necessity when stargazing overhead.
Looking at the half moon was good and offered a range of lunar views thanks to the magnification change, but again, the higher magnifications required steady hands. The moon at 22x magnification also looked significantly dimmer than the moon when observed with the Nikon Action 16x50s. While it suffered from similar levels of handshake, 16x50s have better light transmission because of their fixed magnification and wider exit pupil. At 10x magnification, the binoculars suffered from distortion around the edges of the view, but this disappeared when zooming into higher magnification.
The zoom lever is easy to use while observing, with no fumbling about. (Image credit: Harry Bennett / Future)
Rubber eyecups block light
Versatile zoom range
Tripod adapter socket
The Nikon Action Zoom 10-22x50 is a versatile optical tool and is useful when you are unsure what level of magnification you will need before you go out. We tested them out with the other binoculars in the Nikon Action range, the 7x50, 10x50 and 16x50. If we were going out for the evening, we would usually reach for these as it saved us having to take two different binoculars for wide-field and close-up viewing.
The zoom lever was incredibly easy to use during observation and touching up the focus with the focus wheel was easy with my middle finger. That said, viewing overhead objects at 22x magnification is heavily marred by hand shake and would be improved with the use of a tripod.
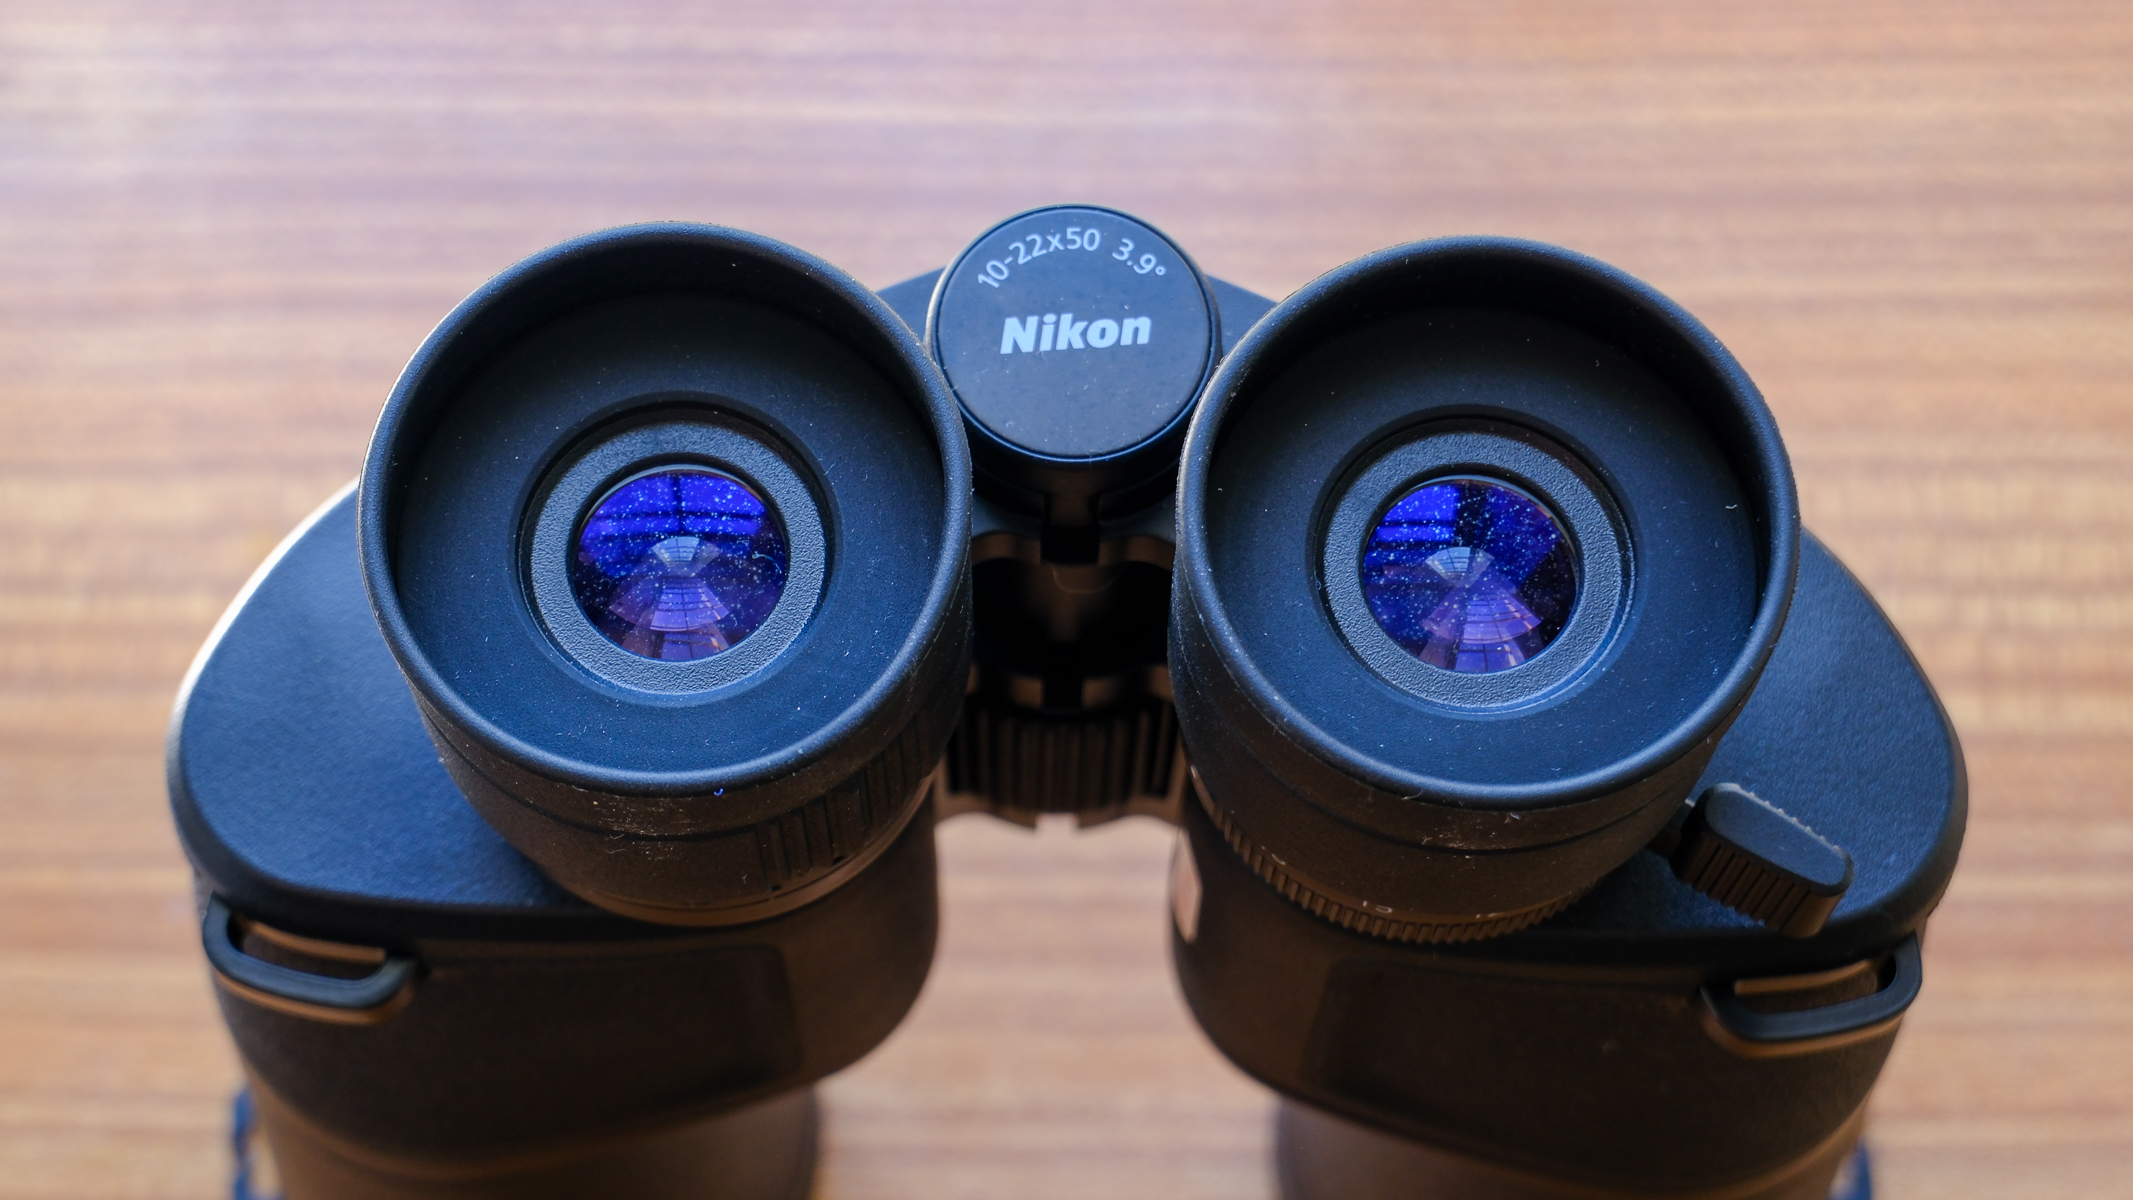
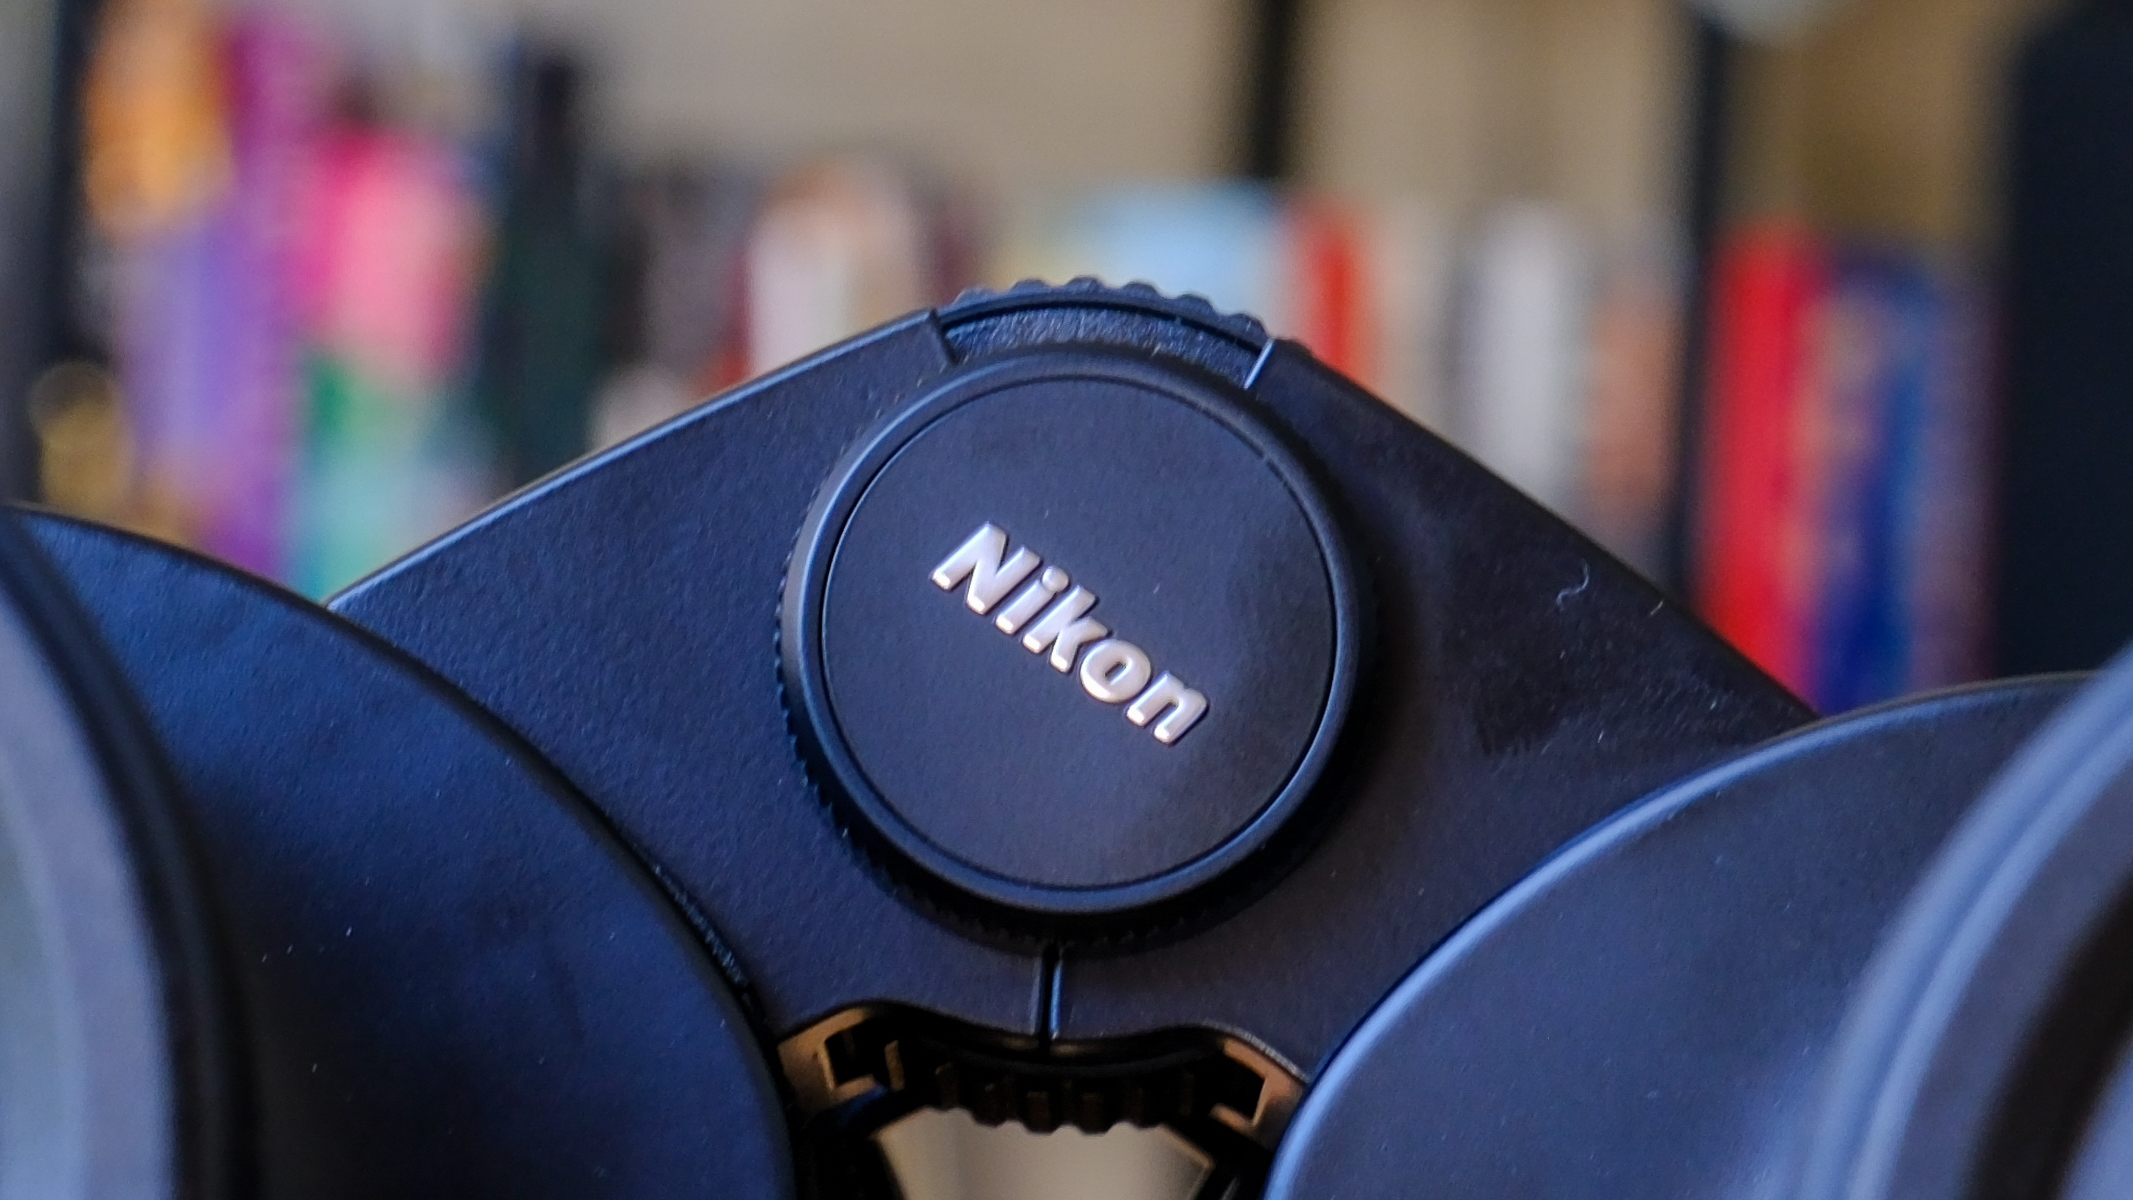
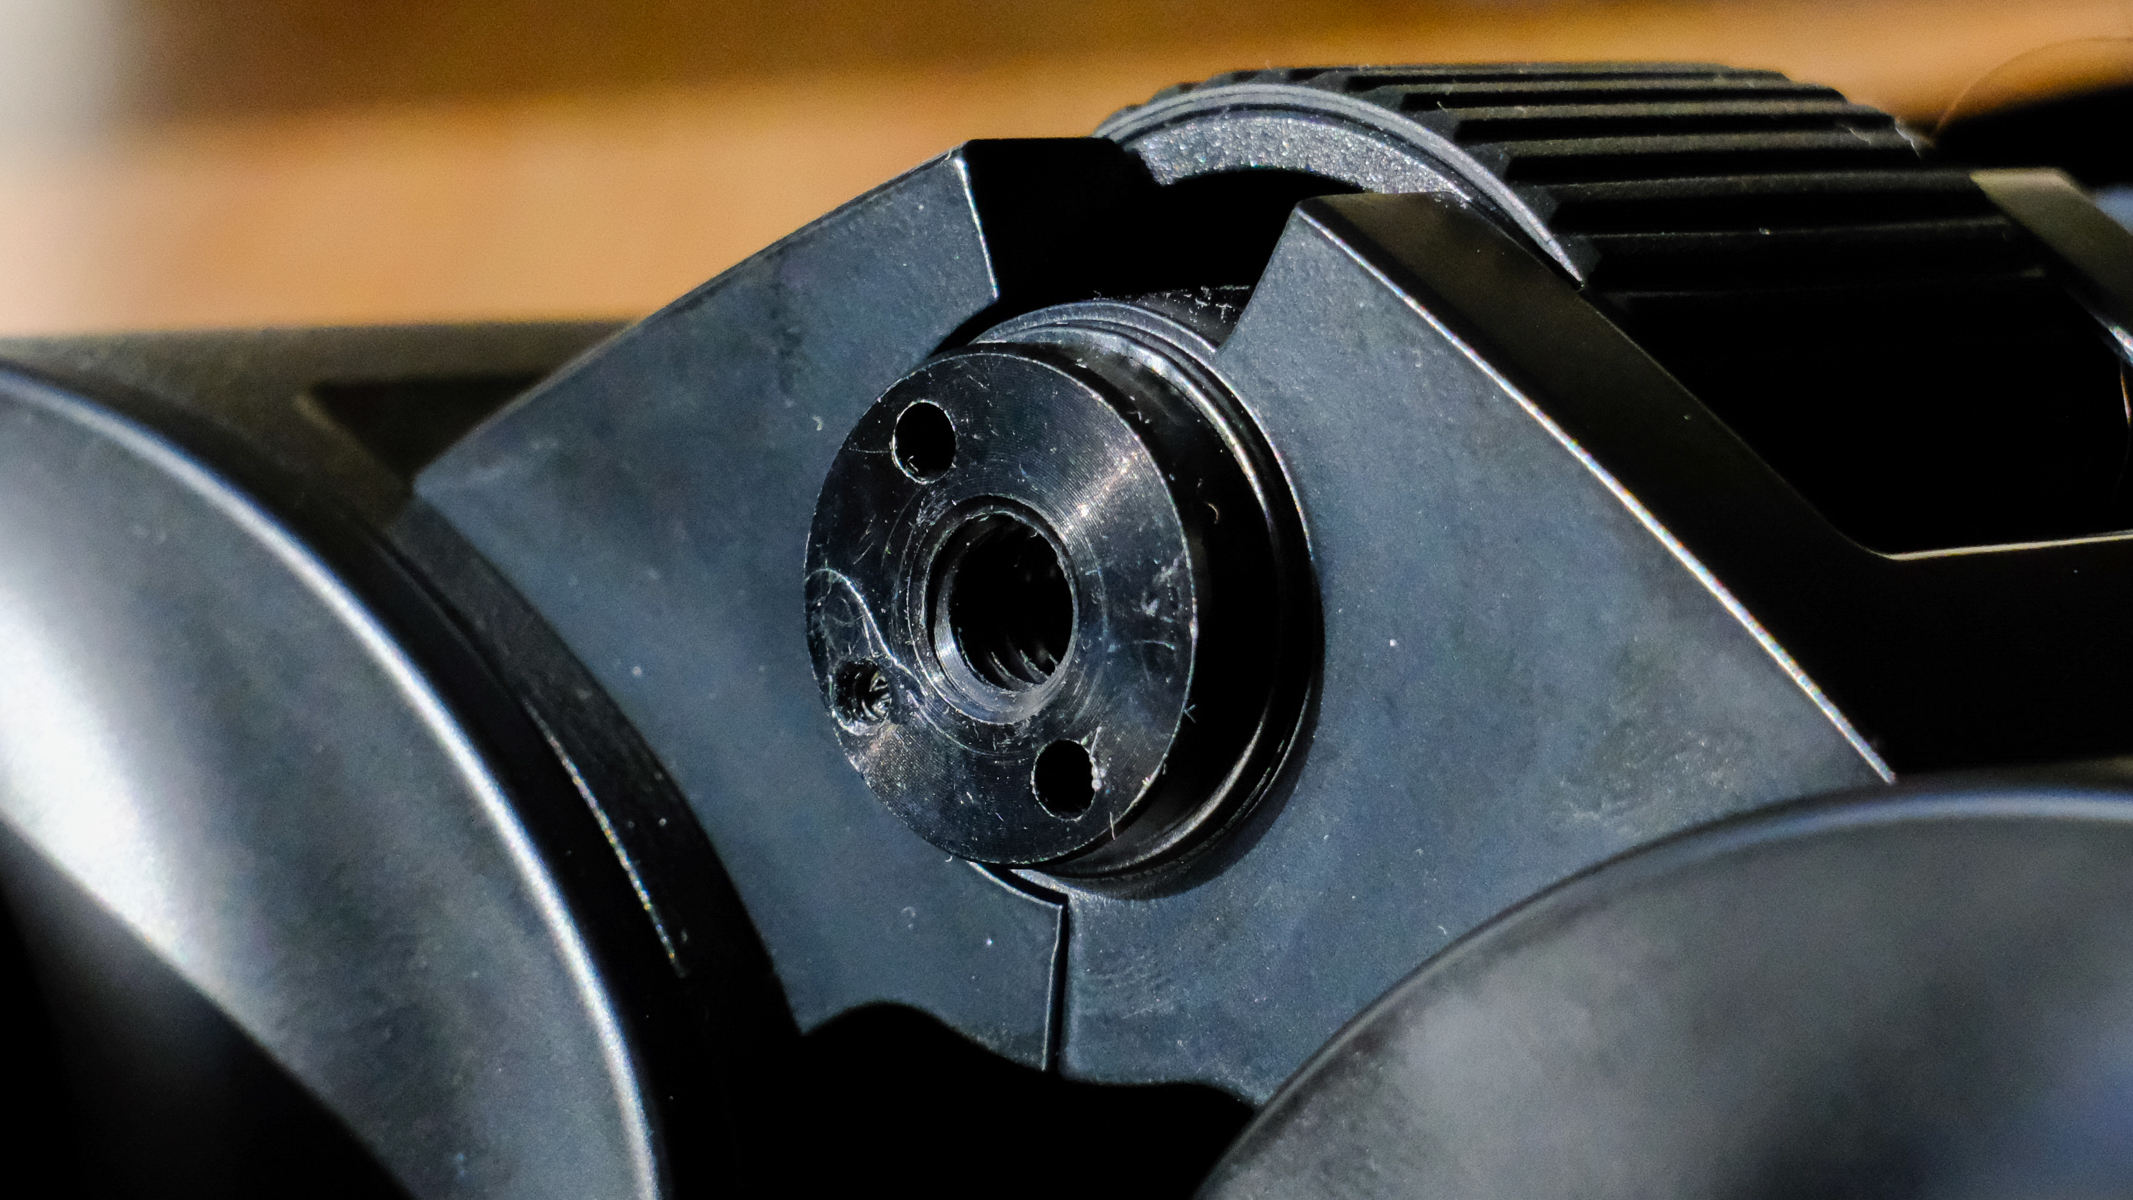
Just like the rest of the new Nikon Action range, the Zoom model has a tripod adapter socket in-between the two barrels, hidden behind a screw-in Nikon logo. If you are planning on using these for a lot of high-magnification observation, we would recommend buying the Nikon 7650 binocular tripod adapter and a budget tripod, like the Manfrotto Element II tripod, to ensure you can get blur-free views of the stars.
The fold-down eyecups are a boon for glasses wearers. Harry Bennett / FutureHarry Bennett / FutureHarry Bennett / Future
We found the rubber eyecups were really comfortable, and actually preferred them to the hard, twist-up cups that the rest of the Nikon Action range has. They blocked out any light in the environment far better than the twist-up cups and were much more comfortable on the eye sockets. While the binoculars feature 16.3mm of eye relief, stargazers who wear eyeglasses may be disappointed by only having two heights for eye relief, with the rubber eyecups flipped up or flipped down.
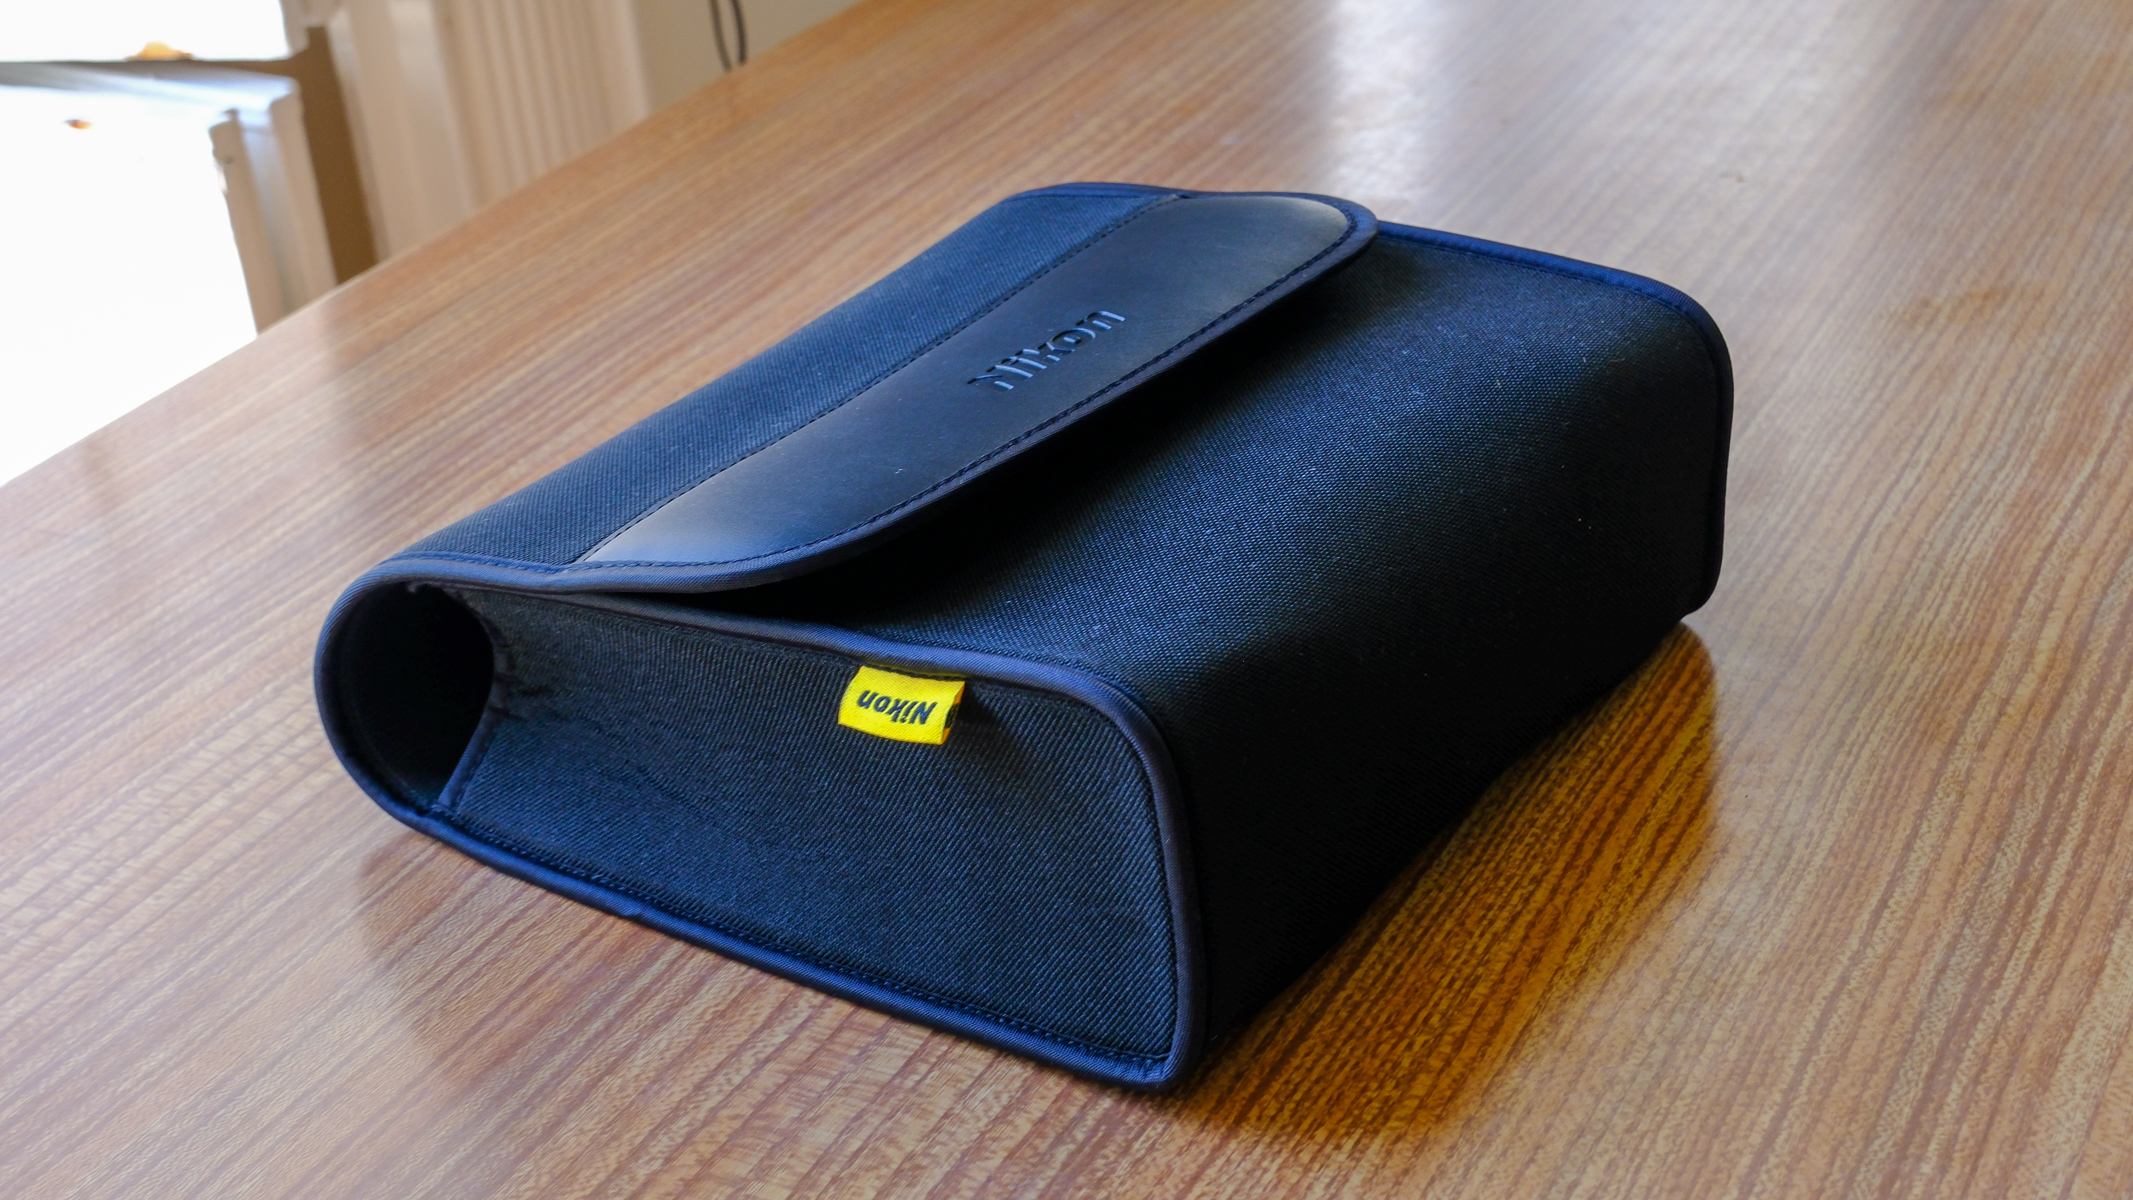
These Nikon Action Zoom 10-22x50 binoculars come with a soft carry case. Harry Bennett / FutureHowever, these binoculars' neck strap is a little thin. Harry Bennett / Future
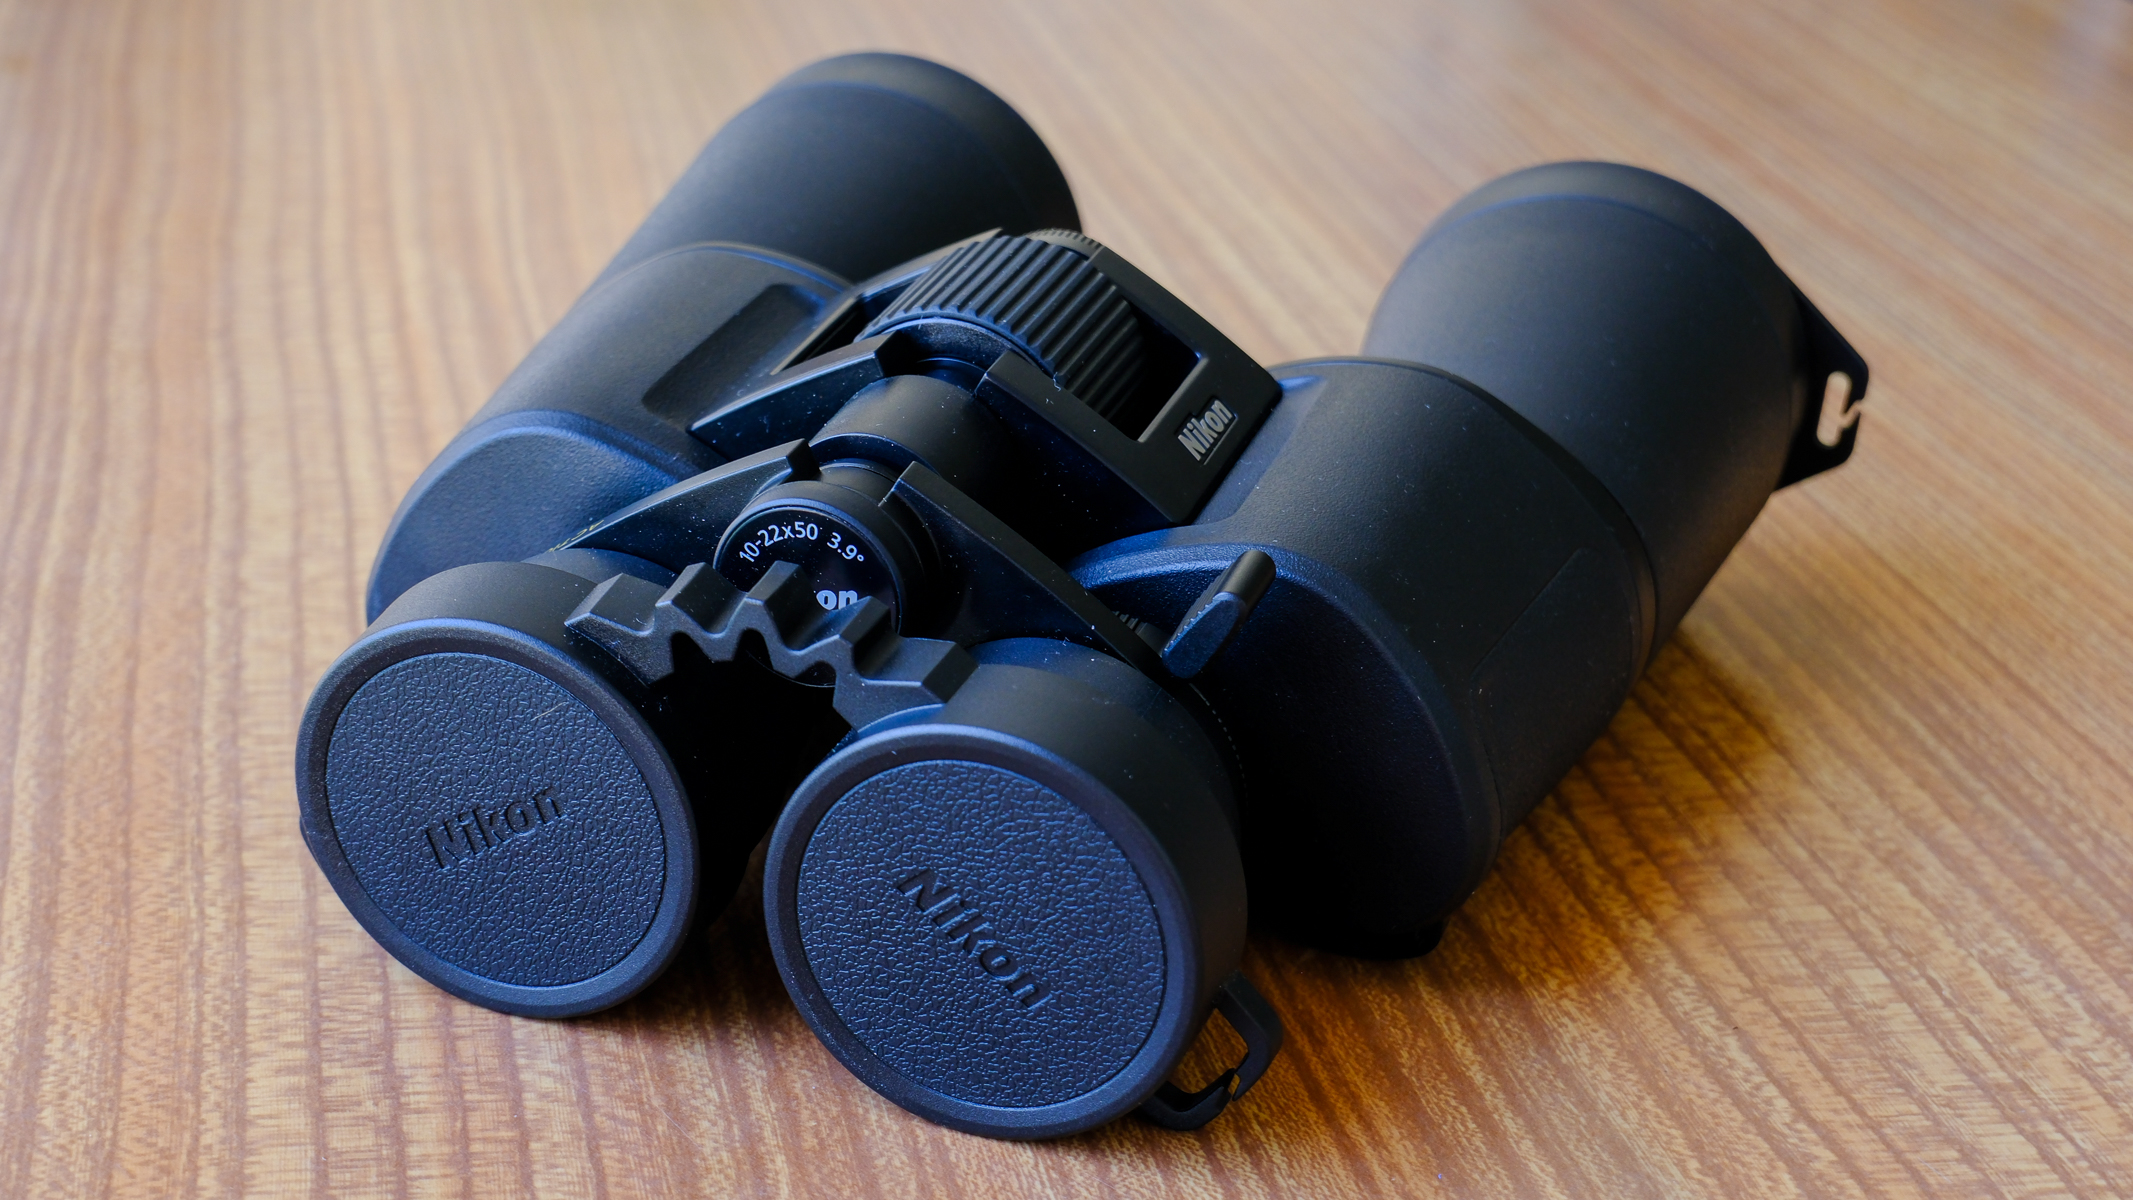
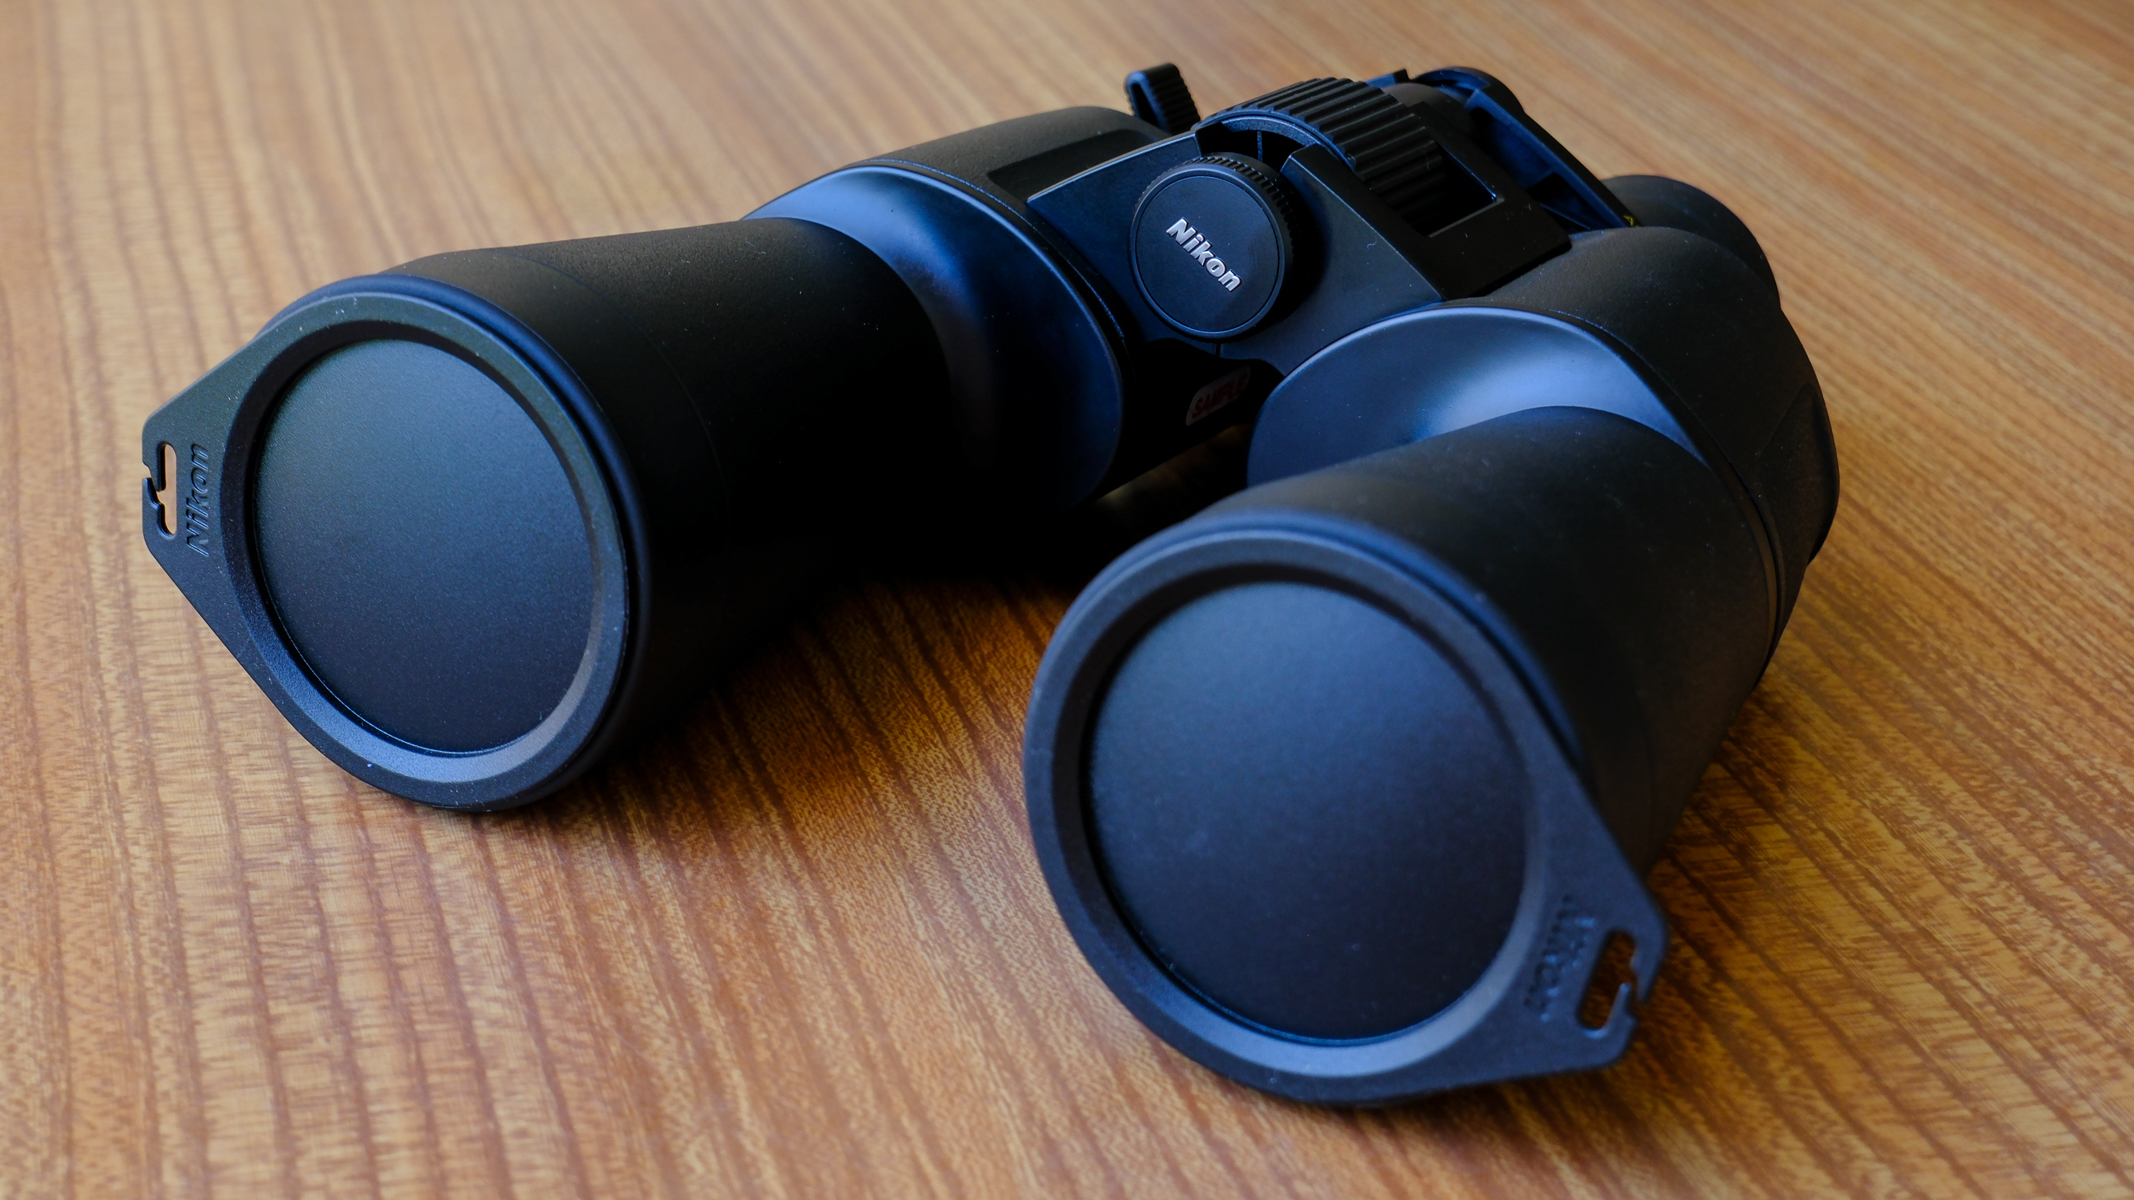
The objective lens caps are easy to remove and replace but they can be quite loose and could get lost easily if not attached to a neck strap. The rubber eyecup covers remain fixed in place during transport and keep the eyepieces clean for observation. Nikon provides a neck strap and soft carry case with these binoculars but the neck strap is pretty thin, so if you are planning on carrying them around for a long time, consider getting a padded neoprene strap for binoculars for only $25.
These Nikon binoculars are great if you want variable magnification. Harry Bennett / FutureRemoving the Nikon logo reveals the tripod adapter socket. Harry Bennett / Future
How we tested the Nikon Action Zoom 10-22x50 binoculars
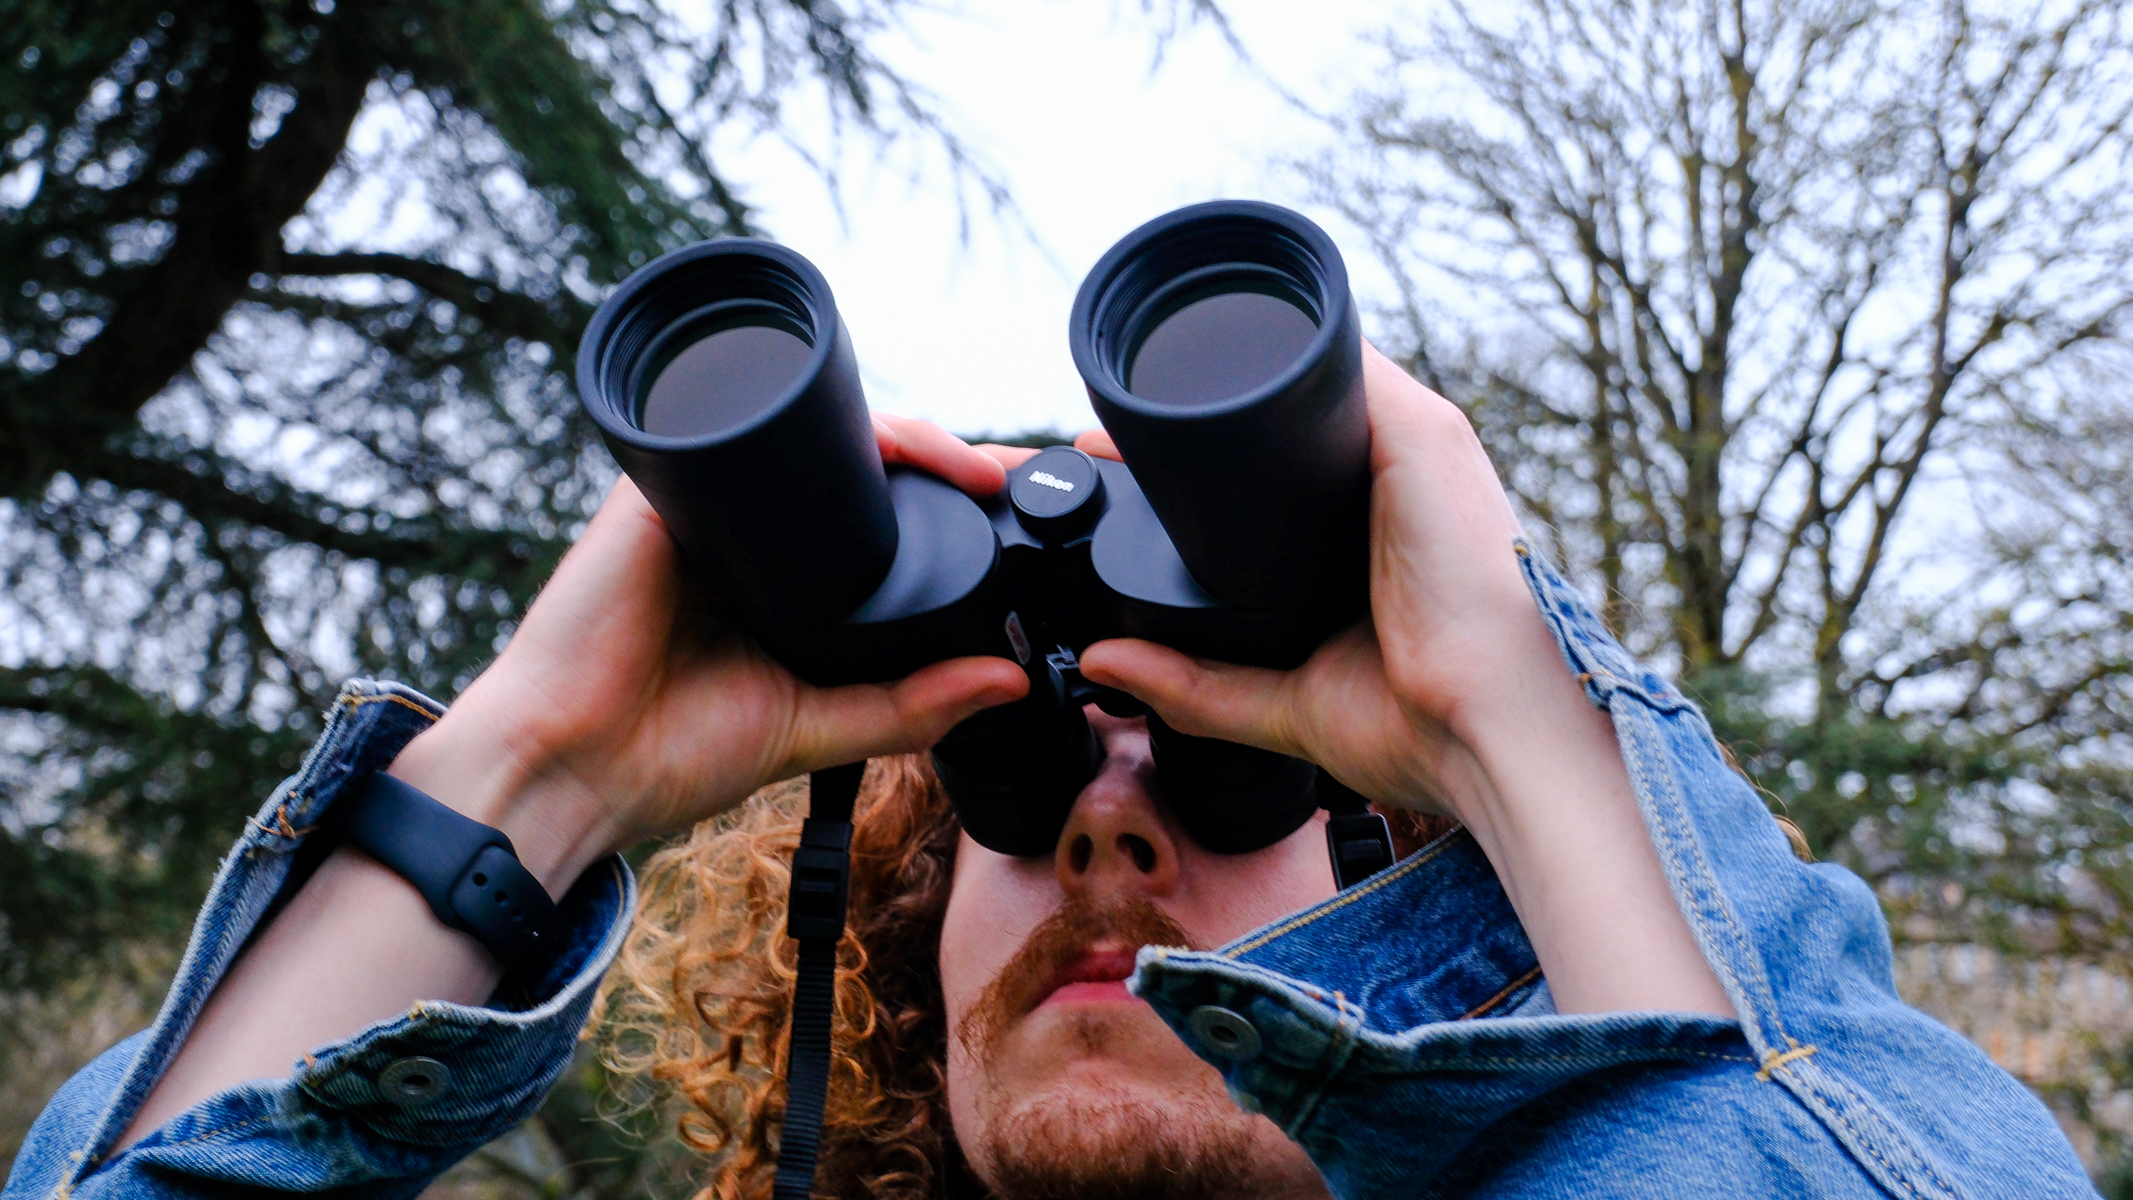
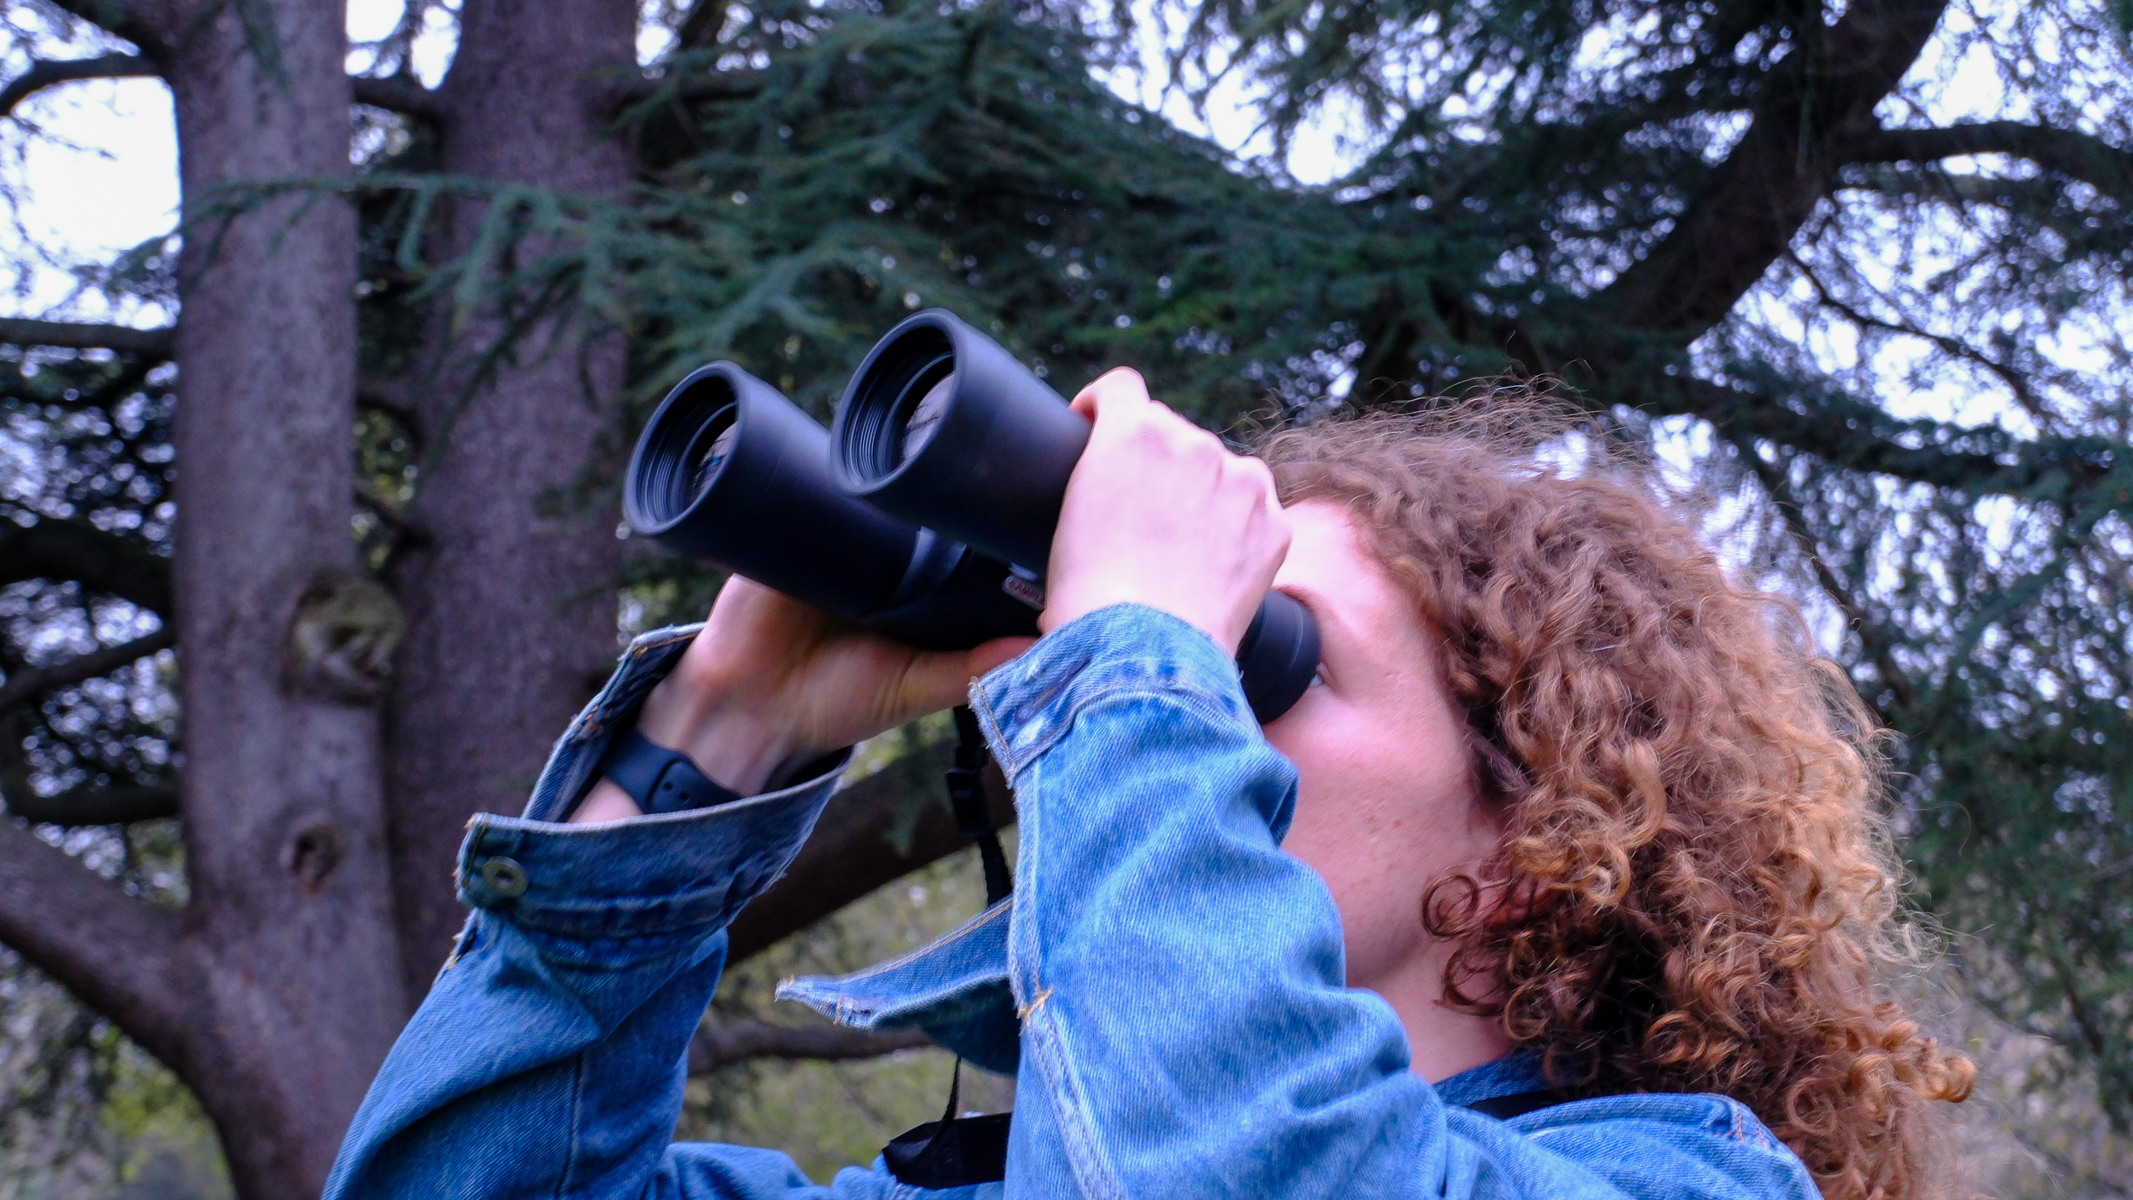
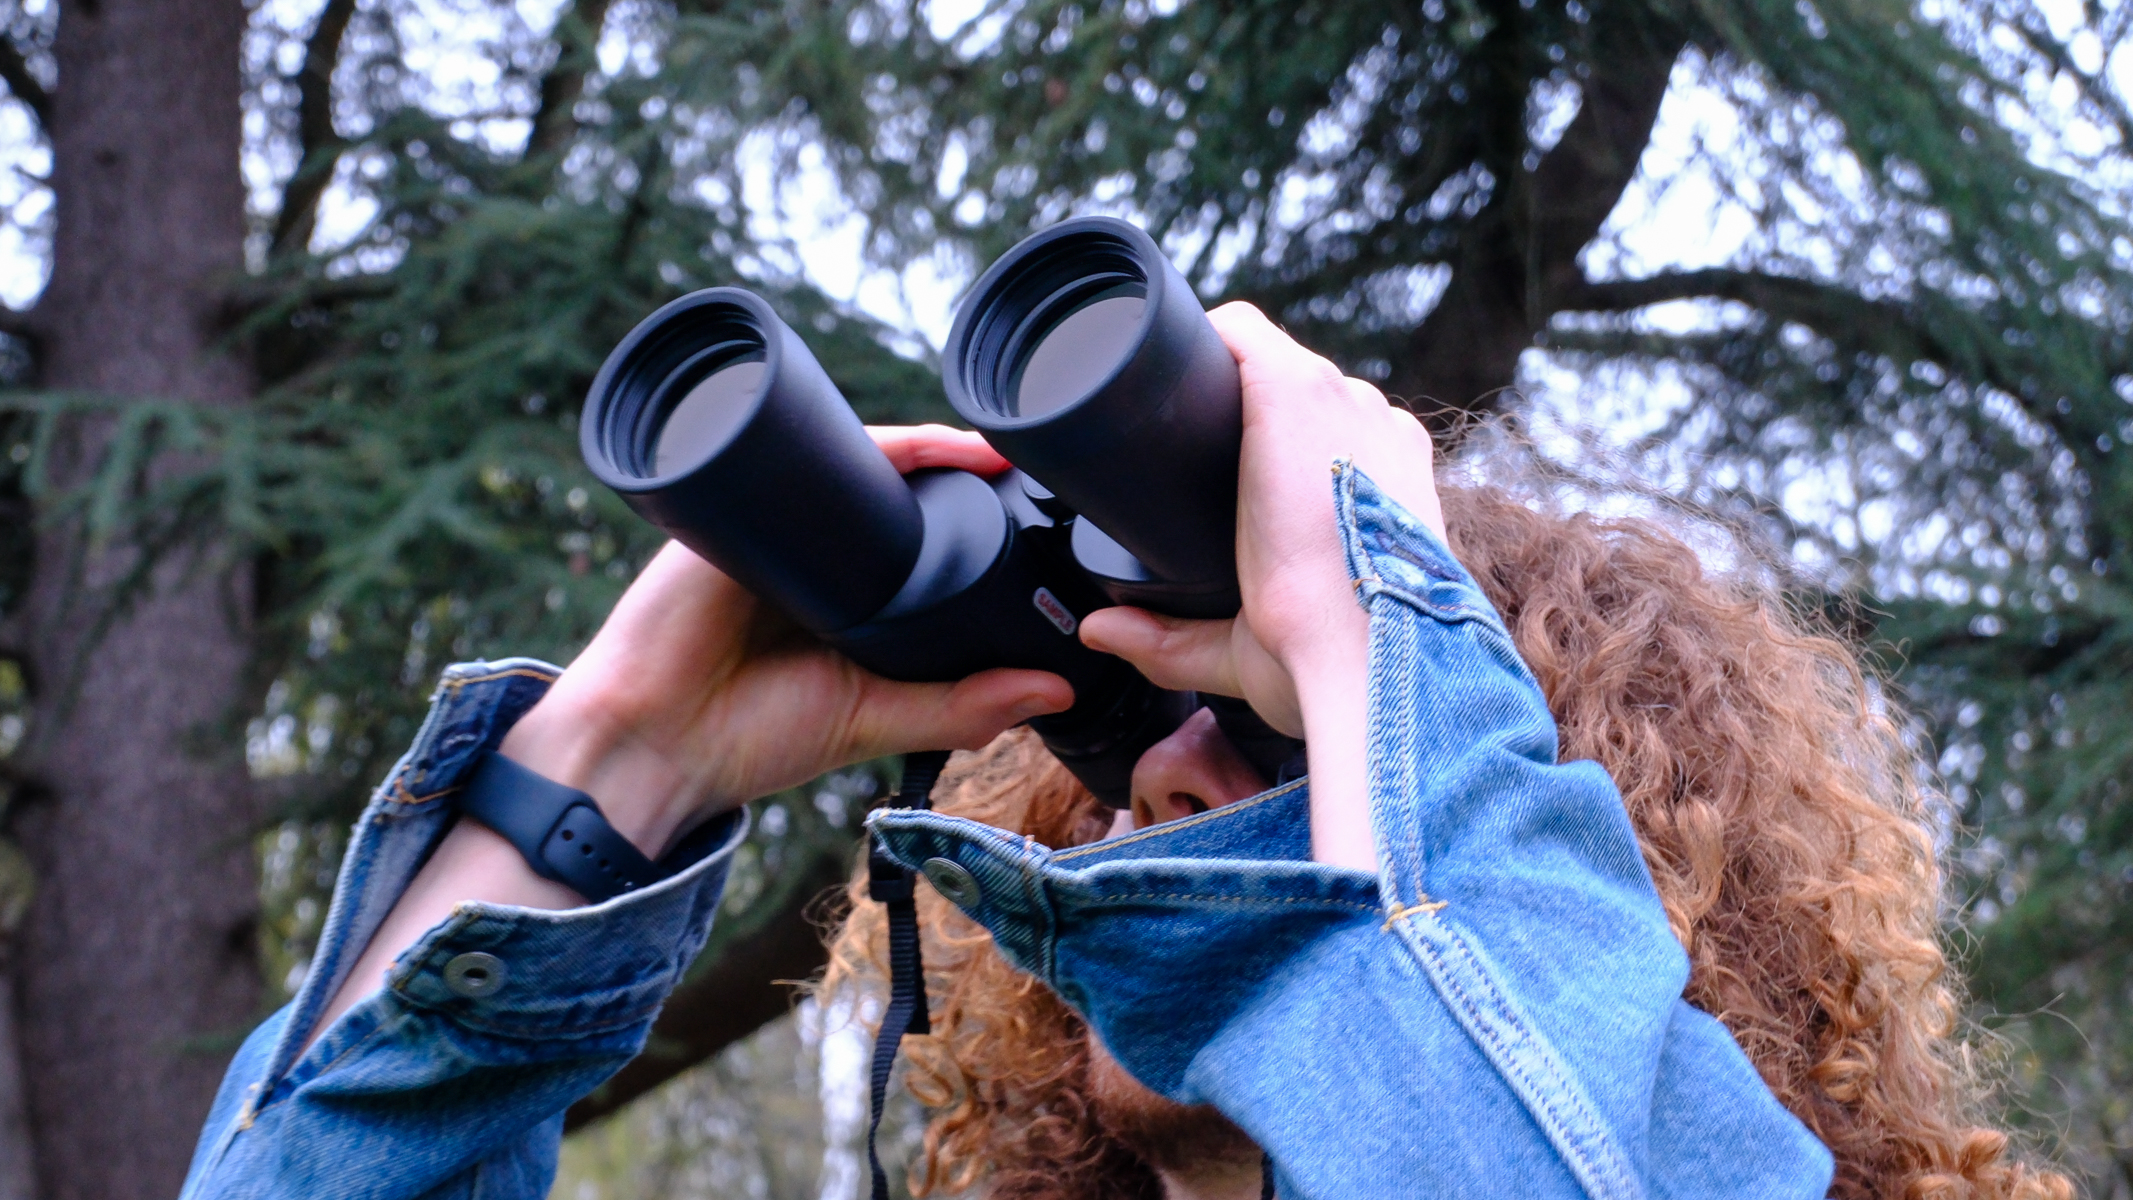
We took the Nikon Action Zoom 10-22x50 binoculars to a city and local park test them, using them for stargazing and birdwatching respectively. (Image credit: Harry Bennett / Future)
We tested the Nikon Action Zoom 10-22x50 binoculars in a city park during the day and at night in mid-March in the U.K. For stargazing, we tested them in a city park with a Bortle scale between 5 and 7. Our primary observation targets were Orion's belt, Sirius, Jupiter, the waxing half moon and the Beehive Cluster in the constellation of Cancer. For terrestrial viewing, we used them for finding birds in a local park and zooming in for up-close observation.
During testing in the U.K., nighttime temperatures were on average between 46 and 54 degrees Fahrenheit (8-12 degrees Celsius). Seeing conditions were clear and during non-lunar viewing, the skies had minimal or no moonlight.
User reviews
At time of writing, reviews for the Nikon Action Zoom 10-22x50 were relatively positive, with users praising the smooth zoom mechanism and agreeing with the quoted 22x magnification on the zoom.
Users also liked the Zoom’s flexible magnification options and the 50mm objective lenses for height views, but the general consensus was that a tripod would vastly improve observation at the maximum magnification.
Should you buy the Nikon Action Zoom 10-22x50 binoculars?
Buy it if:
✅ You need one binocular with varied magnification: These binoculars have a variable zoom, from 10x through to 22x
✅ You are a high-magnification beginner: Varying magnification means you can practice higher-magnification viewing without investing in a dedicated pair
Don't buy it if:
❌ You want to look at deep-sky objects with binoculars: The view is much dimmer at 22x than at 10x, which drastically reduces the brightness of nebulas and diffuse deep sky objects.
❌ You need super-still images: Unless you buy a tripod, you are unlikely to get fully stationary images with these binoculars.
If you are a binocular beginner or casual stargazer who wants variable magnification, these are a great purchase. The build quality is solid and the zoom mechanism is very smooth, enabling you to observe from 10x through to 22x.
The zoom function does mean that sacrifices have to be made in terms of light transmission, and at full magnification, the view is noticeably dimmer than at lower magnifications. This reduces the brightness when observing deep space objects like nebulas, but for brighter objects and stars, they performed well.
If you want to observe frequently at 22x magnification, though, we would recommend buying a tripod and binocular tripod adapter, so that you can enjoy these night sky wonders shake-free.
If the Nikon Action Zoom 10-22x50 binoculars aren't for you
If you need binoculars purely for wide-field observations, we would recommend the Nikon Action 7x50 binoculars or Action 10x50 binoculars. They have fixed lower magnifications and light transmission isn't sacrificed for the zoom functionality. The build is almost identical to the Action zoom model.
If you need optics for looking at deep sky objects, we would recommend one of the best telescopes, or a pair of binoculars with strong magnification and large objective lenses. Try the Celestron SkyMaster Pro 20x80 or Celestron SkyMaster 25x100 binoculars, both of which have larger objective lenses than the Nikon Action zoom. You will have to use a tripod with these, but the larger objective lenses will give you a brighter view of dim objects.
If you want high-magnification views without needing a tripod, the Fujifilm Fujinon Techno-Stabi TS-L 1640 binoculars are a great choice. The objective lens diameter is only 40mm, but the image stabilization gives you a higher level of detail that makes up for the lower light transmission. For handheld use, the difference is night and day.
Small telescopes have really come on leaps and bounds in recent years. There was a time when refractors with apertures smaller than 4 inches were seldom to be recommended, but manufacturers have been pushing the capabilities of smaller apertures ever further, with optical coatings and high quality, mass-produced optics helping to eke out every little bit of capability from these pocket-sized instruments.
While still aperture-limited — a smaller aperture makes less light received, which makes faint objects harder to see and details harder to resolve — a good small telescope can excel at the things it can do. This include showing fabulous views of the whole moon, revealing the phases of Mercury and Venus, showing surface features on Mars when the Red Planet is at a close opposition, tracking the Galilean moons of Jupiter, splitting double stars, showcasing open star clusters and revealing the very brightest deep-sky objects, including the Orion Nebula and the Andromeda Galaxy.
The Celestron Moon Mission Travel-scope 70 portable telescope is a re-skin of the plain Celestron Travel-scope 70, and is labelled as a lunar telescope. The moon is what it excels at, which is particularly handy in the year that humans went back to the moon for the first time since 1972, drumming up all kinds of excitement about our nearest neighbor.
Its affordable price and simplicity of use further increase its attraction for children. How many young astronomers will find a passion for space after being excited by the Artemis II mission and then seeing the moon for themselves through the eyepiece of this easy-to-use telescope?
Celestron Moon Mission Travel-scope 70 review
Celestron Moon Mission Travel-scope 70: Design
The Celestron Moon Mission Travel Scope 70 comes with everything you need to get started. (Image credit: Gemma Lavender)
Quick and simple set-up
Comes with all the accessories to get started
Lightweight and portable
Inside the box we found the telescope tube, which is just 17 inches (44 centimeters) long, kept within a protective travel bag. Also present were the two eyepieces (10mm and 20mm), a 3x Barlow lens, a moon filter, a star diagonal, a finderscope with crosshairs and a useful moon map poster. There are even free download options for the well-known Starry Night planetarium software and Celestron’s Sky Portal mobile app. All in all, it’s a complete package for anyone wanting to get started in astronomy. The only thing it doesn’t come with is guaranteed clear nights!
Everything is lightweight, so there is no risk of children hurting themselves if they drop anything (though one would advise not dropping the telescope tube!). No tools are required for assembly, which is an additional advantage when aiming a telescope at children. The finderscope is attached by chunky thumb screws, the telescope tube screws onto the pan of the mount, and the tripod legs extend via a series of latches.
It may be aimed at beginners and younger stargazers, but this is no toy. (Image credit: Gemma Lavender)
Specifications
Optical design: Refractor
Aperture: 2.8-inch (70 mm)
Focal length: 15.7-inches (400mm)
Focal ratio: f/5.7
Eyepiece focal lengths and magnification: 20mm (20x) and 10mm (40x)
The mount is a simple, manual alt-azimuth with a pan handle for easy control. The tripod can extend from 22 to 52 inches (56 to 132cm), and it’s a good height for sitting down while observing or standing up — whichever you prefer. The whole set-up process takes a couple of minutes — perfect for impatient children (and the occasional impatient adult!).
You'll get superb views of the moon through this scope but you don't need to stop there. (Image credit: Gemma Lavender)
The moon looks superb through both eyepieces
Ideal for following Jupiter’s moons
Open star cluster Messier 35 was easily shown
The view of the crescent moon while it was in the constellation of Gemini, the Twins, and near Jupiter, was impressive. First using the 20mm eyepiece at 20x, the whole moon easily fit into the field of view. Though the moon’s phase was two days away from first quarter, through the eyepiece we could easily see the silhouette of the whole moon’s disk thanks to earthshine.
During the time we observed the moon, the day/night terminator cut close to the crater trio of Theophilus, Cyrillus and Catharina around the edge of Mare Nectaris. Other lunar seas including Mare Crisium, Mare Tranquilitatis (landing site of Apollo 11) and Mare Serenitatis were nicely displayed.
Through the 8mm eyepiece at 40x, the moon filled the field of view. The low-angled sun cast dark shadows below the crater walls, which contrasted nicely with the bright surface. Just beyond the terminator, the peaks of crater walls and highlands caught the sun, islands of daylight on the edge of night. All in all, it was a very pleasing view.
The Celestron Moon Mission Travel Scope 70 has enough power to pick out solar bodies and star clusters. (Image credit: Gemma Lavender)
A short hop brought us to Jupiter, the moon’s close neighbor for the night. As expected, we found the sub-3-inch aperture unsuitable for revealing any details in Jupiter’s atmosphere — the gas giant just appeared as a bright disk. Its four Galilean moons could be seen to either side, however. We tried with both the 20mm and the 8mm eyepiece: Jupiter’s moons were evident in both and filled the view in the 8mm, appearing as points of light accompanying Jupiter.
Close by in Gemini was Messier 35, an open star cluster that is technically visible with the naked eye, but only from the darkest sites in a moonless sky. Through a 70mm telescope it should be much easier to see, and it was, appearing as a faint smattering of stars against the night sky.
We could not, however, see NGC 2158 — a neighboring open star cluster that is much fainter at magnitude +8.6. This revealed the limitations of a 70mm telescope as opposed to a 100mm (4-inch) or 127mm (5-inch) aperture.
We'd have preferred if the tripod was a little more stable. (Image credit: Gemma Lavender)
Wobbly tripod
Accessories are a mixed bag
The actual telescope is as smooth as they come. We found the focuser is good enough for the price point, the two supplied eyepieces aren’t at all bad, and the optics were pretty crystal-clear. For more experienced users with larger telescopes, this 70mm telescope would make a fine finderscope. But what massively lets down the Celestron Moon Mission Travel-scope 70 portable telescope is the tripod that comes with it.
We found the tripod to be incredibly flimsy, and this resulted in vibrations that would shake and blur the view through the eyepiece. Every time we used the pan-handle to turn the telescope and mount head, the tripod would wobble, setting up a feedback of vibrations which we would then have to wait to settle down. The same happened whenever we adjusted focus. While budget telescopes typically do come with poor tripods, we definitely recommend investing in a better tripod as soon as you can.
The 3x Barlow lens also felt like overkill to us. For a 70mm aperture we would not recommend pushing the magnification too high: the telescope simply does not have sufficient aperture to capture enough light for such high magnifications, and the view just becomes a blur. Anything above 100x for a 70mm aperture is too much in our view, yet when used with the 10mm eyepiece (which has a power of 40x) the Barlow lens pushed the magnification up to 120x. We think a 2x Barlow lens would have sufficed.
The Celestron Moon Mission Travel Scope 70 is a very capable scope, considering the price. (Image credit: Gemma Lavender)
We were indifferent to the moon filter. When screwed into the eyepiece it just dulled the moon and made it look red and drab, similar to how it might appear during a lunar eclipse. Admittedly it might be more useful when looking at a full moon rather than a crescent, when there are no shadows or contrast on the surface, but we found we preferred not to bother with the filter.
Overall, the telescope’s engineering is decent for the price, but replacing most or all of the accessories would not be unwarranted. But given how much it would cost to do so, if you are intending to spend that money then it would be better just to buy a more expensive, larger-aperture and better quality telescope.
Should you buy the Celestron Moon Mission Travel-scope 70 portable telescope?
Buy it if:
✅ You want an affordable telescope for a youngster or beginner that is easy to use and set-up
✅ You are interested in viewing the moon and following its changing phases, and how the illumination alters the view of the lunar surface
Don't buy it if:
❌ You are a deep-sky observer hoping to track down faint fuzzies
❌ You hope to do astrophotography (beyond simple afocal photography at the eyepiece).
If the Celestron Moon Mission Travel-scope 70 portable telescope isn't for you
If you are looking for a telescope for astrophotography that is also relatively simple to use and won’t break the bank, consider ZWO’s SeeStar S30 smart telescope.
If you want a telescope that has the same 70mm aperture but is a little more high-tech, go for Celestron’s StarSense Explorer LT70AZ refractor, which uses Celestron’s StarSense mobile app technology.
There were not many customer reviews of the Celestron Moon Mission Travel-scope 70 portable telescope available at the time of writing, but as it is identical in all but aesthetics and a few accessories to the standard Celestron Travel-scope 70, we can use reviews of the latter as a guide.
The consensus on Amazon was that users were mostly delighted by the telescope, valuing how easy it is to set up and use, as well as its portability and appropriateness for children. However, they shared our concerns about the flimsiness of the tripod.
How we tested the Celestron Moon Mission Travel-scope 70 portable telescope
We took advantage of the clear, mild spring weather that the southwest of England enjoyed in the week beginning April 20, observing around 9.30pm. In particular, we took time to study the moon on the evening of April 22, from a south- and southwest-facing garden.
Related articles
Want help choosing the right stargazing equipment? We have guides to the:
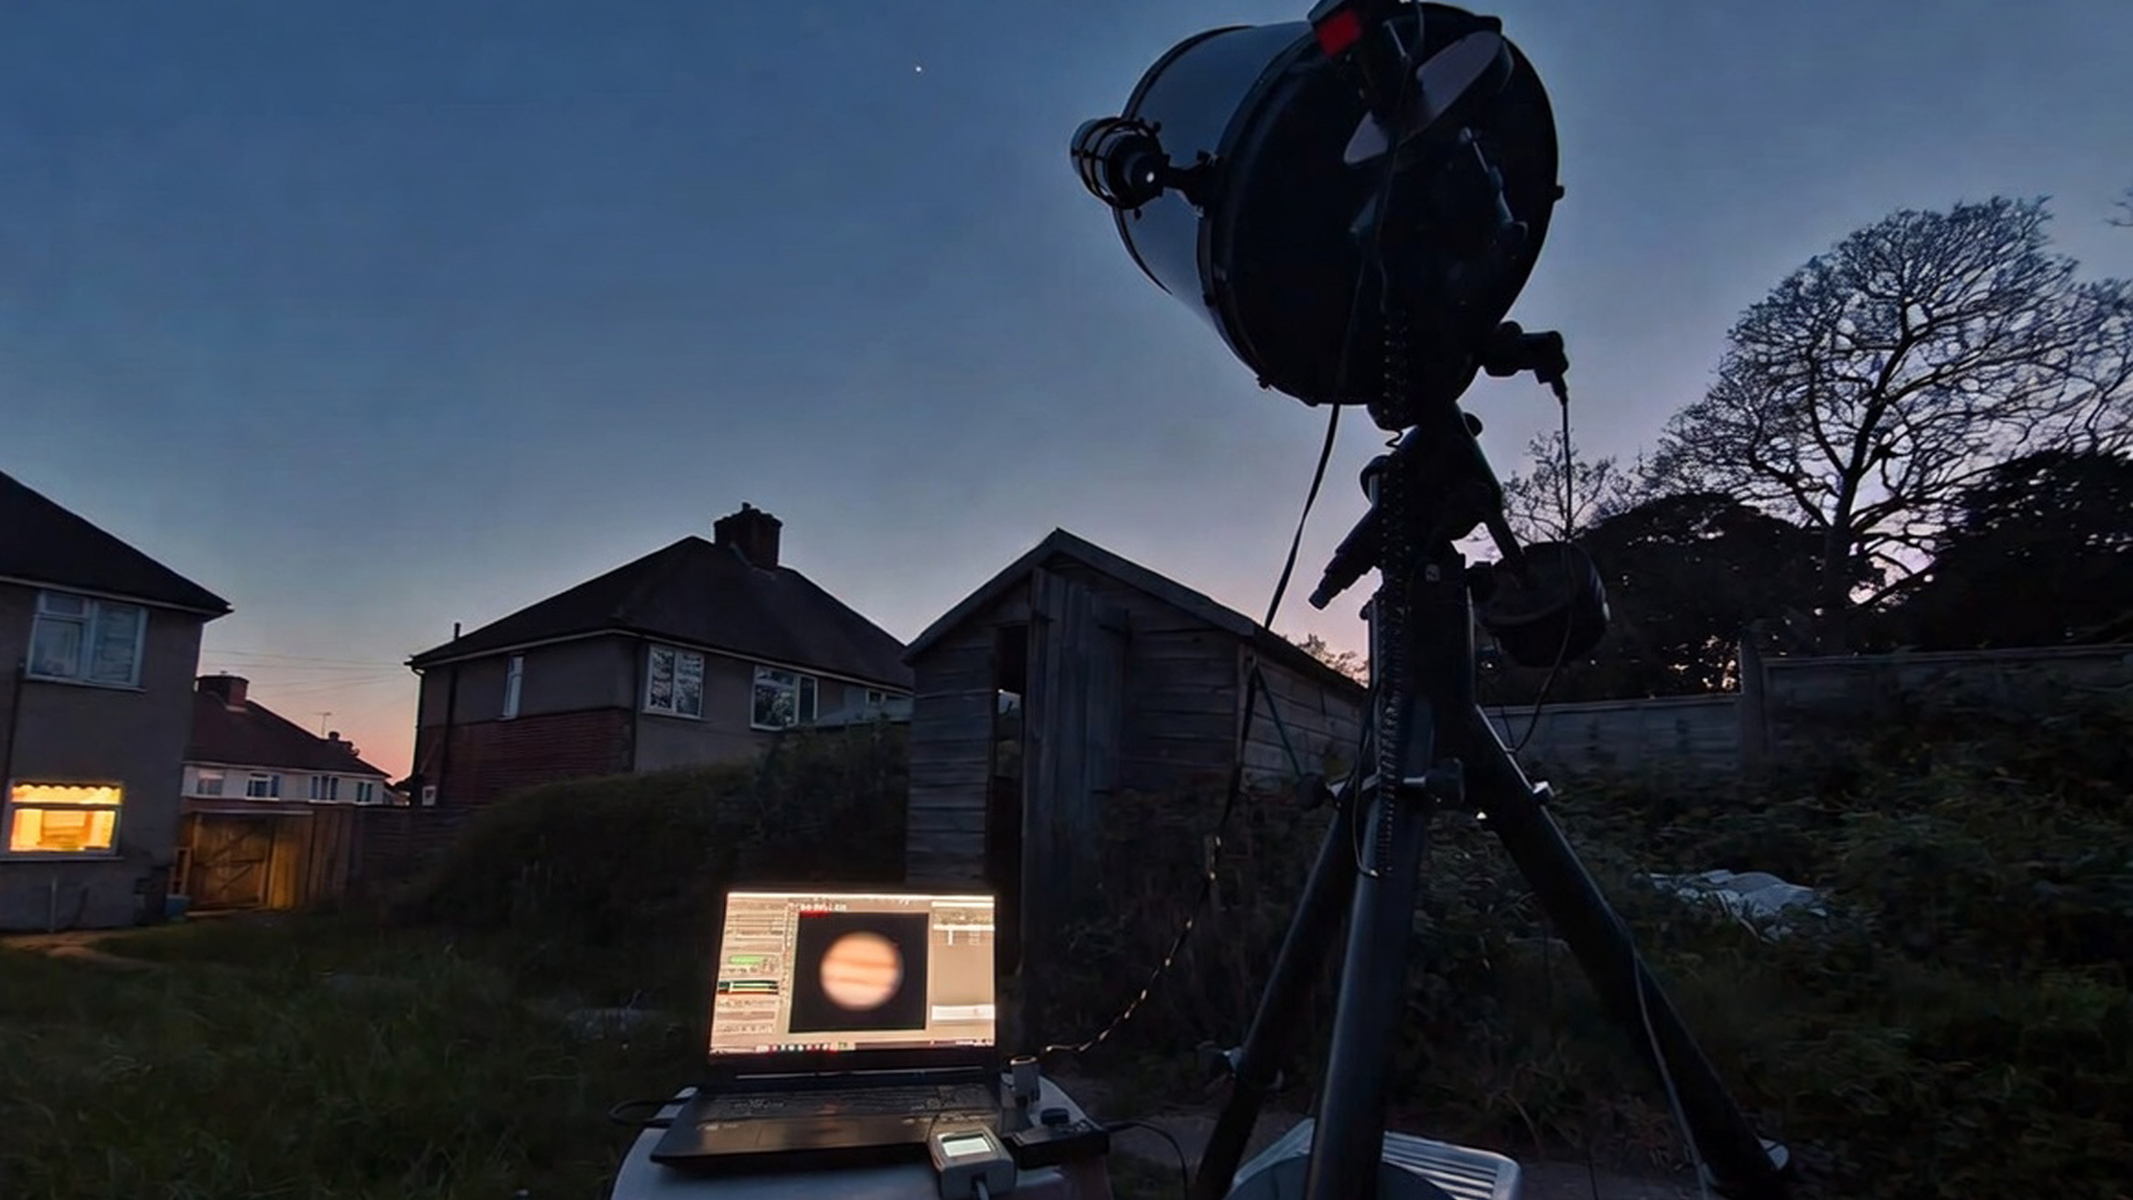
The night sky holds endless wonders, but few experiences match the thrill of photographing planets in vivid detail. With even a modest telescope and camera setup, you can capture cloud bands on Jupiter, the majestic rings of Saturn or the polar caps of Mars — images once the preserve of professional observatories. This technique, known as lucky imaging, records short video clips at high frame rates to freeze fleeting moments of steady air, then stacks the sharpest frames into one crisp photo.
No advanced skills are required to start. Whether you own a modest backyard telescope or are shopping for your first planetary camera, this guide provides everything needed to succeed. You will learn a complete workflow that takes you from set-up to finished image, explore why certain planets are easier than others and find answers to practical questions that beginners often ask.
Clear skies, patience and practice are your only limits. Soon you will be creating gallery-worthy shots right from home.
Step-by-step tutorial: Imaging planets with a telescope and camera
Planetary imaging relies on video capture rather than single long exposures. Follow these 12 steps for reliable results with most setups. Planning observations in advance is essential!
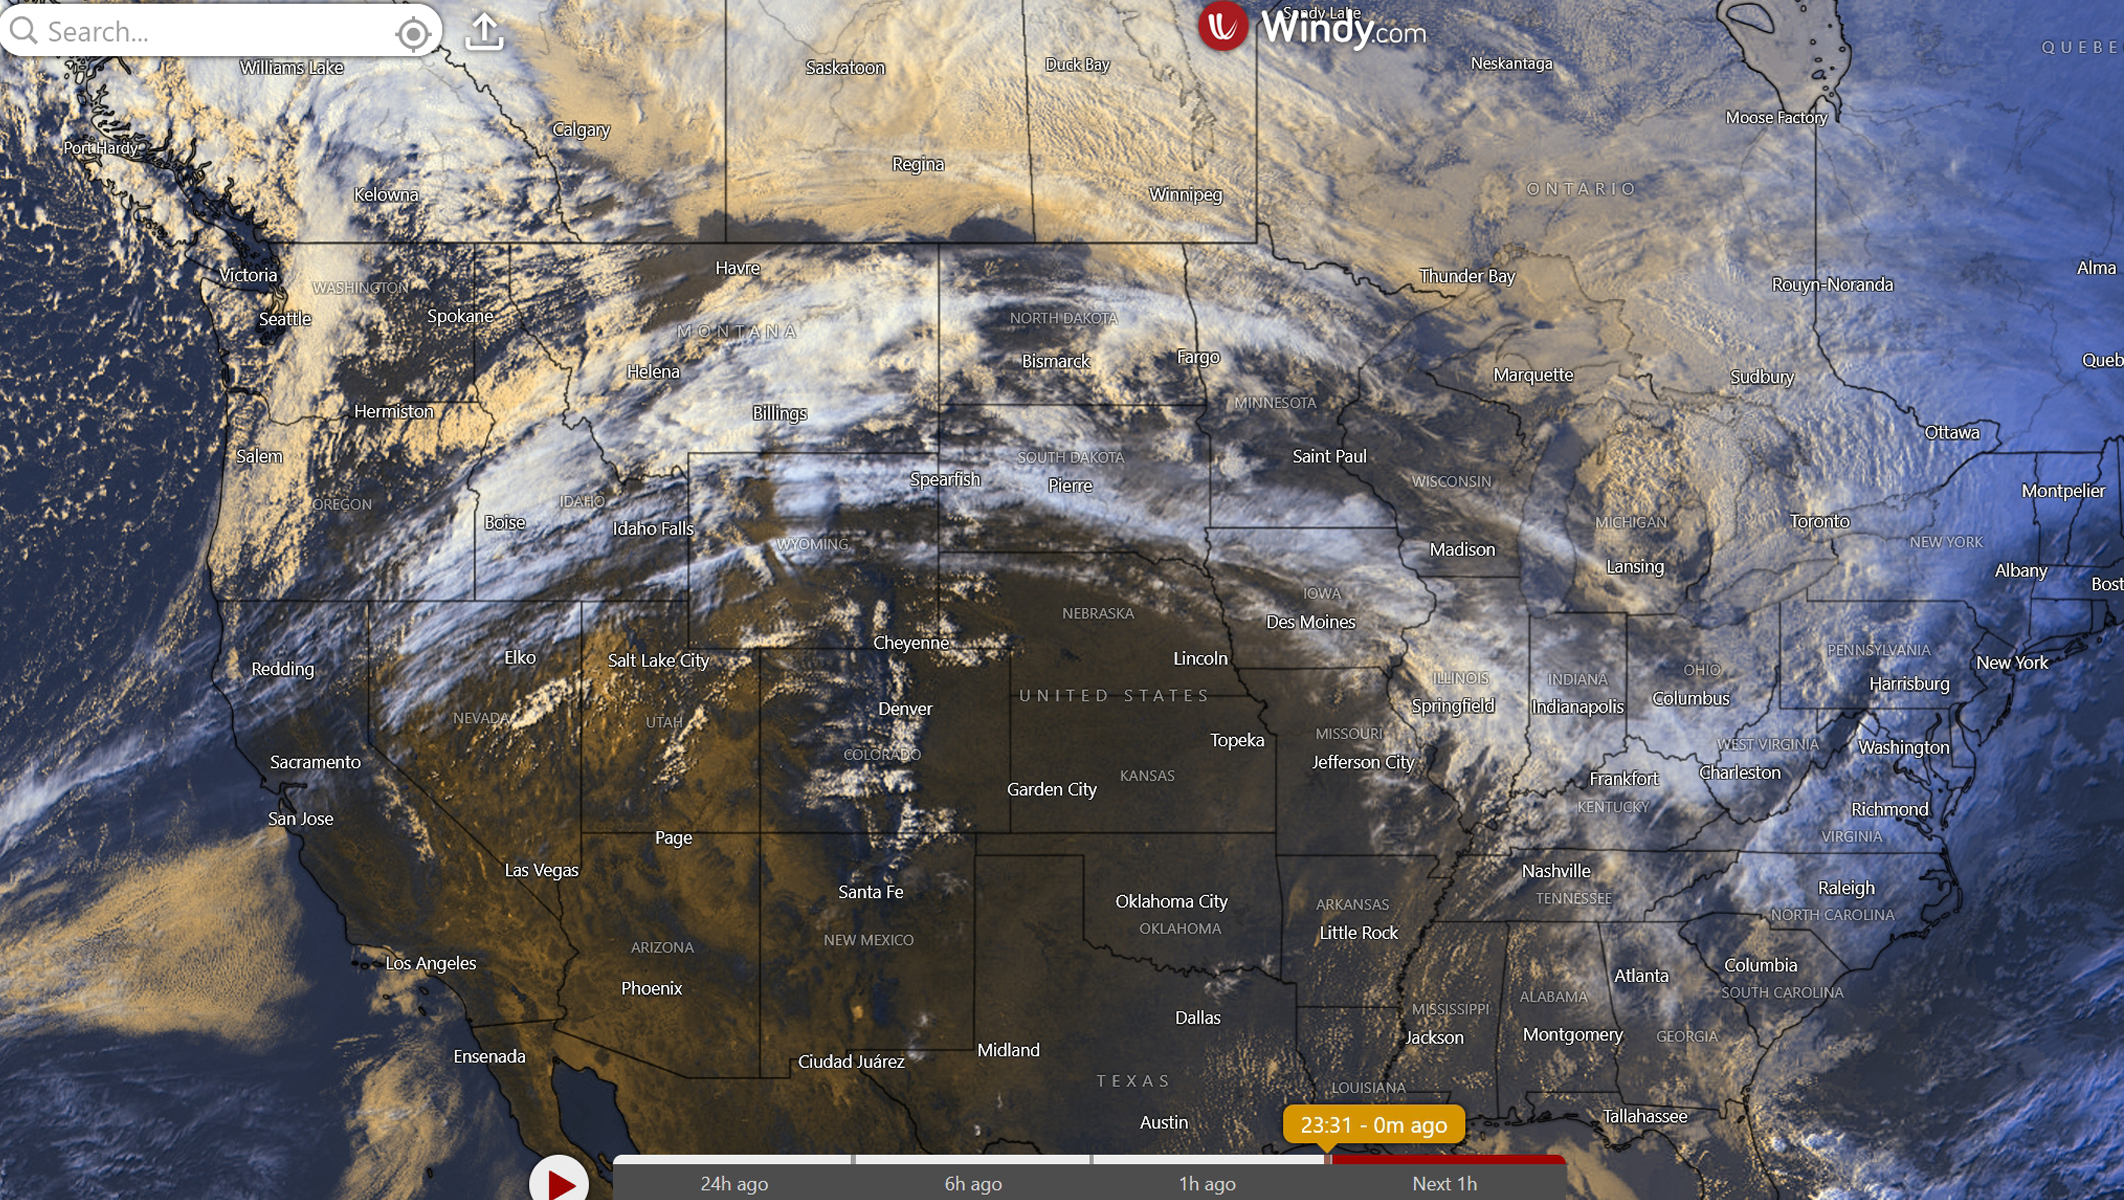
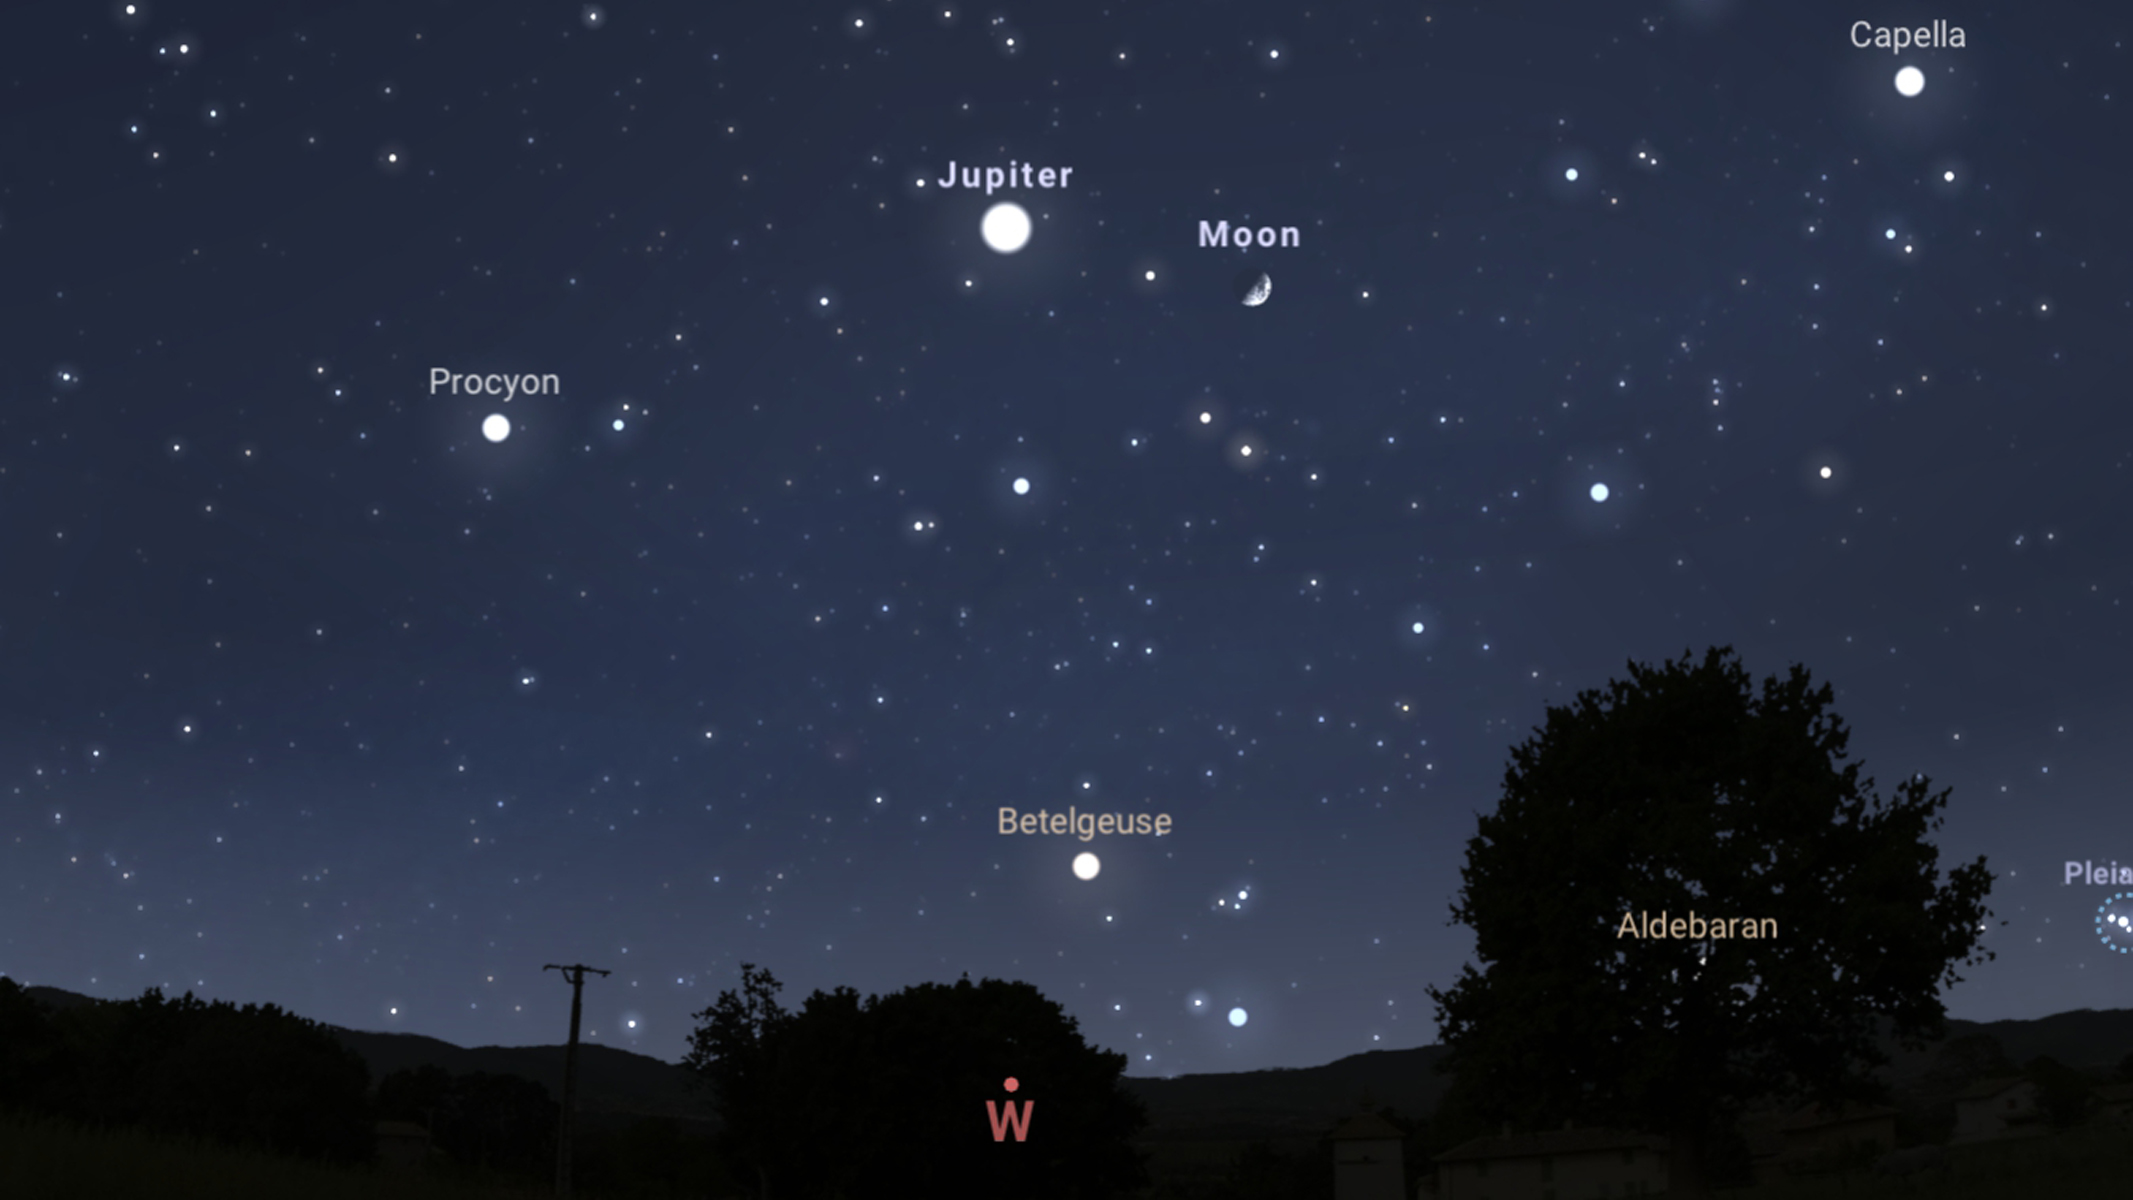
Check conditions and plan your target. Use a planetarium app such as Stellarium or a site like TimeAndDate.com to confirm the planet is visible and high in the sky. Review weather forecasts and seeing predictions on ClearDarkSky.com or Windy.com. Good seeing — stable, calm air — makes all the difference when it comes to this kind of imaging!
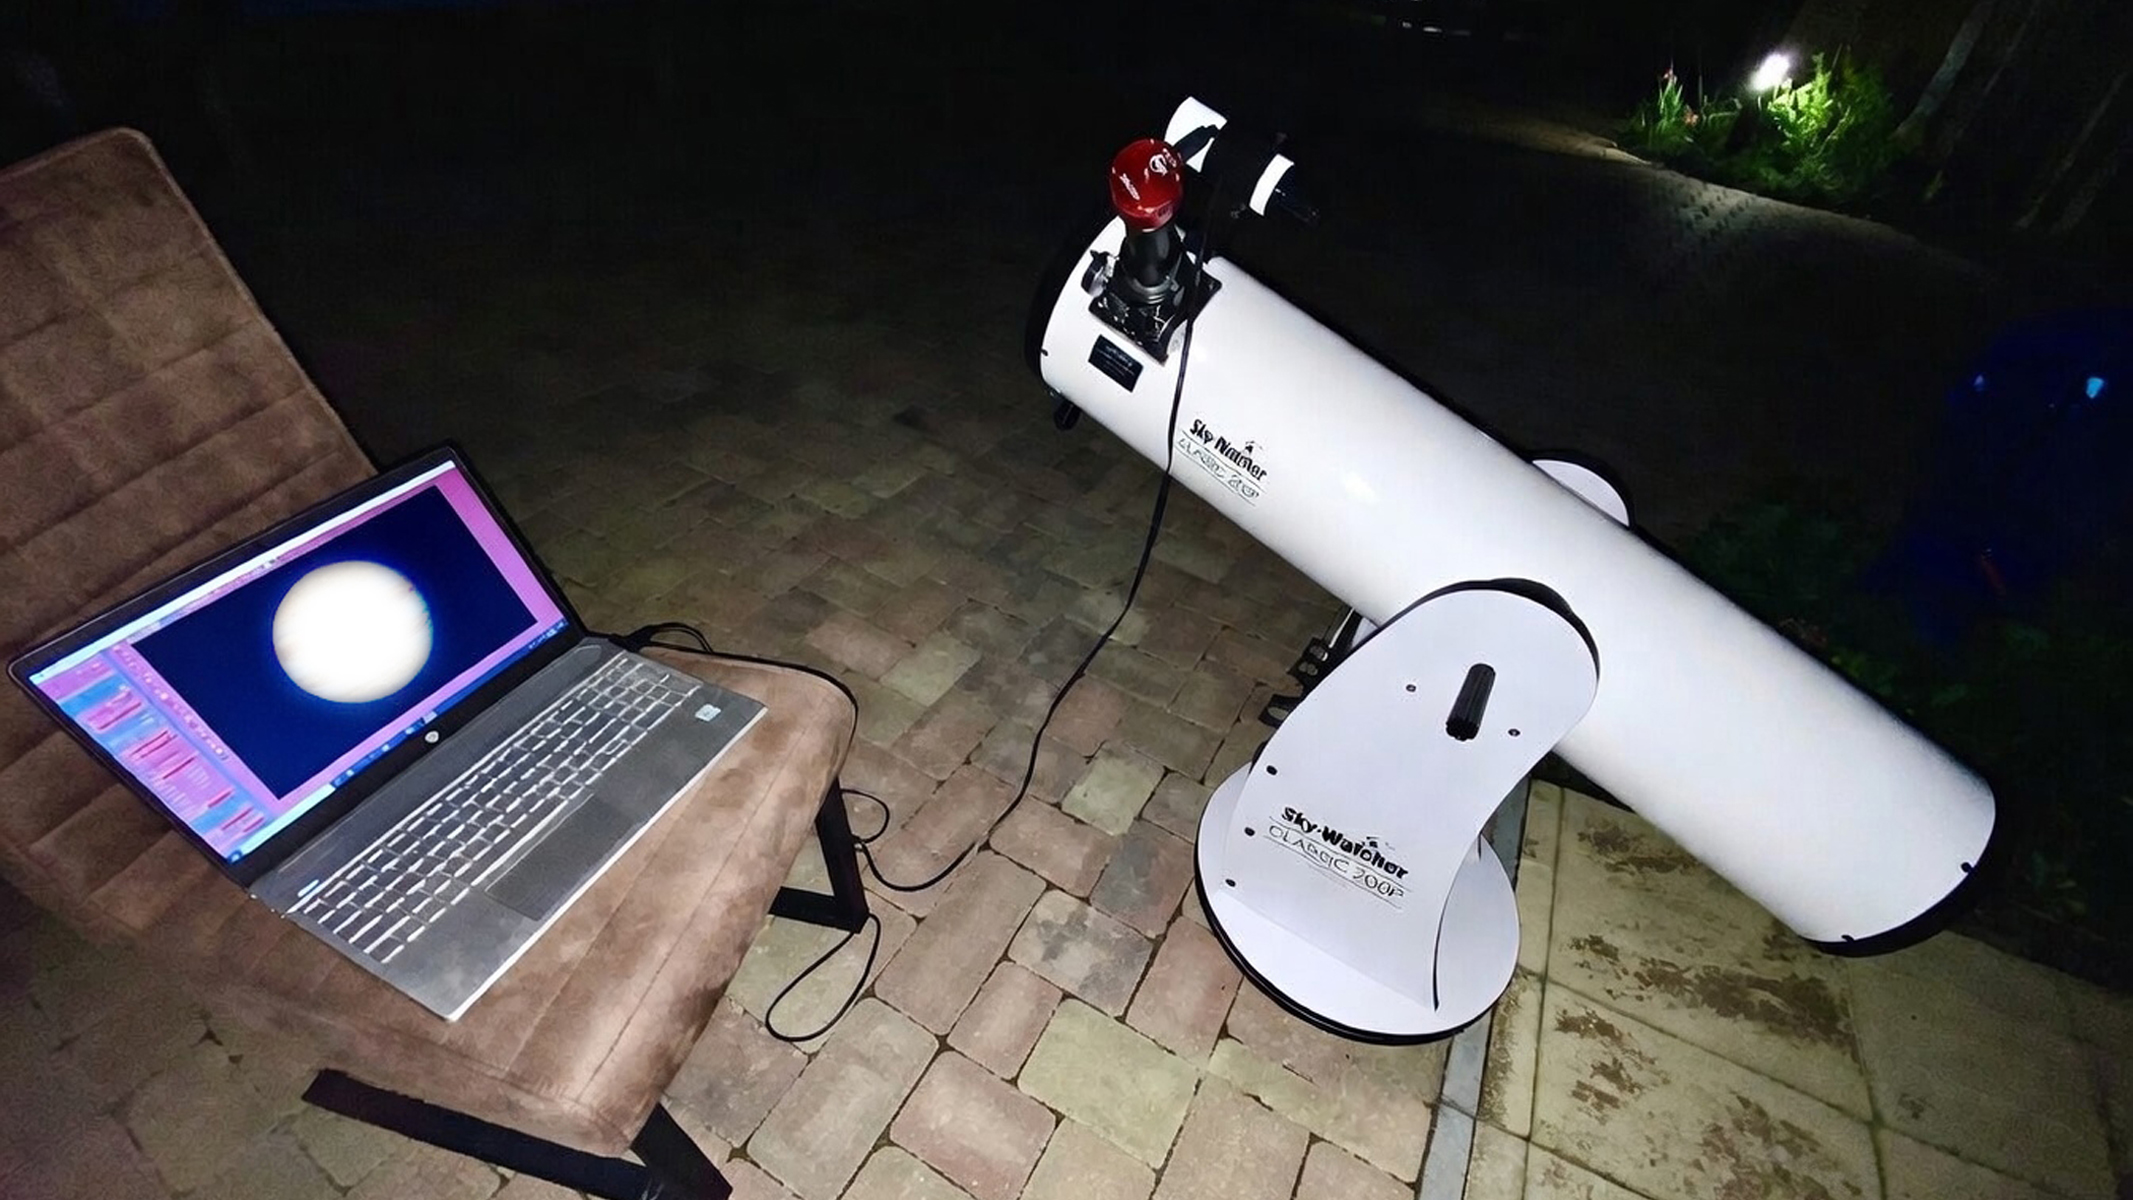
Set your telescope up outdoors early. Allow it to cool for at least a couple of hours so that internal air currents do not blur the view. Level the tripod and power on your motorized mount.
A motorized tracking mount is essential. For GoTo systems such as Celestron NexStar models, perform a quick two-star alignment and sync directly on the planet. Equatorial mounts need polar alignment for smooth tracking. Alt-az tracking Dobsonians need just a quick one- or two-star alignment to get you underway.
Centering the planets make take a little while, less with a GoTo mount, but it's absolutely essential.
4. Locate and center the planet either manually or via GoTo. Use the finder scope or red-dot finder, then switch to a low-power eyepiece to bring the target into view and center it as best you can.
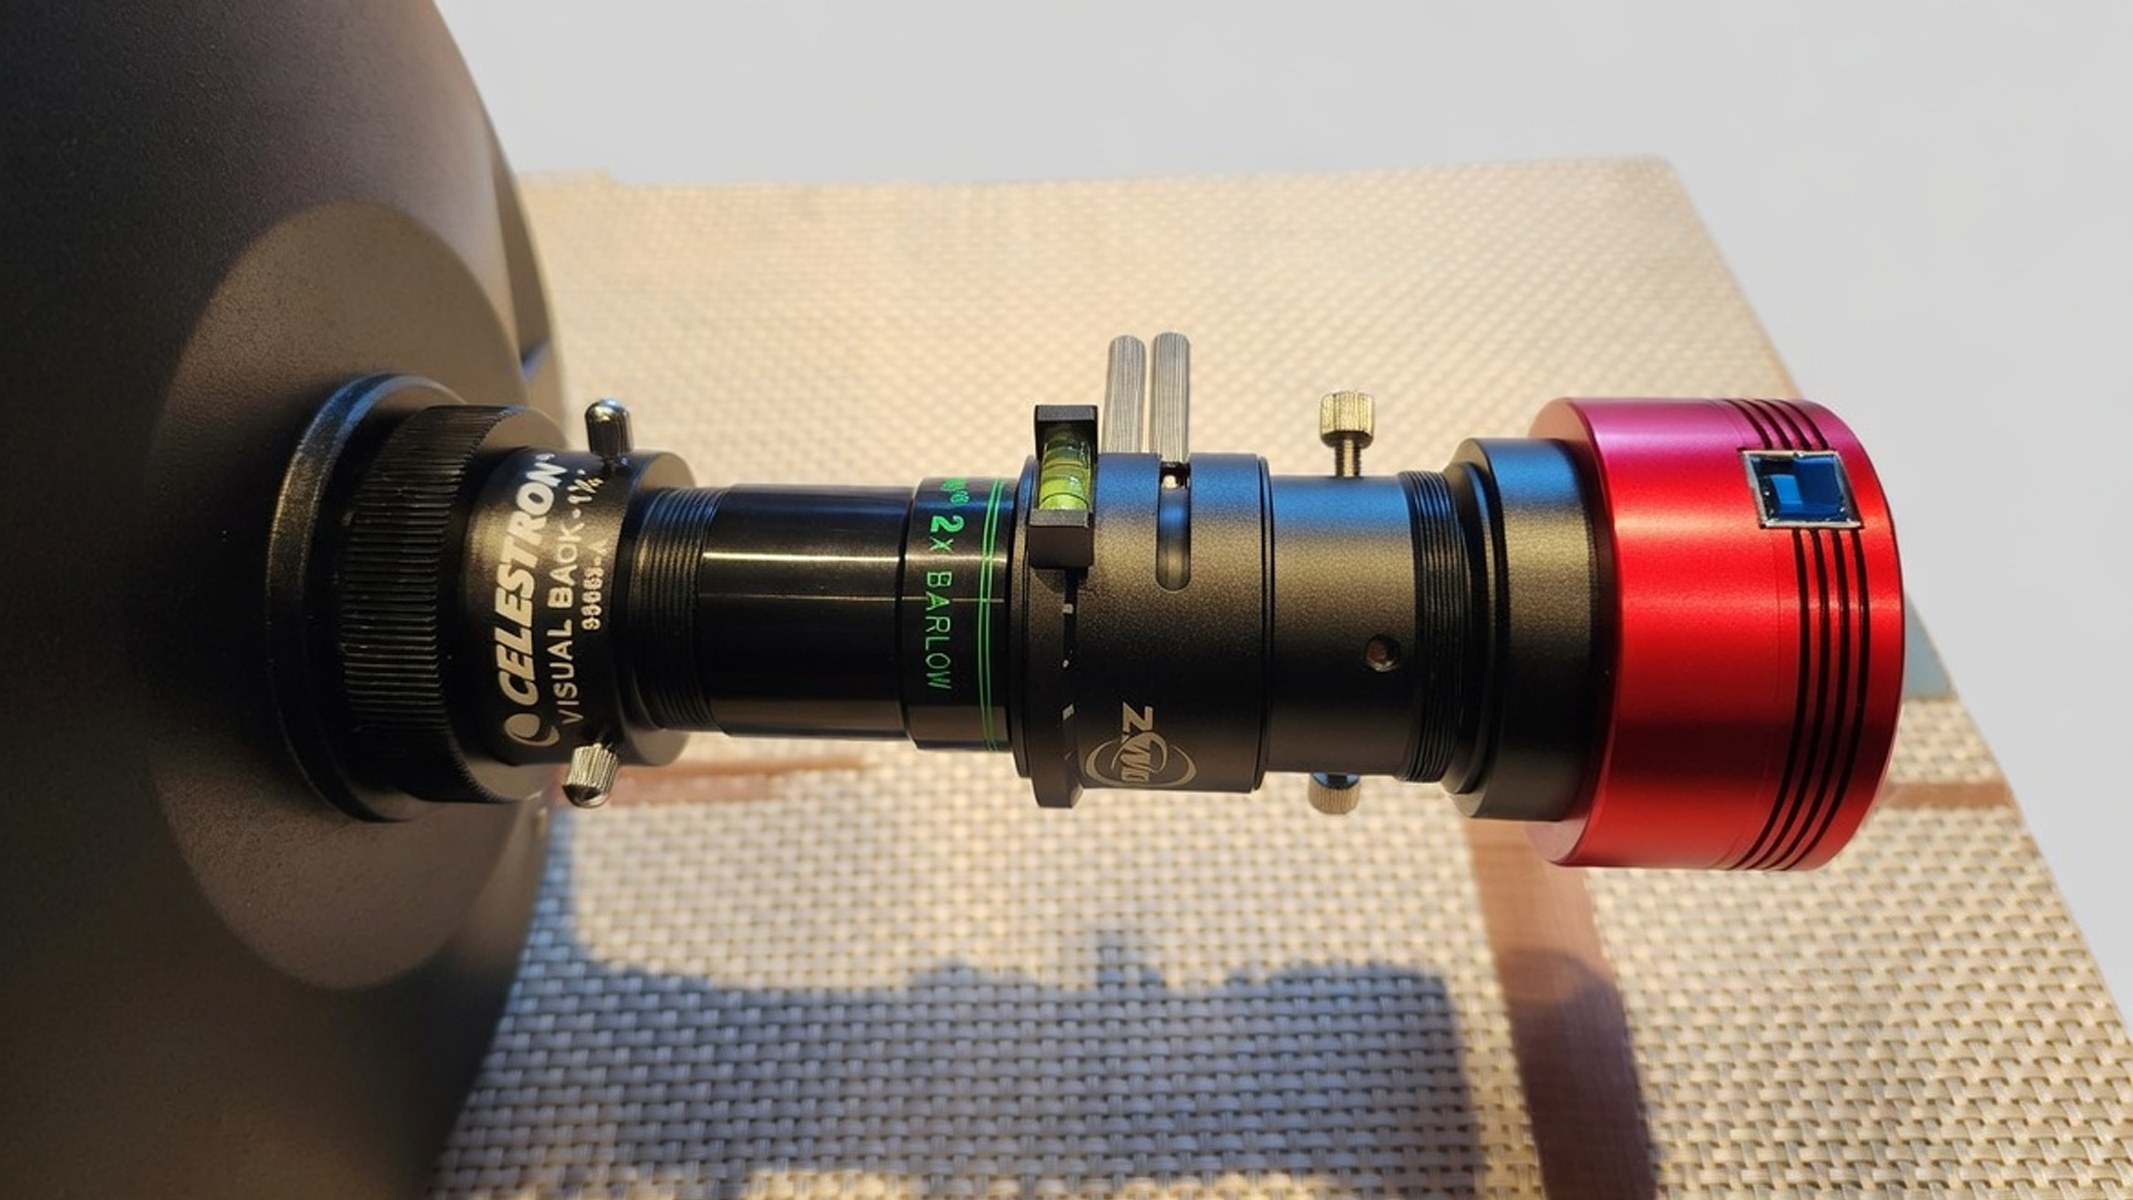
Add magnification. Insert a 2x or 3x Barlow lens or Powermate into the focuser. This increases focal length to fill more of the camera sensor with the small planetary disk. Once that’s done, check your telescope collimation on a star – this is essential for this kind of astrophotography. Adjust the collimation screws to give a nice concentric, out-of-focus star pattern that looks like a bullseye.
6. Synchronize your laptop
Connect to your laptop. Plug the camera into a USB port and launch capture software such as SharpCap or FireCapture – both programs are freely available for use.
7. Connect the camera
Remove the eyepiece and connect your planetary camera — such as a ZWO ASI224MC,ASI585MC or similar — using the appropriate 1.25-inch nose piece or T-ring. Secure everything firmly.
8. Keep things central
Center the planet. Spend time focusing carefully on the planet itself. Slowly adjust the focuser while watching surface details sharpen. Many imagers slightly defocus, then refocus through the sweet spot for precision. Do this several times to get the best focus you can. Atmospheric seeing conditions will seriously impact how easy this step is.
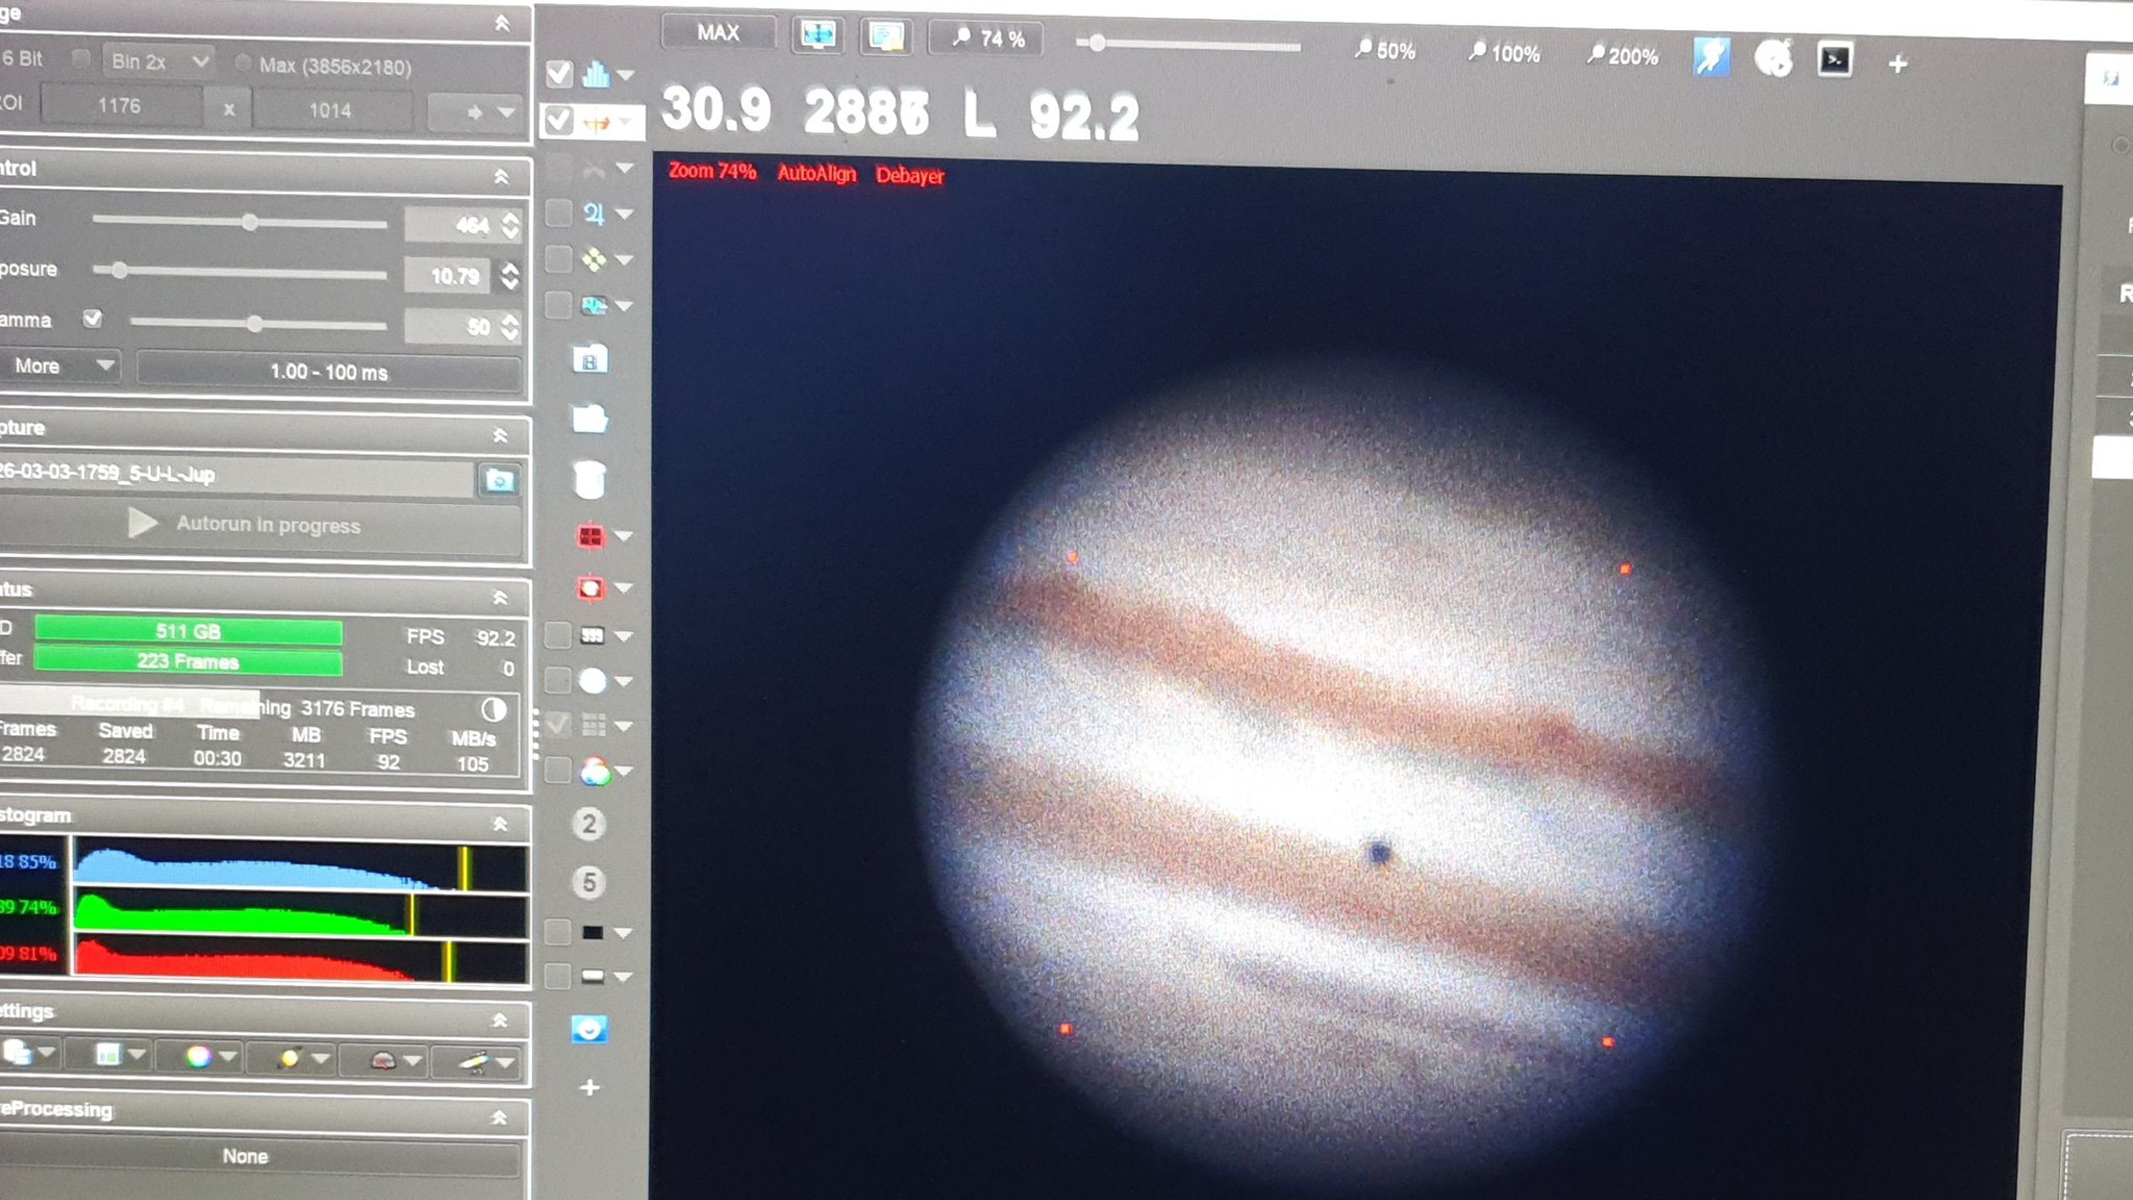
Set camera parameters. Choose a high frame rate — 50 to 100 frames per second or more. Keep exposure short and gain moderate, so the planet fills at least 80% of the histogram without clipping highlights. Enable color debayering or monochrome mode as appropriate.
Record videos. Capture plenty of short videos of 60 to 120 seconds each, aiming for several thousand frames per run. Save in SER format for ease of use in other software.
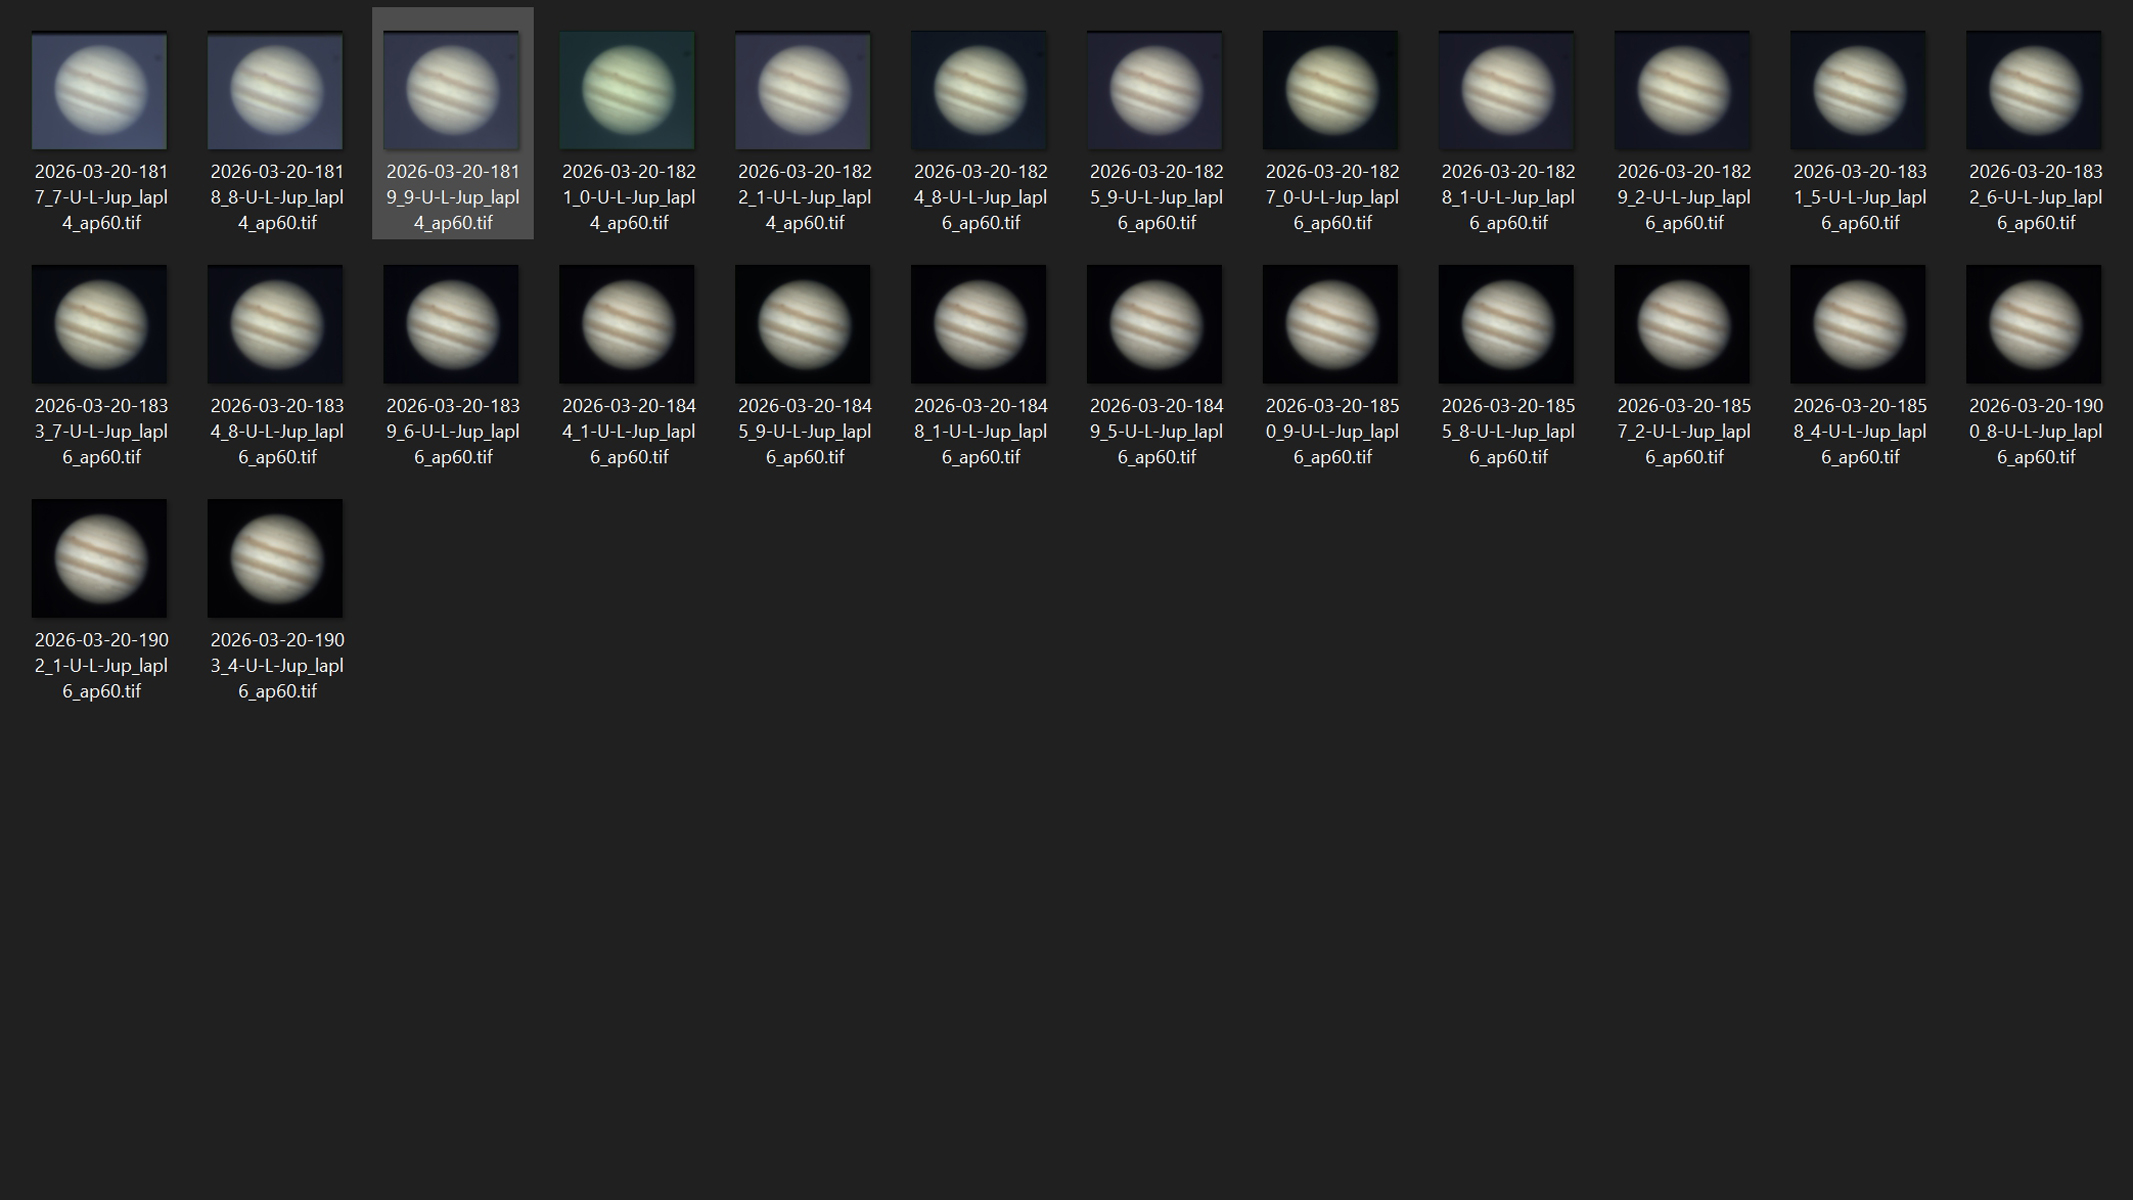
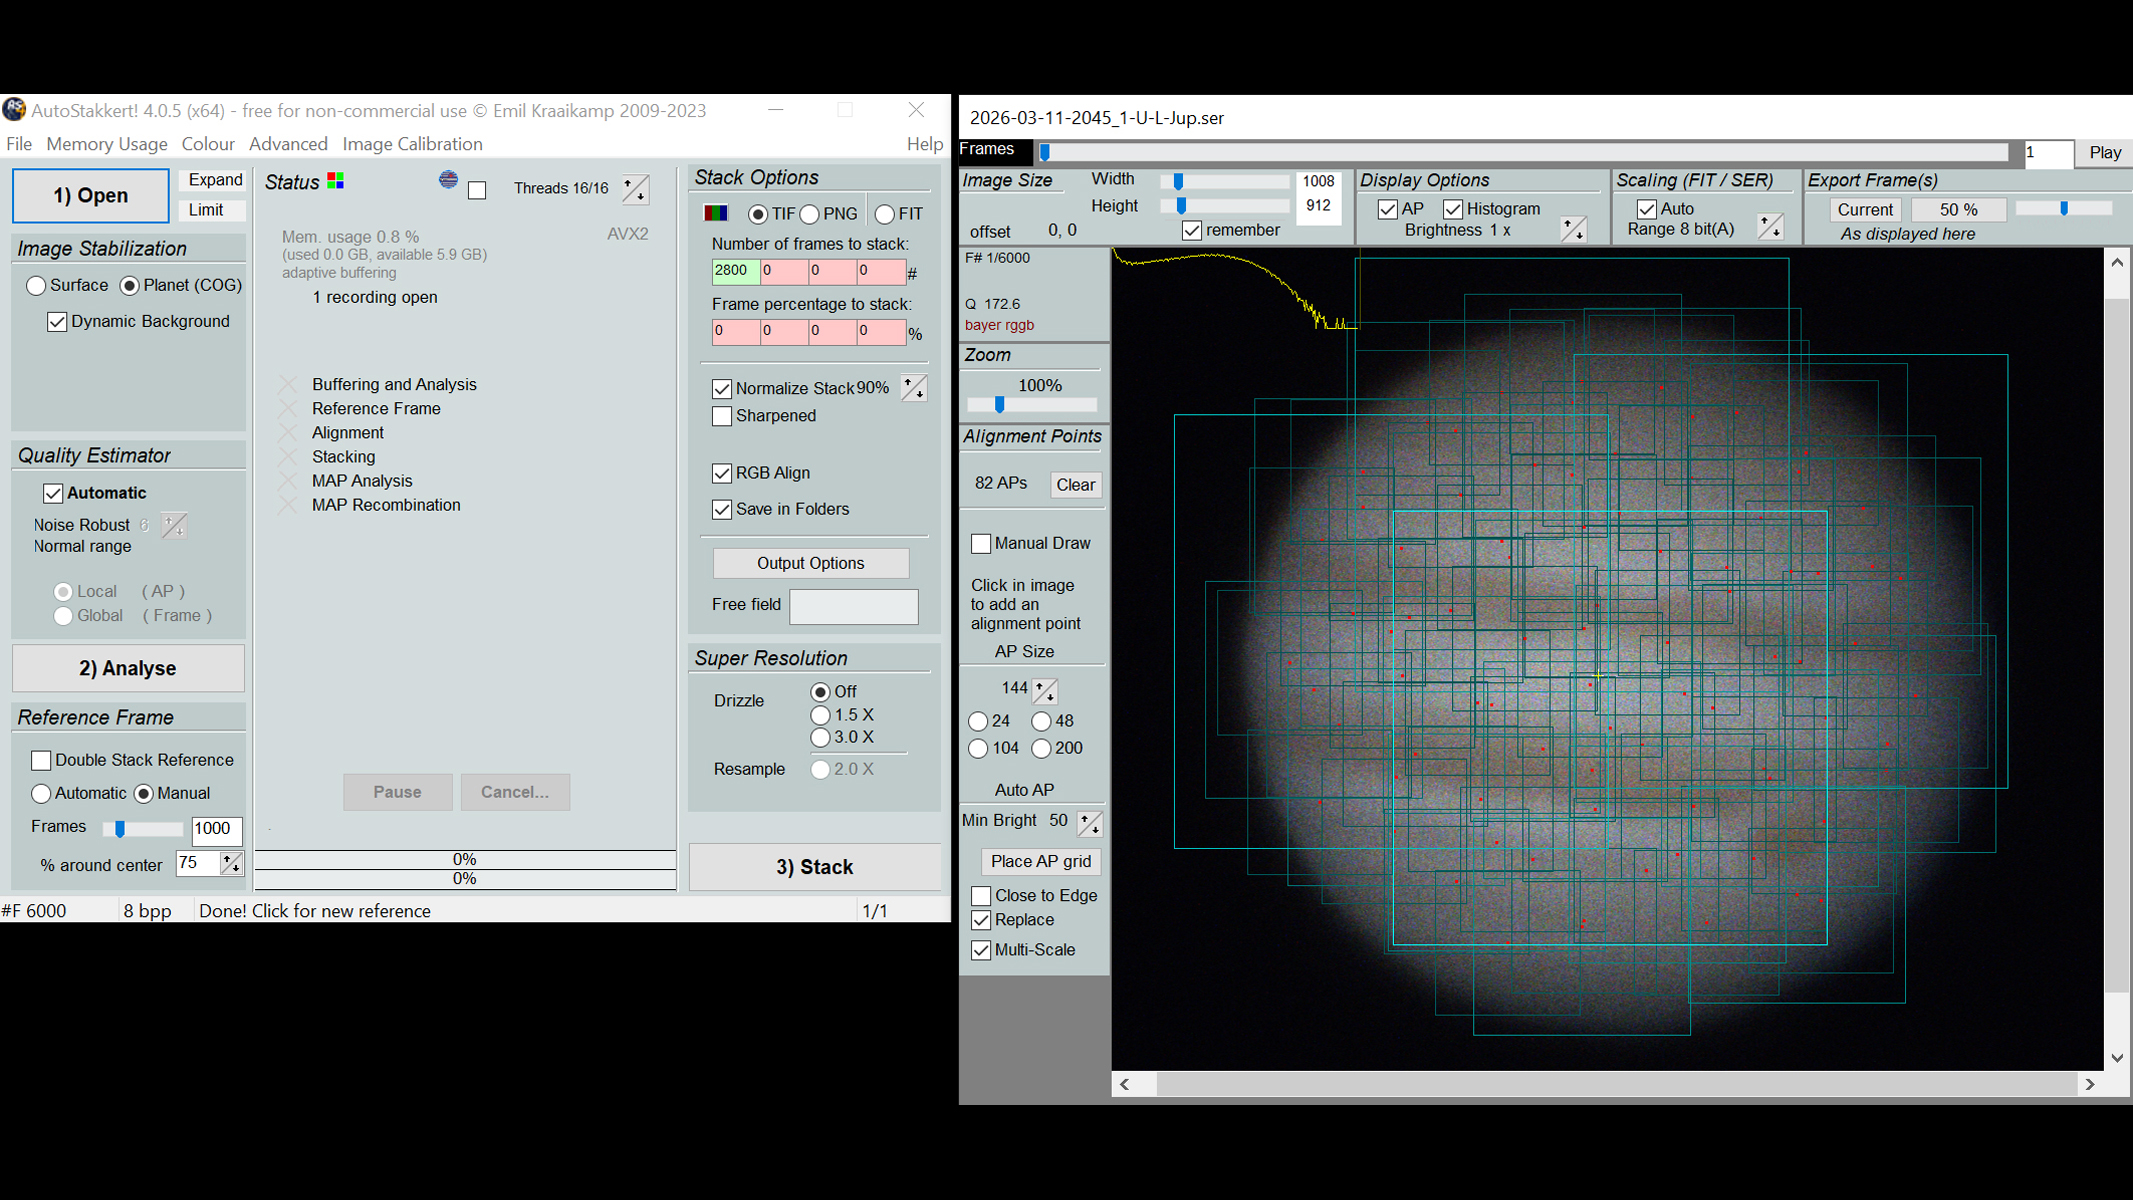
Process the data. Open your best videos in AutoStakkert! to align and stack the sharpest 20 to 50% of frames from each video. Export the result to LuckyStackWorker or RegiStax. Apply wavelet sharpening in layers, adjust the histogram for contrast and balance the color channels. Export your final image.
Repeat the process on multiple nights. Each session builds skill and yields better data — it can take many attempts before catching some great quality data. Patience is essential.
The best planets to target with your telescope and camera
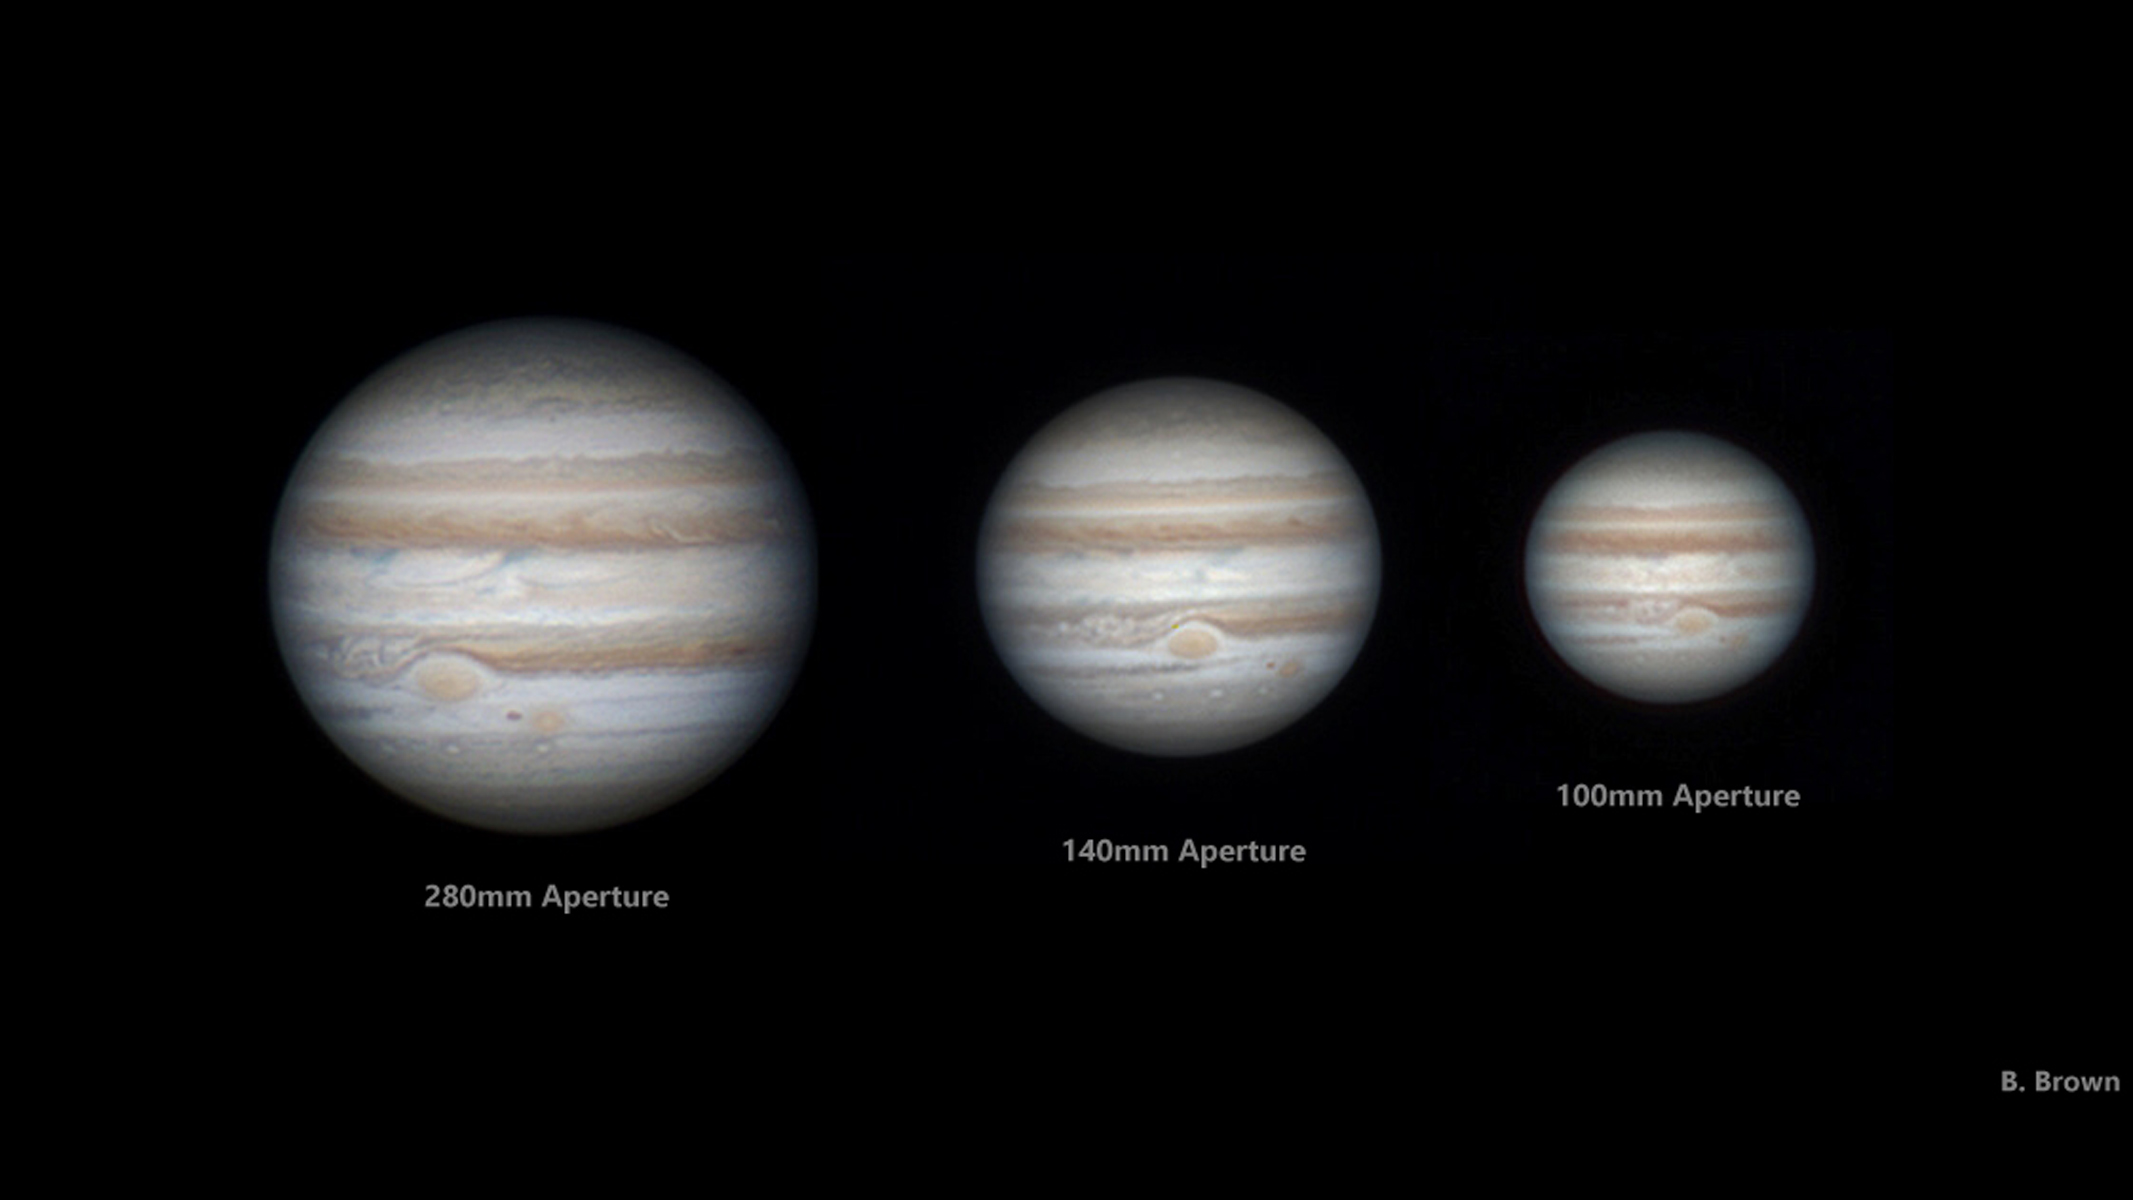
The wider the aperture, the more impressive your shots are likely to be. (Image credit: B. Brown)
Jupiter ranks as the top choice for beginners – and perhaps even veterans! Its large disk shows colorful cloud bands, the Great Red Spot and orbiting moons even in modest telescopes. The planet’s brightness and size tolerate average seeing well and reward those even with modest equipment.
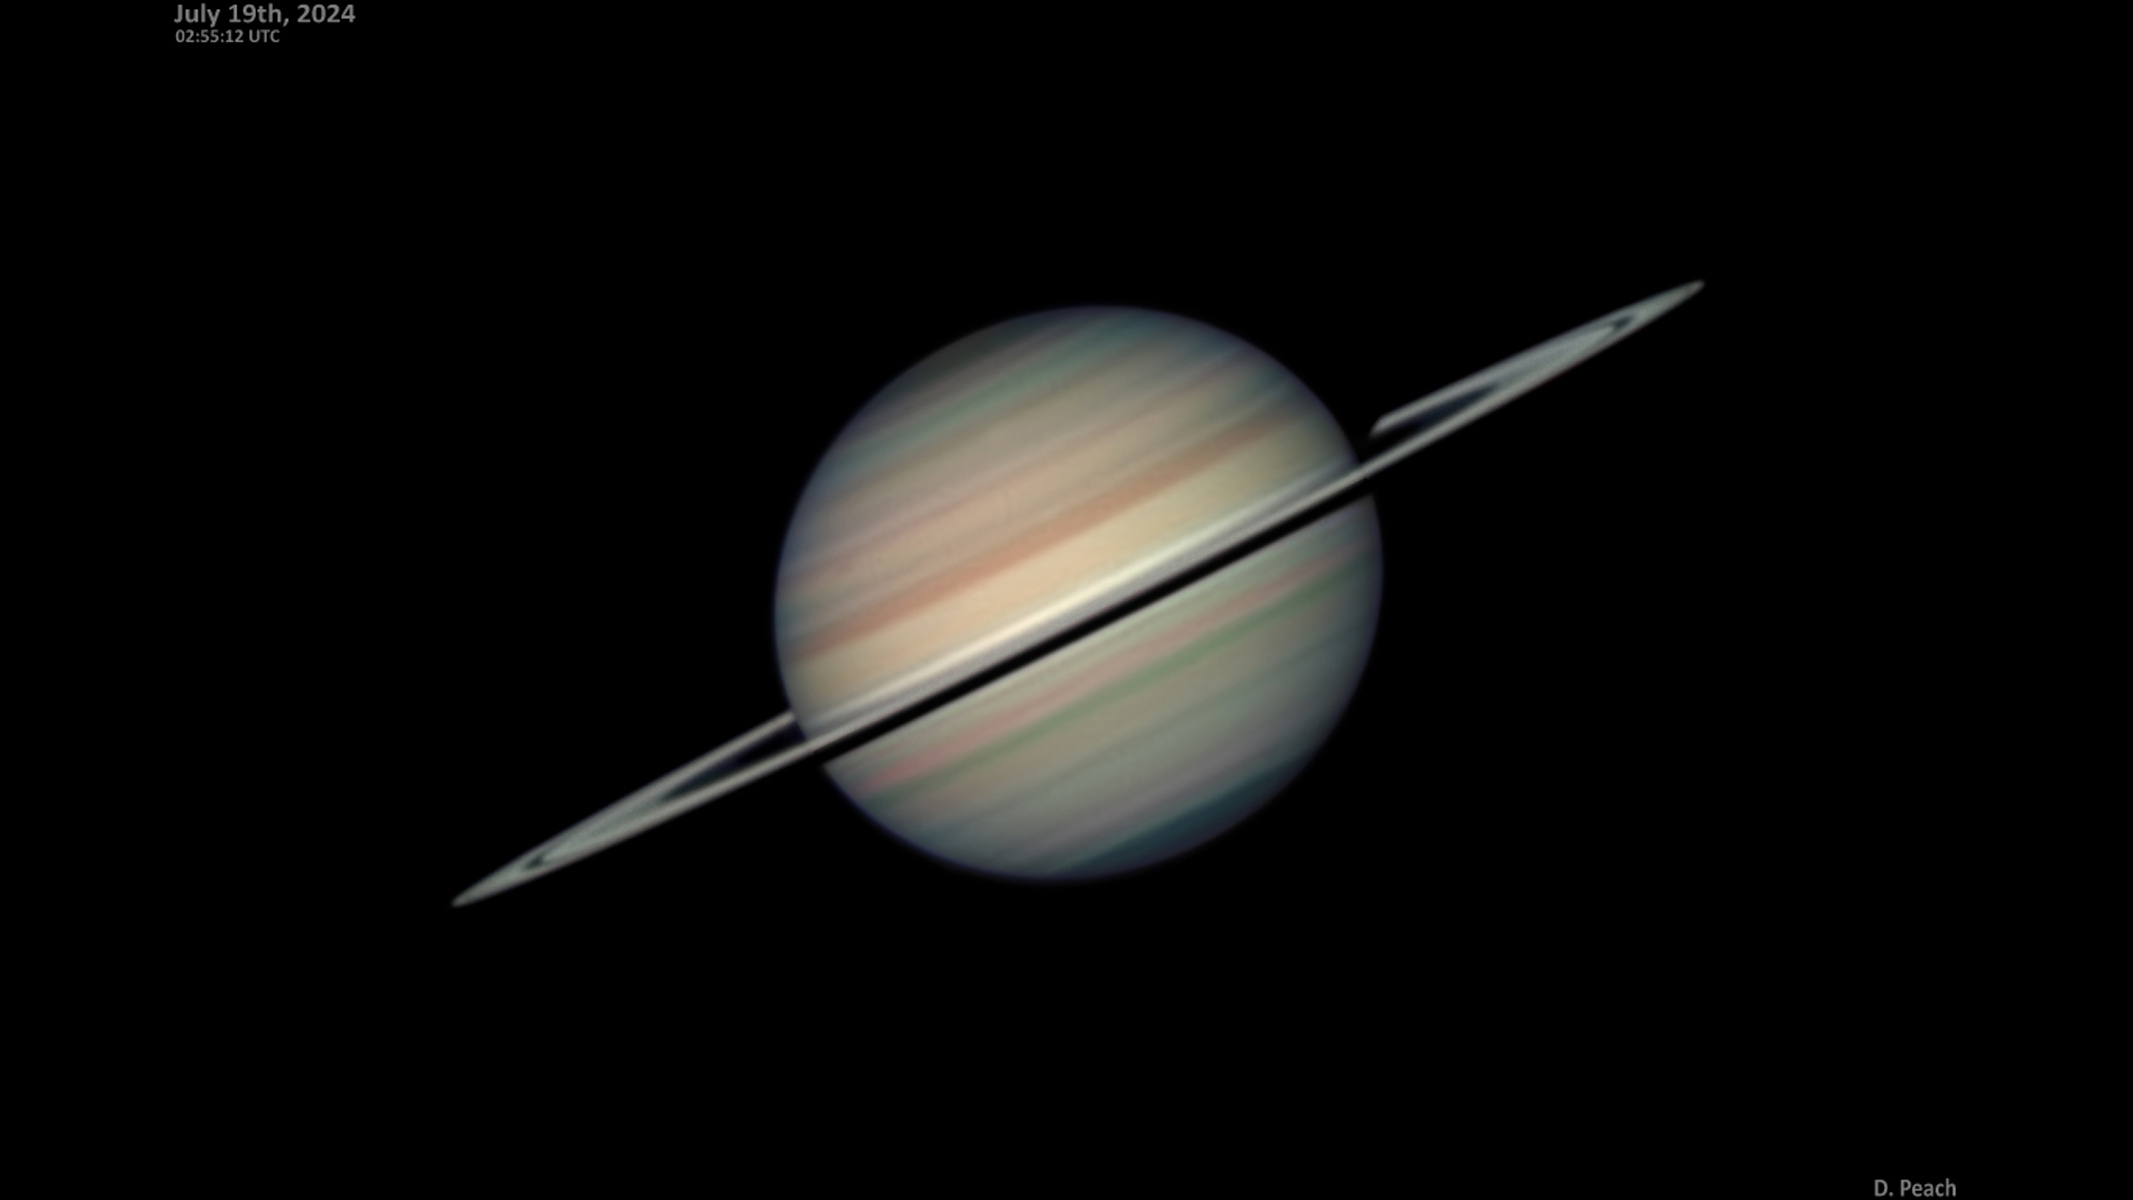
This image of Saturn was captured through a Celestron C14 telescope (Image credit: Damian Peach)
Saturn follows closely. Its iconic rings and subtle atmospheric banding create dramatic images. While significantly dimmer than Jupiter, modest telescopes easily reveal its brilliant rings, and the belts and zones within the planet’s atmosphere.
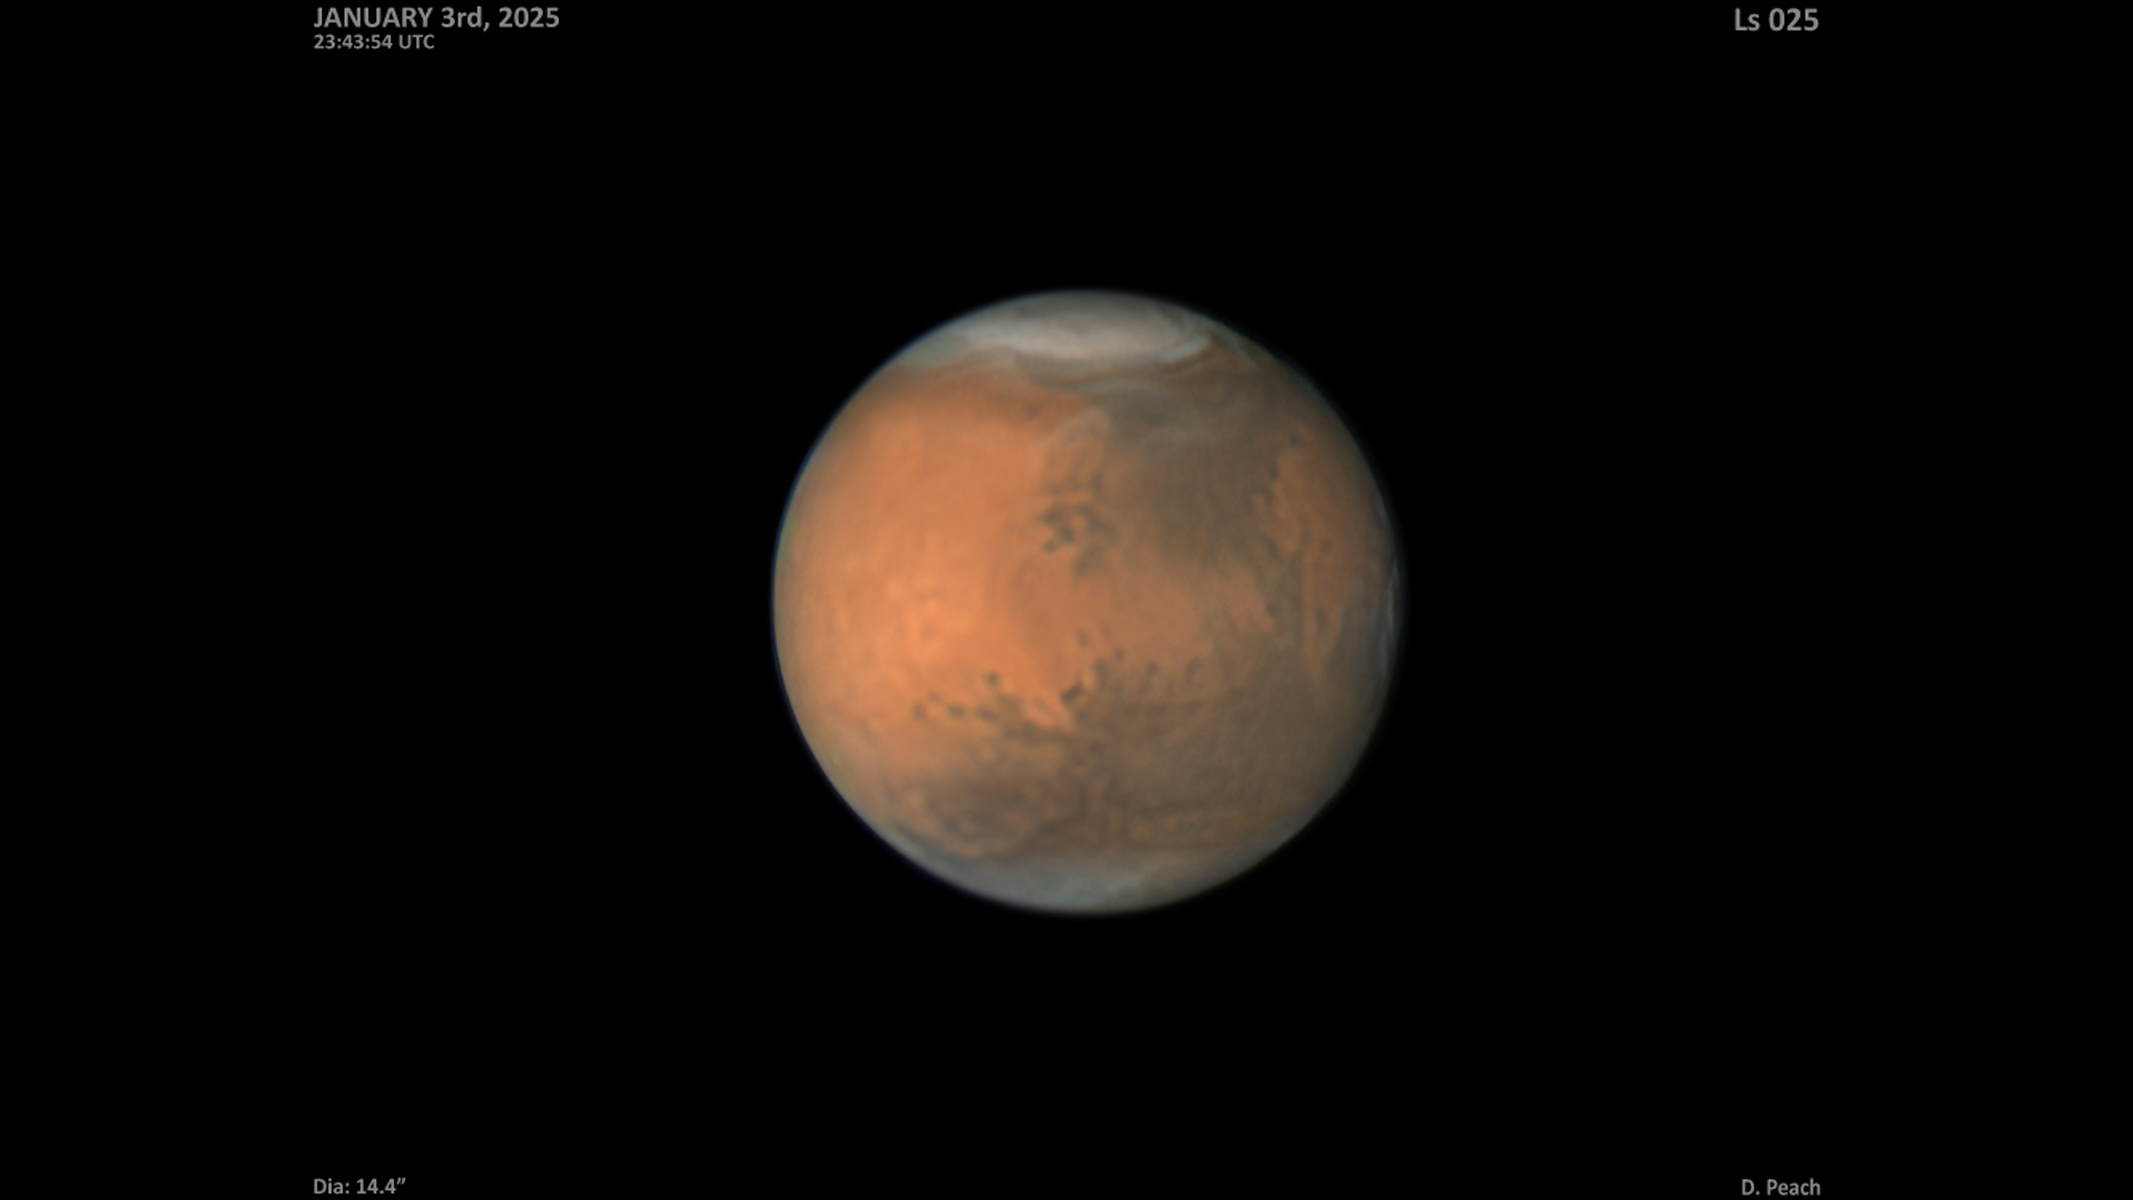
Again viewed through the Celestron C14, a close-up view of Mars. (Image credit: Damian Peach)
Mars delivers excitement during its oppositions every couple of years. At closest approach the planet swells in apparent size, revealing dark surface markings, polar ice caps and occasional dust storms. Again, even small telescopes reveal fascinating detail when the planet is close to opposition.
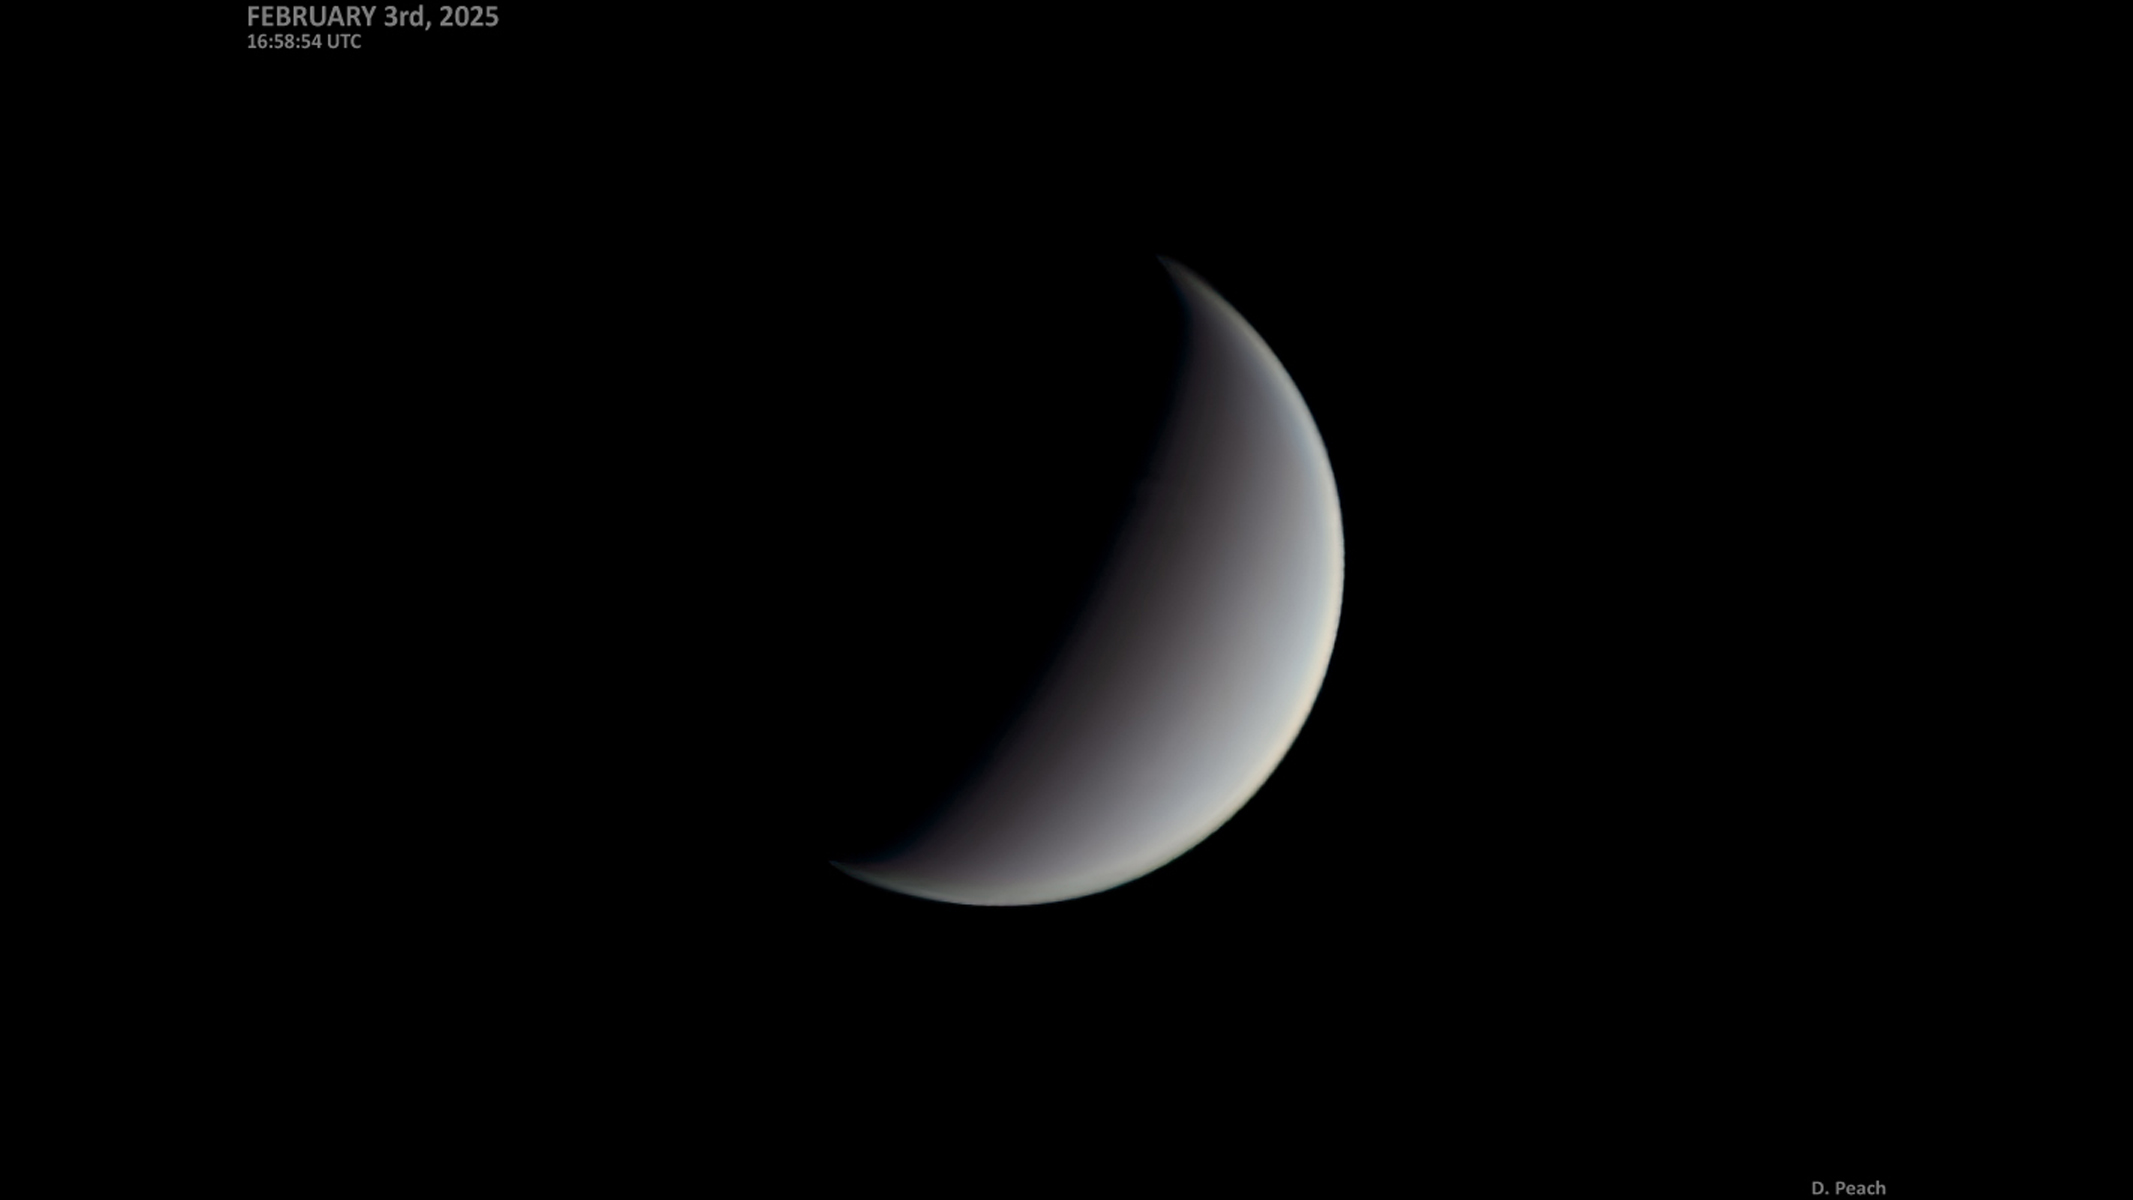
Venus is harder to see through a telescope, often resembling our own moon from a distance. (Image credit: Damian Peach)
Venus offers an easy entry point. Extremely bright and straightforward to locate, it displays clear phases like a miniature moon. Cloud features require ultraviolet filters, but the phases alone impress viewers — even binoculars show these phases clearly.
These four planets share key advantages: They appear large and bright enough for small apertures to record good detail on them. Jupiter, Saturn and Mars are the top three – all are fascinating objects to study for observers of all experience levels.
Handling the more challenging solar system targets, however, requires more advanced equipment and experience levels.
Mercury, Uranus and Neptune present greater challenges. Mercury stays glued to the sun’s glare, visible only briefly at dawn or dusk and best at maximum elongation. Its tiny disk demands exceptional seeing and precise daytime locating skills as well as a decent size telescope.
Uranus and Neptune appear as tiny blue-green disks. Their small apparent sizes require at least an 8-inch aperture telescope, longer focal lengths and higher magnification. Larger apertures gather more light, while monochrome cameras with filters help tease out subtle banding.
Upgrading to a 10-inch or larger telescope, a high-sensitivity monochrome camera and a filter wheel unlocks these distant worlds. Start with the easier quartet before investing further.
Frequently asked questions
Timing can be everything if you're looking to take some superb pictures of planets. (Image credit: Getty)
When is the best time to image the planets?
Aim for nights when the target planet rides high in the sky — ideally near the meridian — to minimize atmospheric turbulence. Planets such as Jupiter, Saturn and Mars look largest and brightest around opposition, when Earth lies directly between them and the sun. But good seeing matters more than the calendar: stable air with low turbulence yields sharper frames regardless of season. Check forecasts and look for periods of high pressure with stable weather and calm winds. Planetary imaging works year-round on clear nights, but spring and fall often deliver steadier conditions. Light pollution is also irrelevant to this form of imaging, so it’s something you can easily undertake from urban locations.
What is the most basic setup you need to do this?
A 4- to 6-inch aperture telescope on a motorized mount — such as a Celestron NexStar 6SE or anything similar — provides an ideal starter platform. Pair it with an entry-level planetary camera like the ZWO ASI224MC, plus a 2x Barlow lens and a laptop running free software. Total beginner budget often stays under $800 if you already own the telescope. This kit can capture excellent Jupiter and Saturn images without breaking the bank. Skip expensive cooled cameras or large apertures until you gain experience.
How long does it take to get a good image?
The real key to achieving good image quality is everything you do before pressing the record button: Making sure the telescope is properly cooled down, ensuring it is properly collimated, taking time to focus carefully. All these factors play a huge role. Beyond this, it is largely down to the steadiness of the atmosphere when capturing. The steadier the seeing, the better the result will be!
Summary
We hope that, with a little practice, this gives you the know-how you need to take stunning images of the planets. If you've yet to purchase the necessary equipment, take a look at our guides to the best telescopes and best dedicated astrophotography cameras.
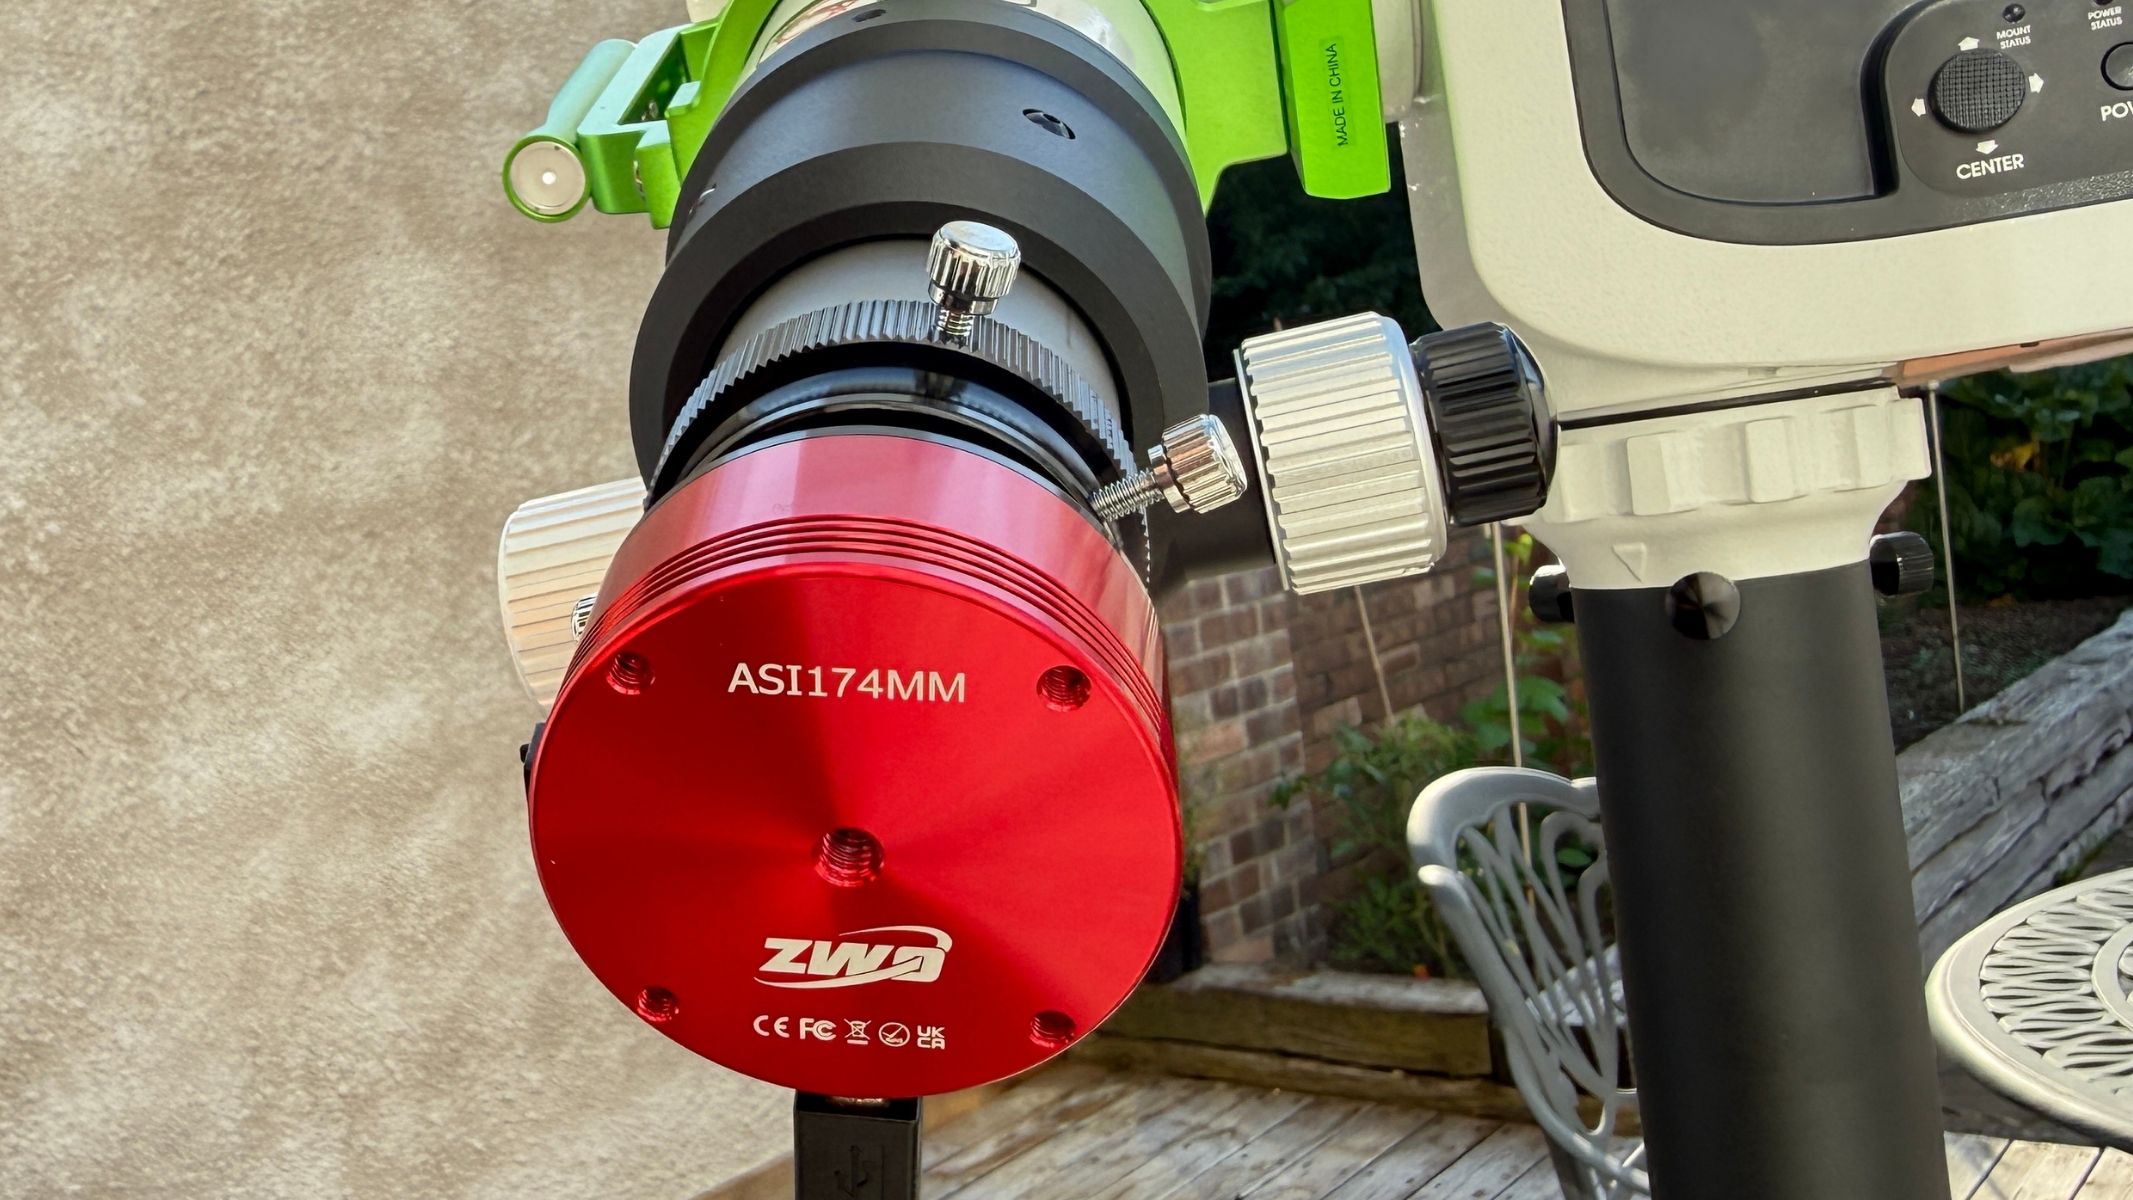
Originally launched a decade ago, the ZWO ASI174MM is a planetary astrophotography camera — something you insert into the eyepiece of a telescope to take images and video of deep-sky objects, planets, the moon and the sun. This one is very much geared towards the latter, with solar and lunar imaging its goal.
Specifications
Product type: Monochrome astronomy camera
Sensor: 1/1.2-inch Sony Exmor IMX174LLJ / IMX174LQJ CMOS
Resolution: 2.3MP, 1936x1216
Pixel size: 5.86µm
Shutter: Pregius global shutter
Maximum frame rate: 164.5fps at full resolution in 10-bit mode; 128.2fps at full resolution in 12-bit mode
At first glance, the specification looks simple: a 2.3MP monochrome Sony IMX174 sensor, 5.86µm pixels, USB 3.0 connectivity and a compact red aluminum body. The important details are the sensor size, speed and global shutter. For lunar and solar imaging, where you often want to capture large areas in high frame rate videos and freeze split-seconds of steady “seeing” — when turbulence in Earth’s atmosphere doesn’t degrade an image of an astronomical object — those traits matter more than headline megapixels.
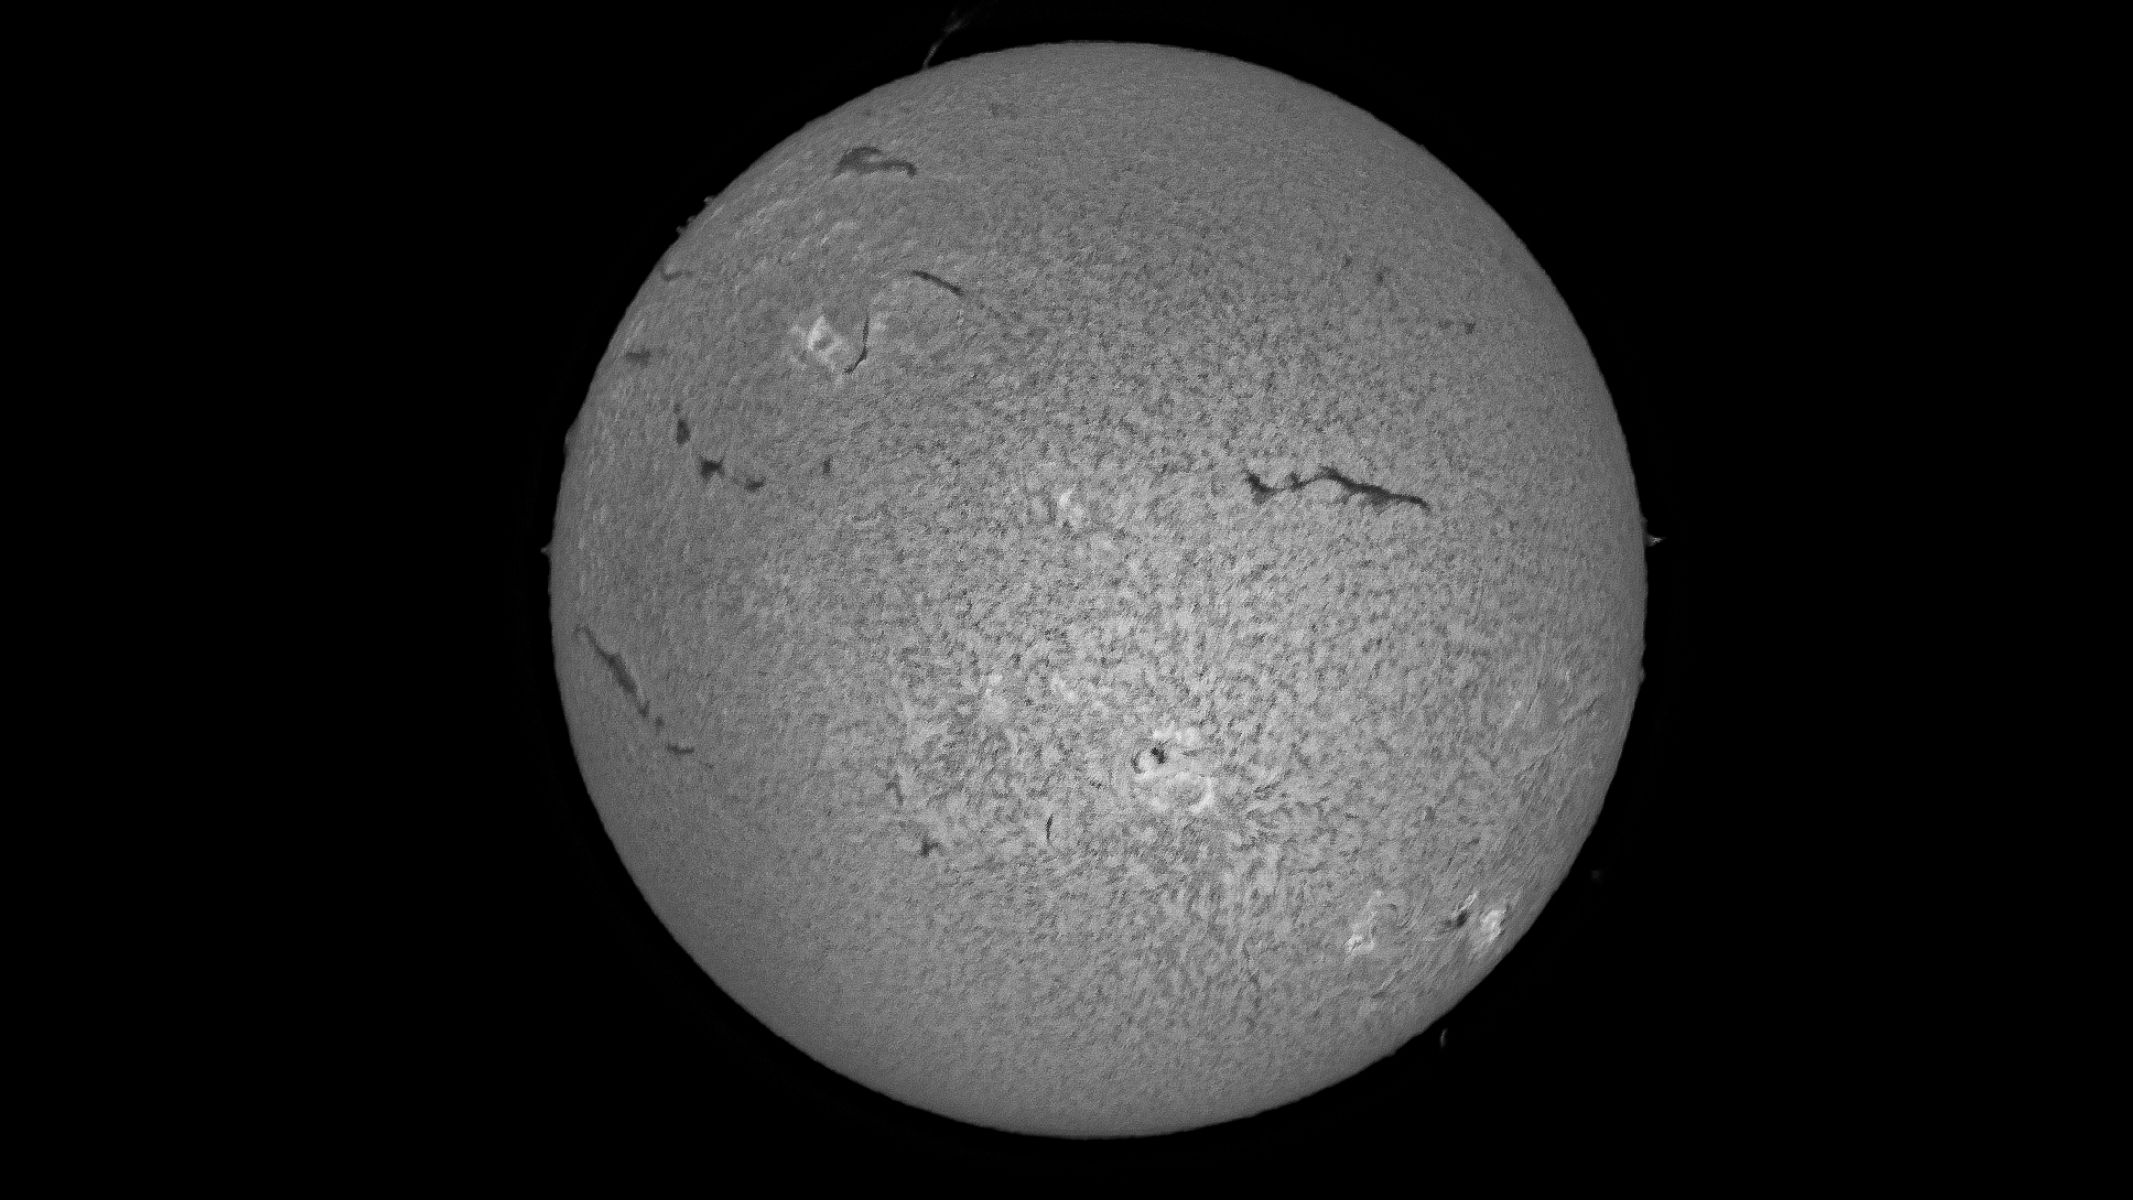
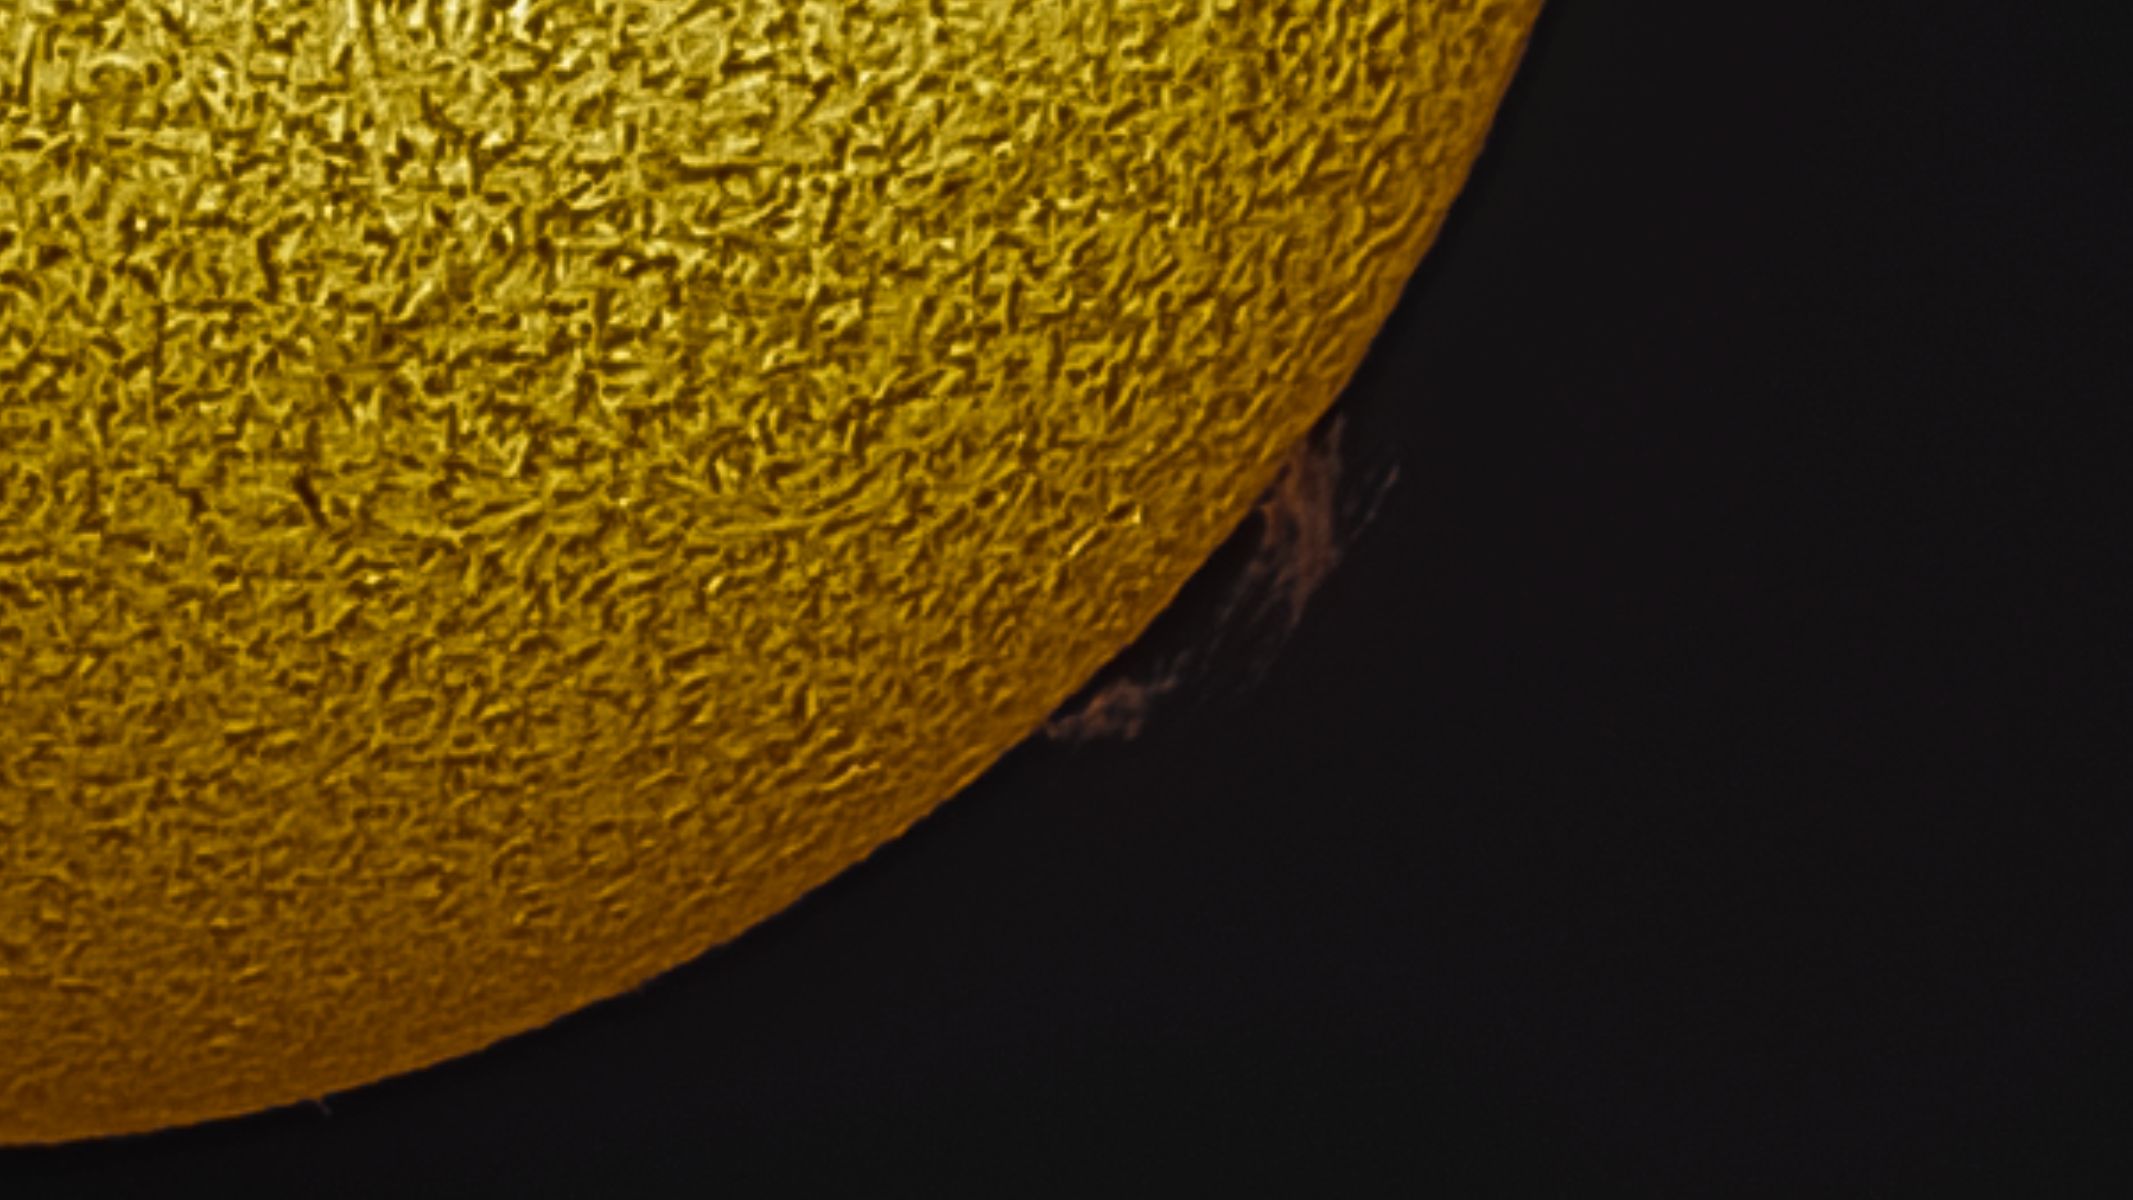
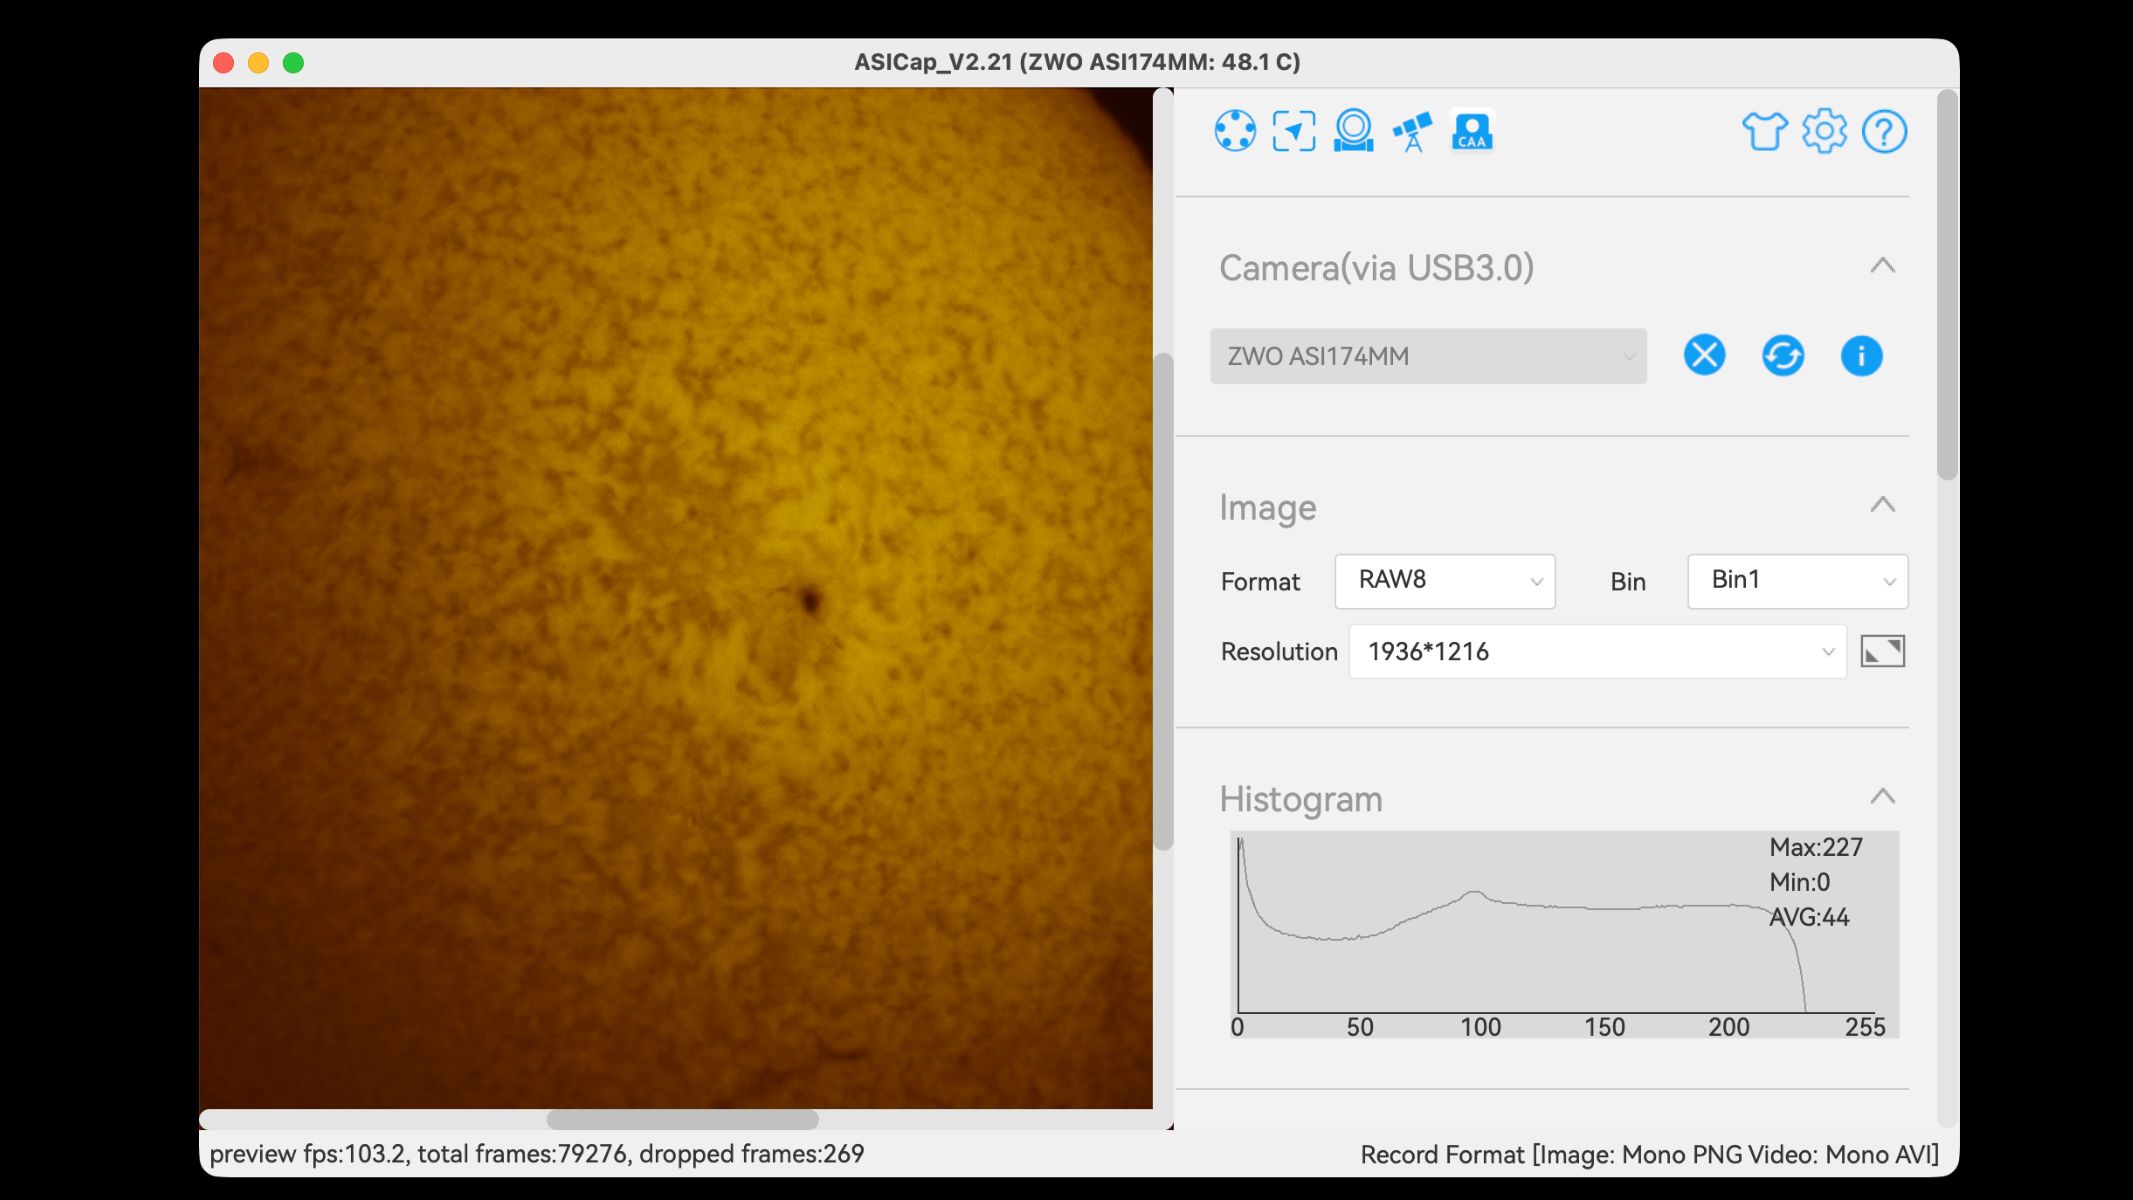
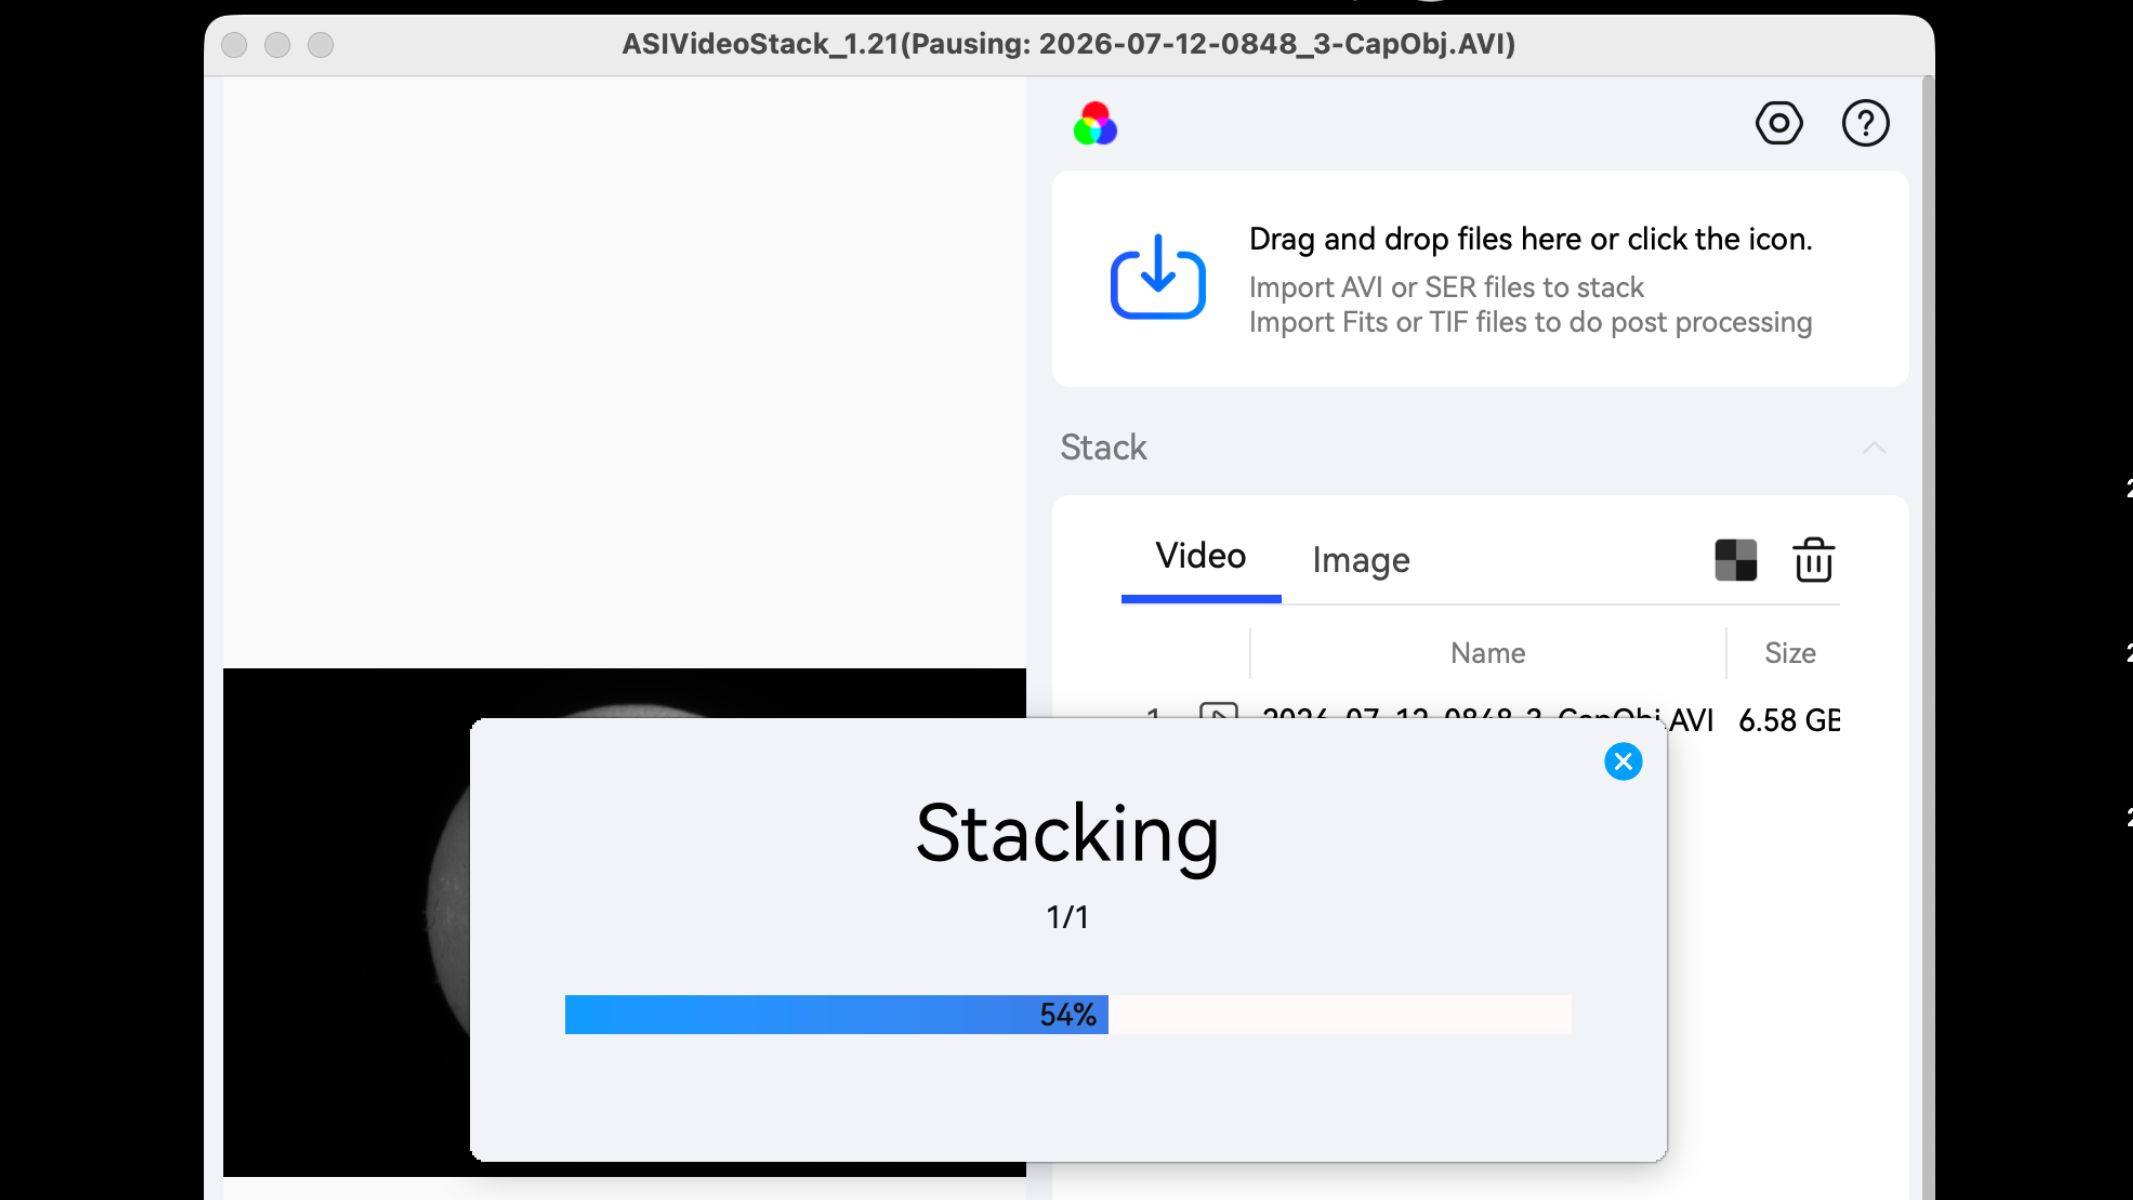
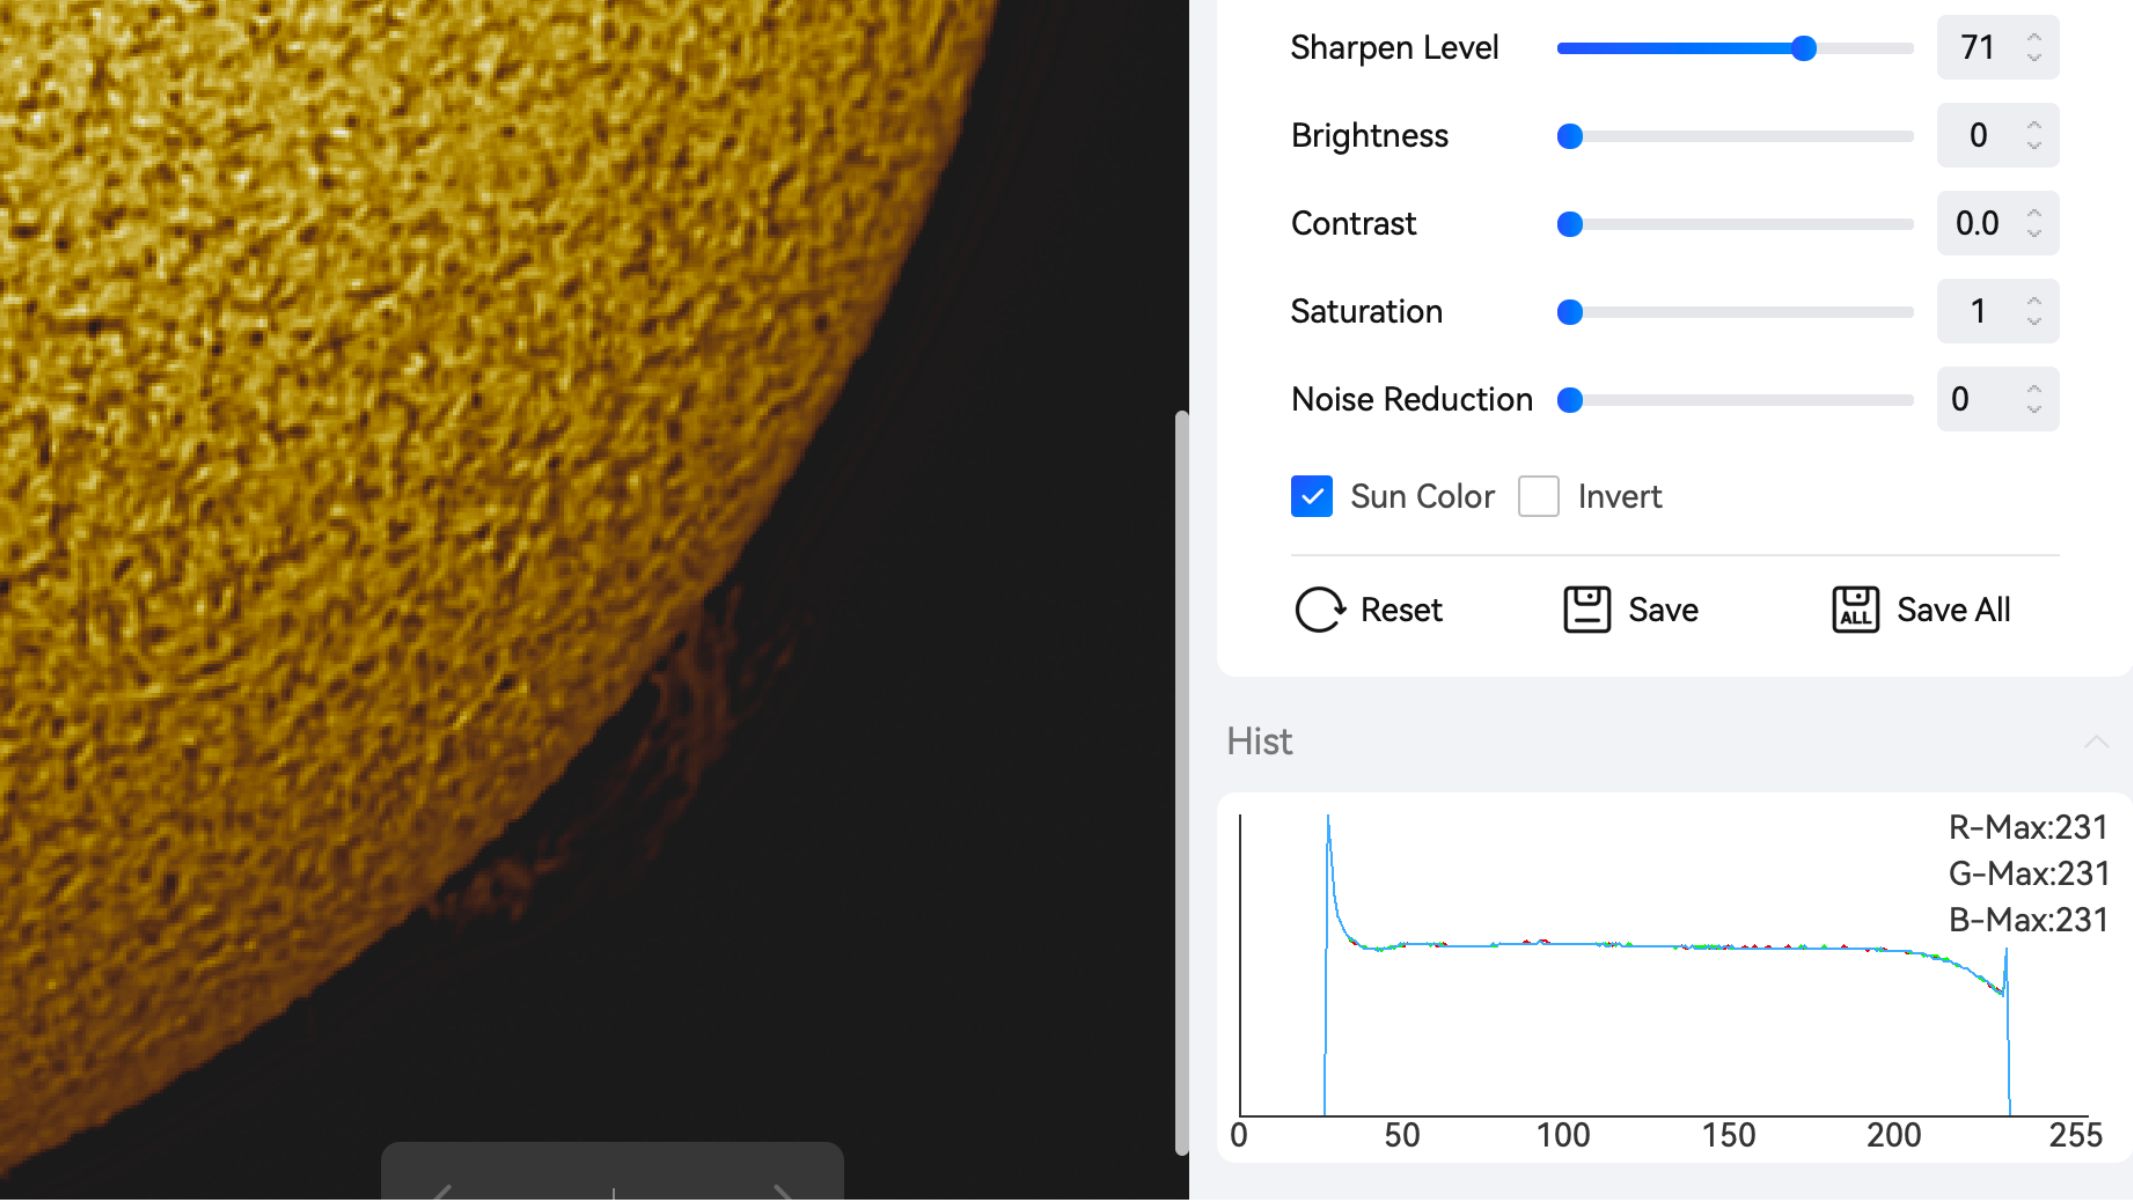
The ASI174MM is especially attractive for solar imaging with an H-alpha telescope — a filter that blocks all wavelengths of light other than H-alpha, which is emitted by hydrogen atoms. That’s because its 5.86 μm pixels match the focal ratios typical of solar telescopes, yielding sharp, efficient detail. Its relatively large sensor can cover more of the solar disc than many small planetary cameras, while its high frame rate supports the usual lucky-imaging workflow of capturing video, selecting the best frames and stacking them for sharper images.
ZWO ASI174MM astronomy camera: Design
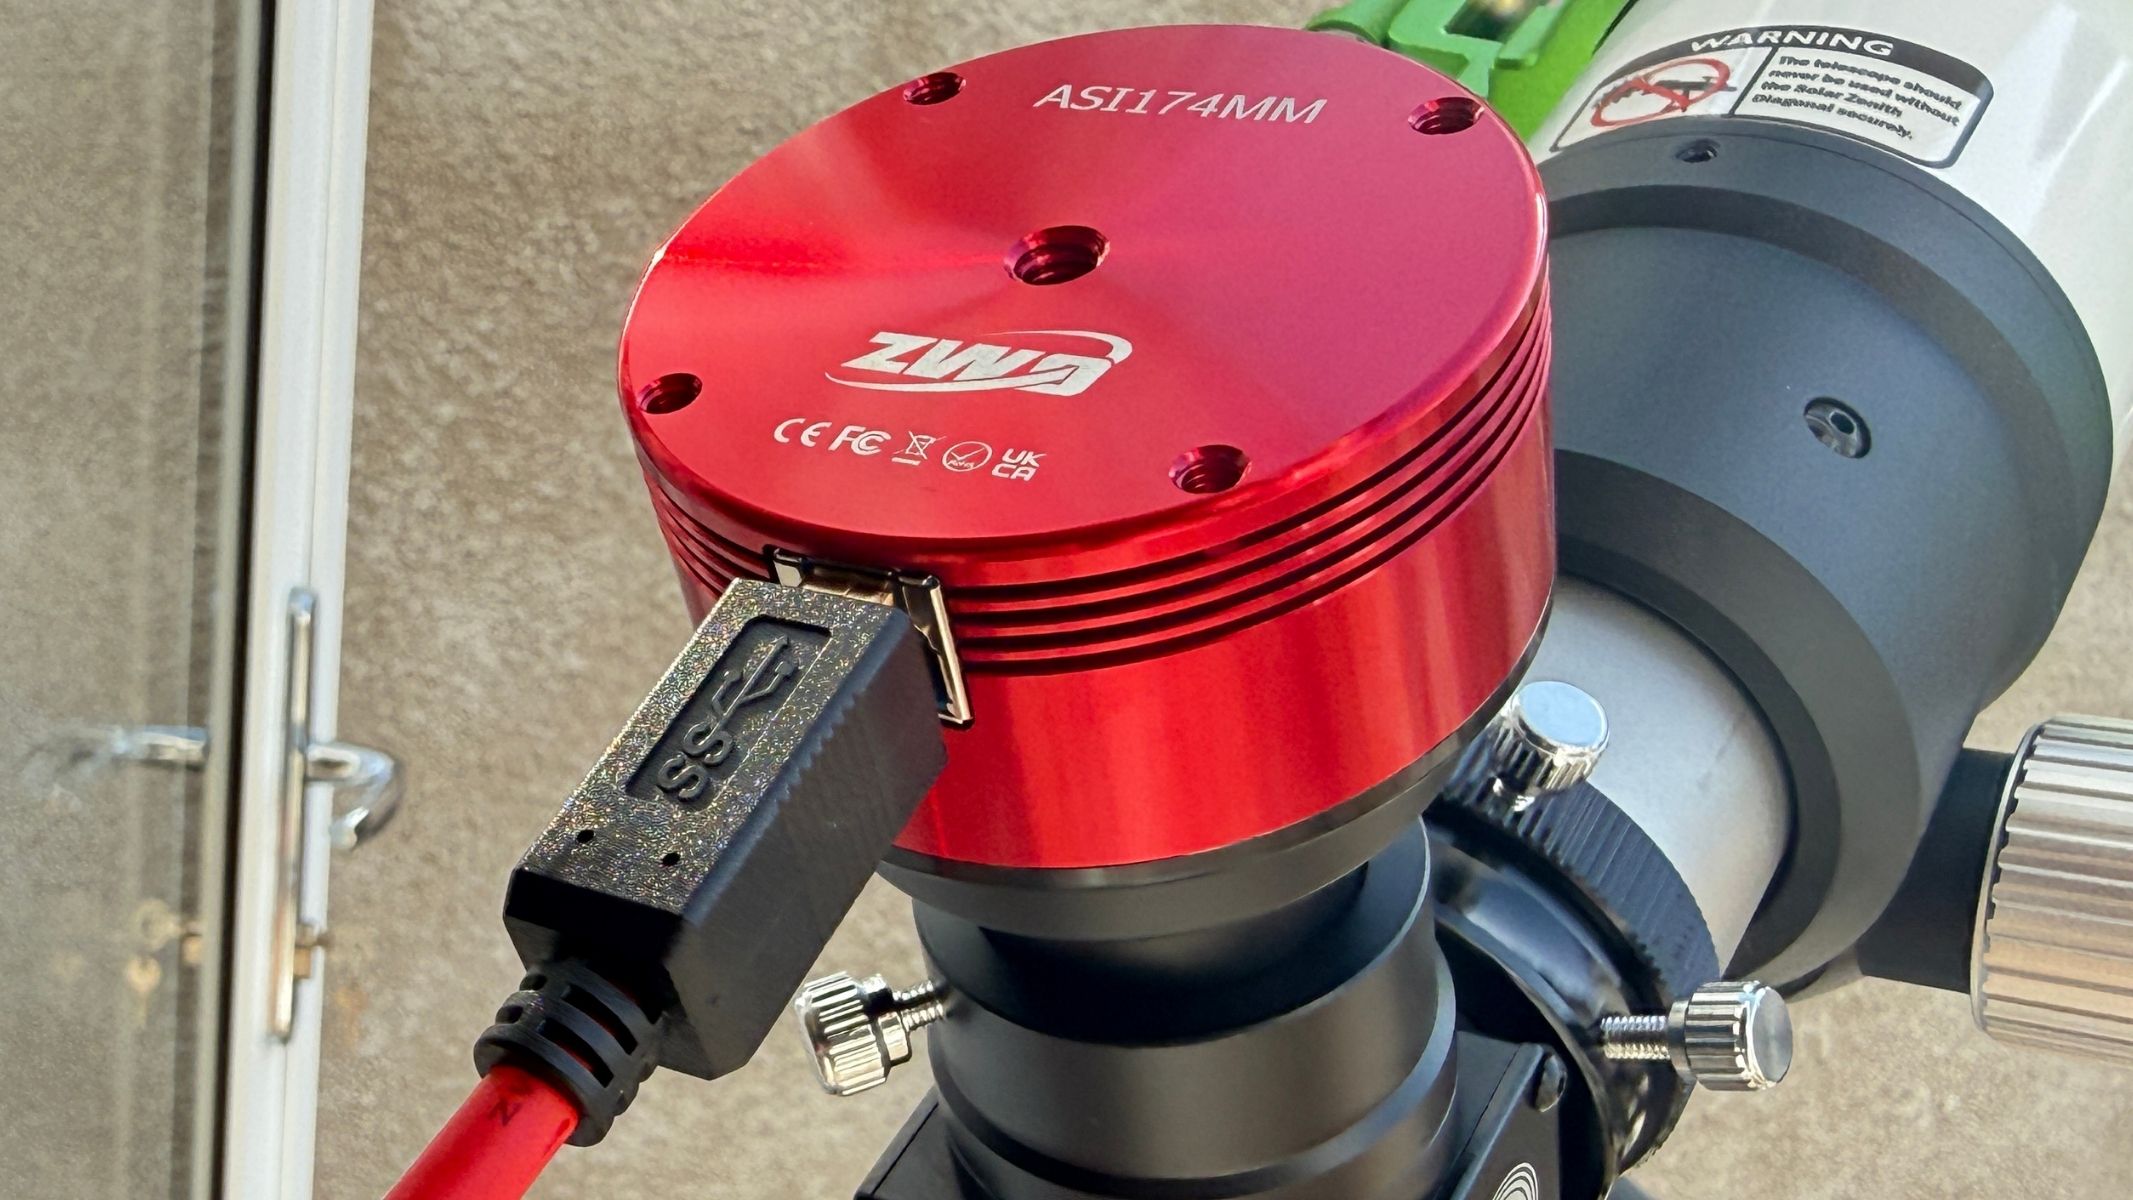
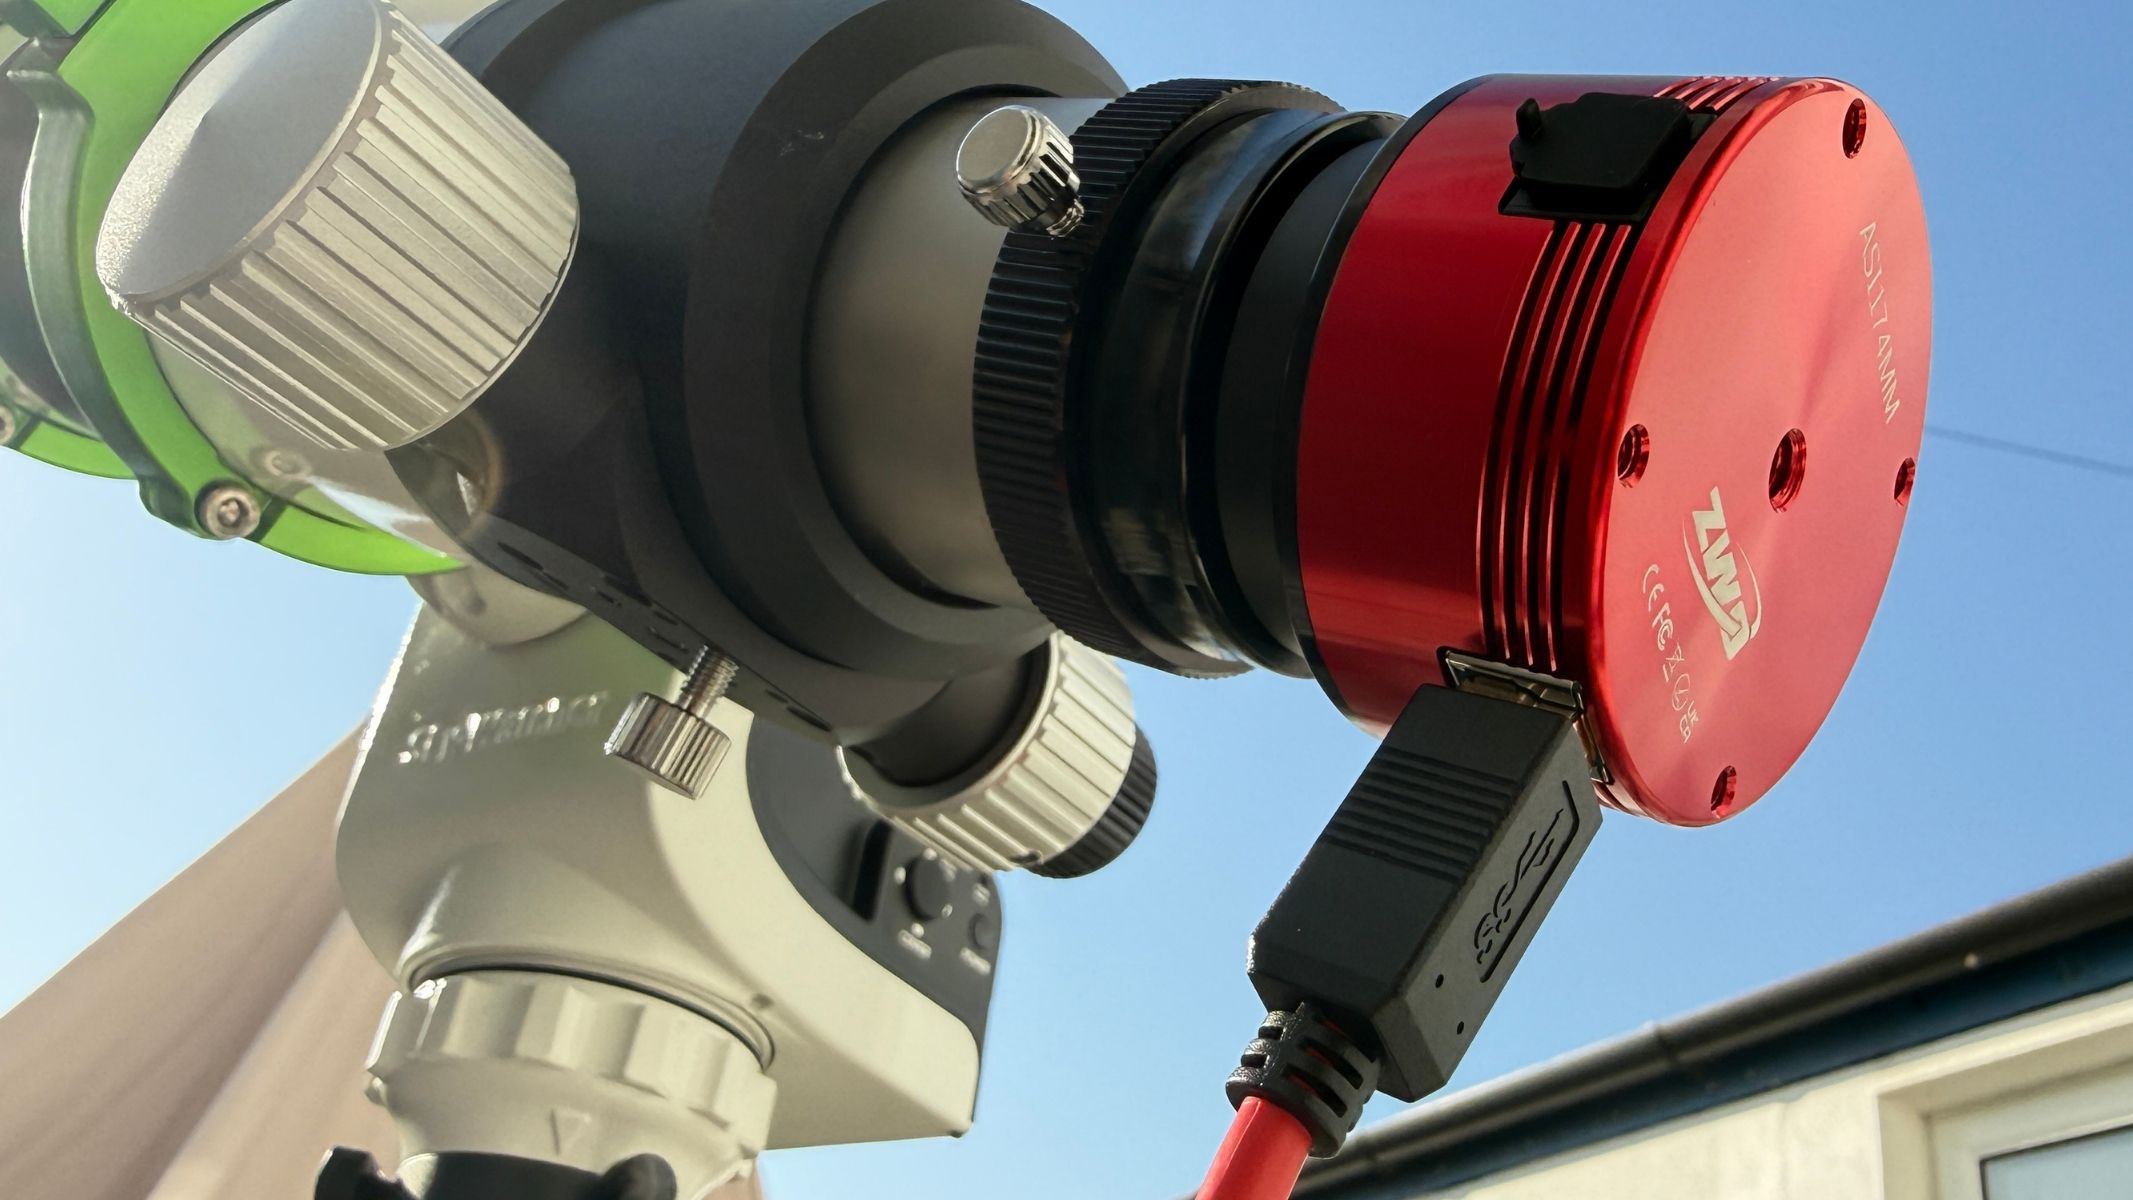
Large 5.86µm pixels help with solar and lunar capture. (Image credit: Jamie Carter)
Compact aluminum camera body
USB 3.0 and ST4 guide port included
Useful adapter bundle
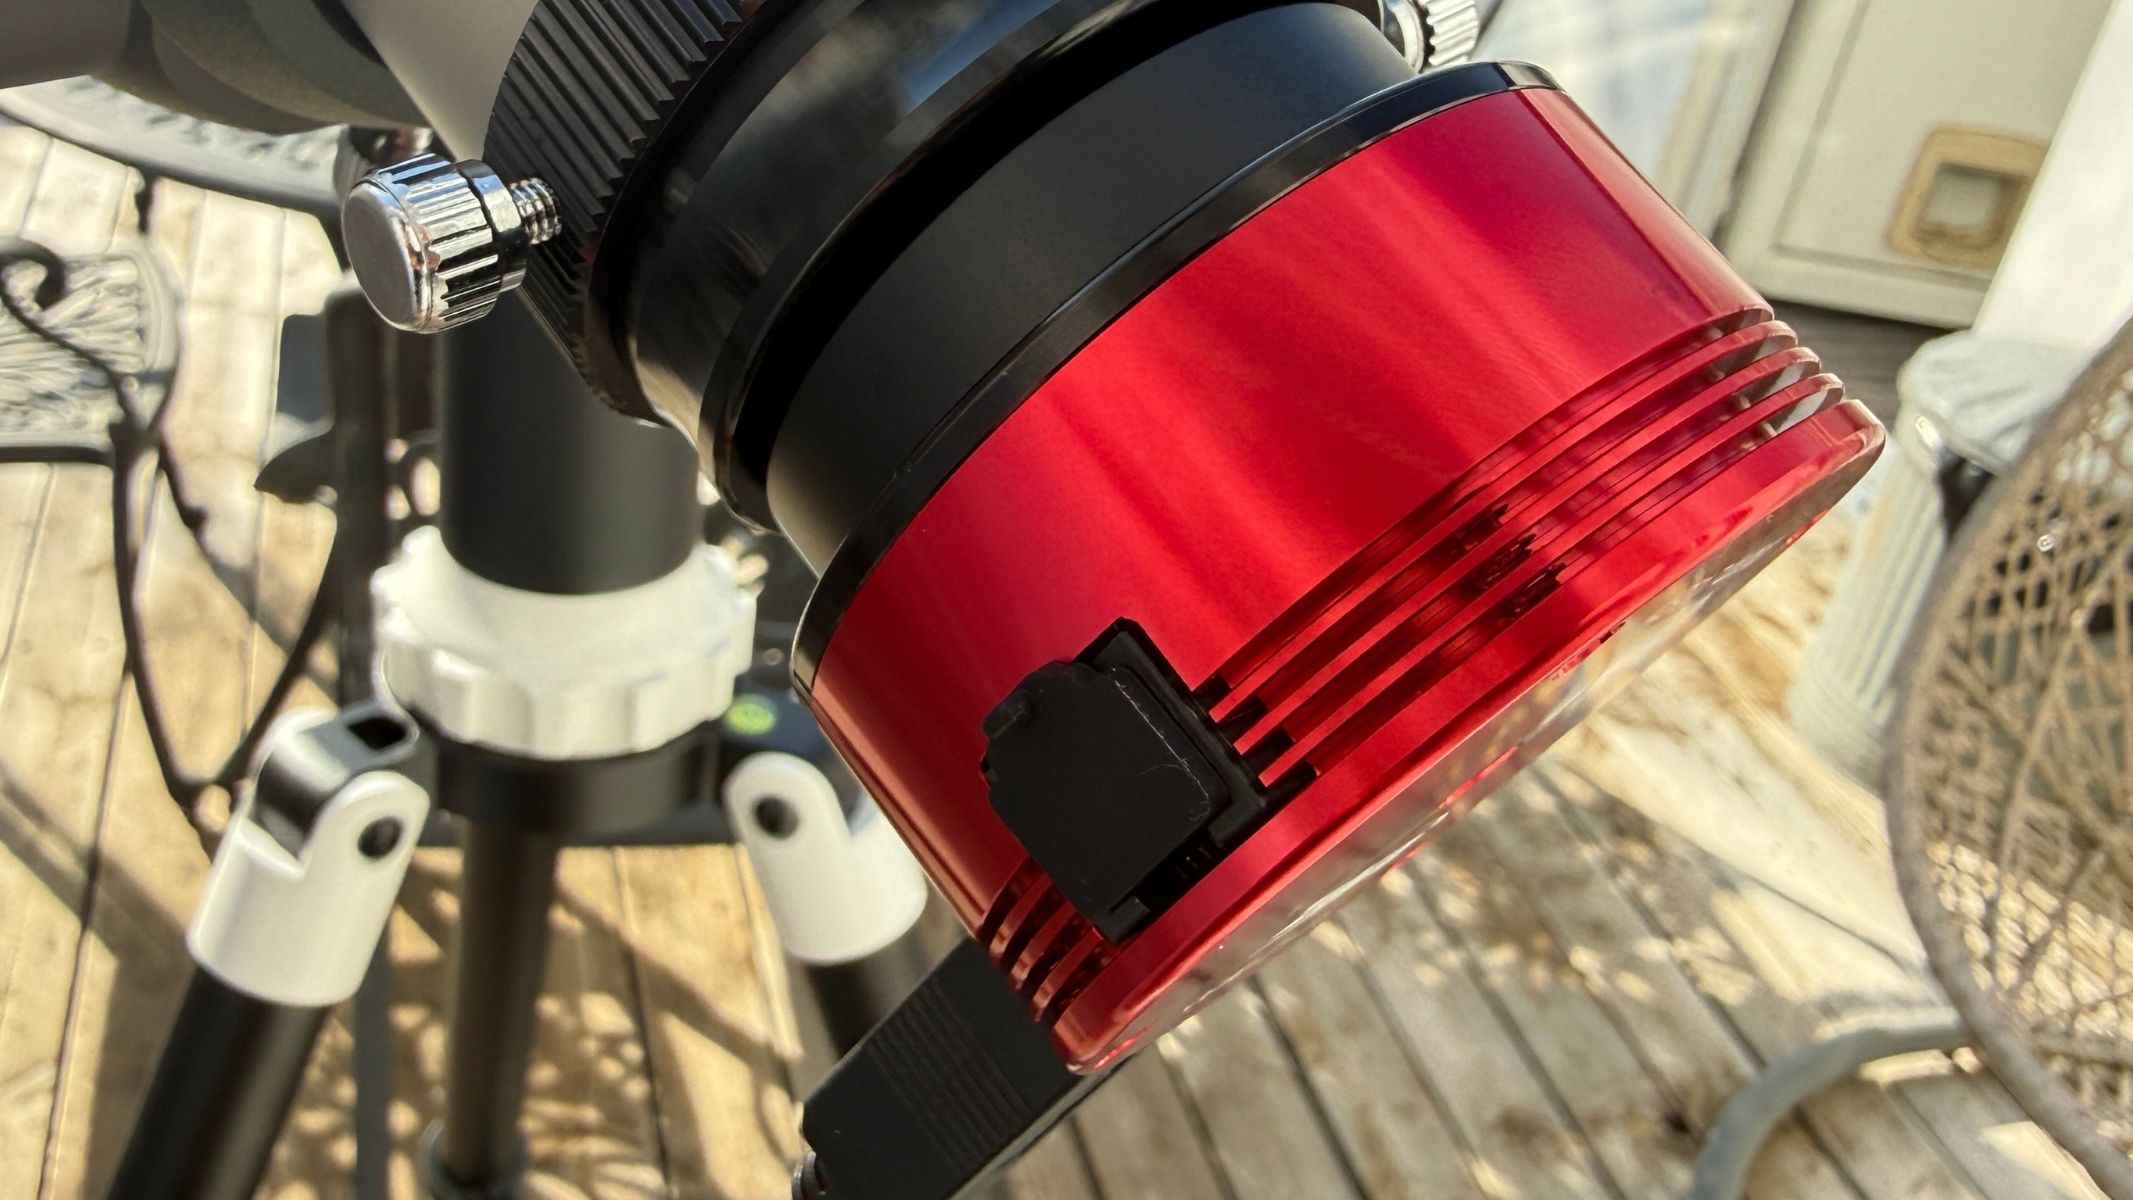
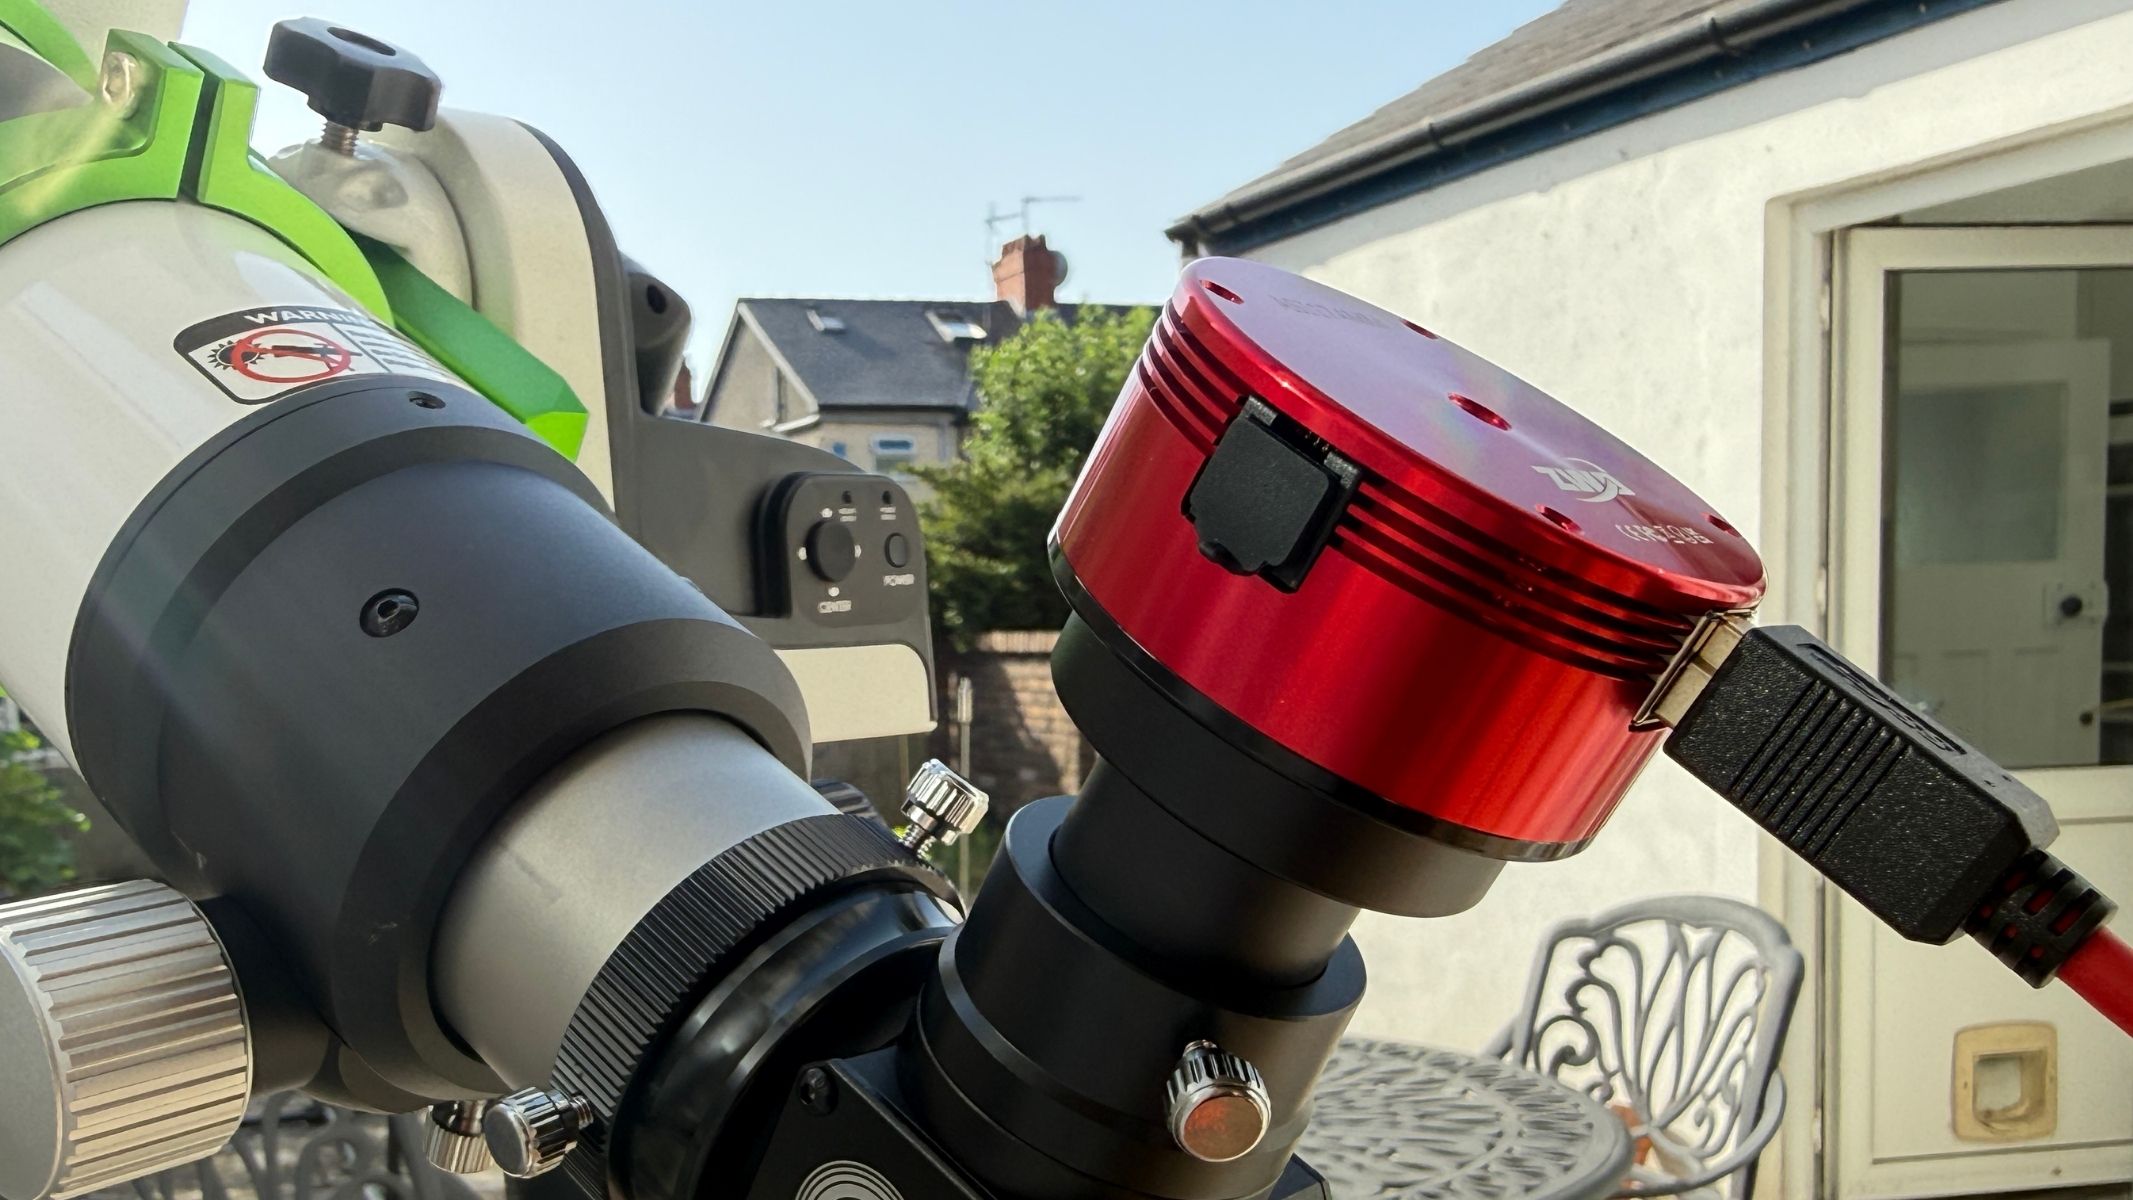
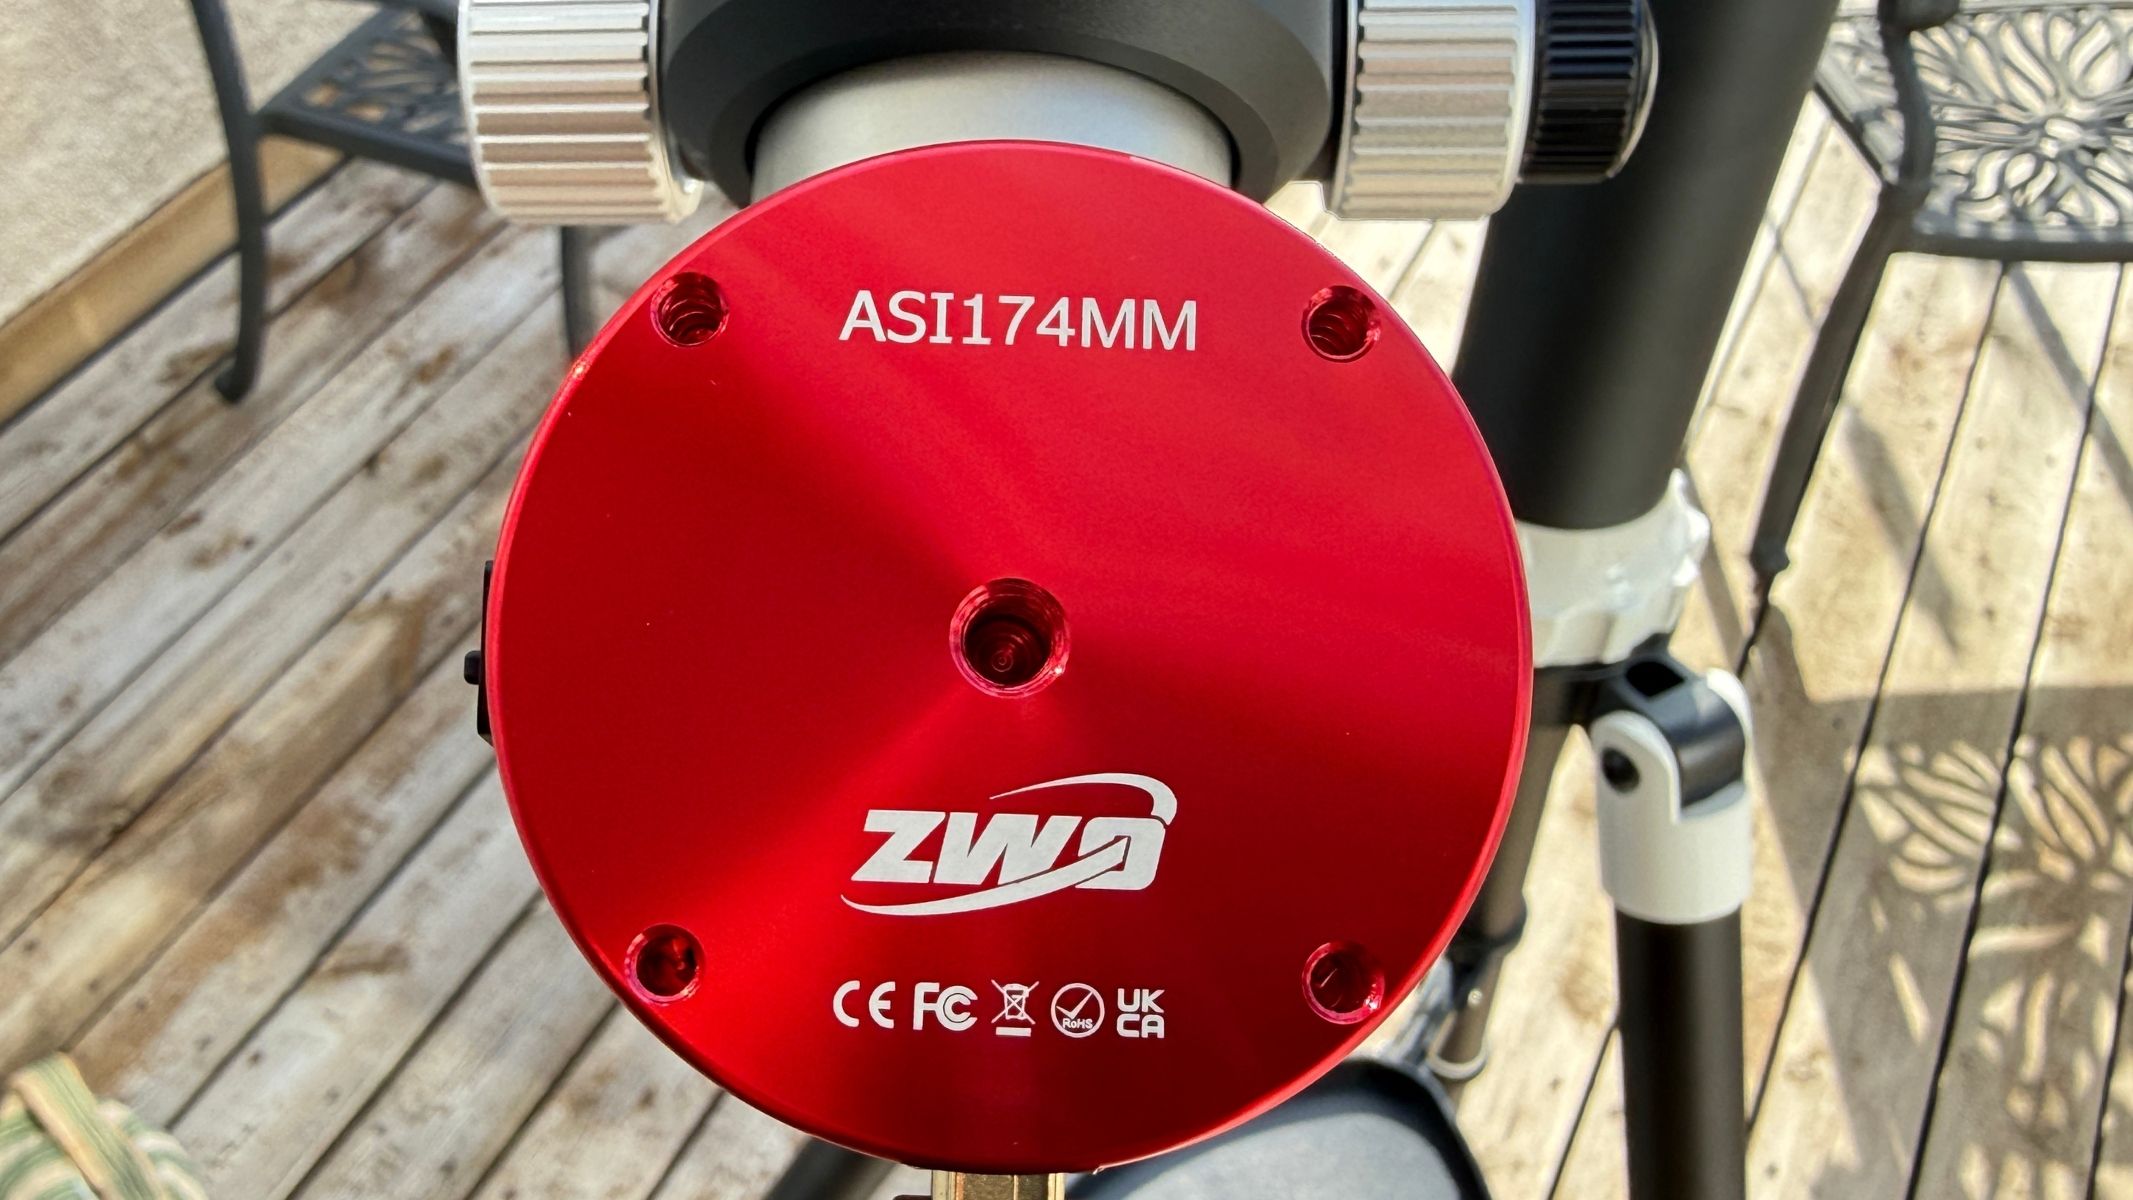
The ZWO ASI174MM has a compact, lightweight and practical design that’s ideal for use as a camera attached to a telescope. Its small cylindrical aluminum body adds very little strain to a focuser, solar diagonal or off-axis guider, which is particularly useful when working with solar telescopes.
The compact aluminum body weighs just 140g. (Image credit: Jamie Carter)
Usefully, the camera includes a high-speed USB 3.0 connection, which is important because the ASI174MM’s main strength is capturing and transferring many video frames very quickly. It can also be used over USB 2.0, but doing so gives up much of the performance that makes the camera appealing in the first place.
The 2.3MP resolution is modest, but well suited to bright solar system targets. Jamie CarterIt’s a tough, practical performer for imaging the sun and moon. Jamie Carter
An ST4 guide port adds extra flexibility. Although the ASI174MM is primarily sold as a planetary camera, it can also be used as a guide camera (mounted on top of a main imaging scope to capture a wide field of view), especially with off-axis guiders (a device that sits between a main camera and the telescope to precisely track stars), where the larger sensor helps find guide stars more easily than smaller-chip models.
ZWO ASI174MM astronomy camera: Performance
A mono image of the sun using data captured by the ZWO ASI174MM. (Image credit: Jamie Carter)
Excellent for solar and lunar video capture
Global shutter is a real advantage
Large pixels favor longer focal lengths
A prominence on the sun captured using the ZWO ASI174MM. (Image credit: Jamie Carter)
The ASI174MM’s combination of a relatively large 1/1.2-inch sensor, 5.86µm pixels, and fast video capture makes it particularly well-suited to imaging the sun and moon. Compared with planetary cameras built around smaller sensors, it records a considerably larger area of the telescope’s field of view, reducing the number of panels needed for mosaics and making it easier to locate and frame a target.
At full resolution, the ASI174MM can capture over 100 frames per second. (Image credit: Jamie Carter)
That larger sensor is especially useful for solar imaging, which is what we tested it with. The exact field of view depends on the telescope’s focal length, but the ASI174MM can capture larger active regions — and, with some setups, most or all of the solar disc — without immediately requiring a mosaic. For example, we tested it with the Sky-Watcher Heliostar 76Ha solar telescope, for which it is a natural match, where prominences, filaments, sunspots and rapidly changing structures on the solar surface need to be recorded at high speed.
A mono image of the sun using data captured by the ZWO ASI174MM. (Image credit: Jamie Carter)
The camera’s global shutter is another advantage for solar imagers. A rolling shutter (the standard choice for deep-sky imaging) records an image progressively, one row of pixels at a time, to produce a low-noise, high-dynamic-range image. However, atmospheric turbulence, which slightly shifts the image, can cause distortion. A global shutter exposes the entire sensor simultaneously, helping the ASI174MM preserve the shape of solar and lunar features more accurately from frame to frame.
The ASI174MM works well with solar telescopes, lunar rigs and longer focal-length scopes. (Image credit: Jamie Carter)
High-speed capture also supports lucky imaging. Instead of trying to produce one perfect exposure, the camera records thousands of short exposures in rapid succession. Software then identifies and stacks the sharpest frames — the brief instants when Earth’s turbulent atmosphere becomes relatively steady.
A colorized image of the sun via the ASIStudio software. (Image credit: Jamie Carter)
While it’s ideal for solar imaging, the ASI174MM is much less convincing as a conventional deep-sky camera. Long exposures can reveal pronounced amp glow towards one side of the frame, while the uncooled sensor becomes increasingly noisy as exposure times increase. Calibration with dark frames can reduce these effects, but it adds complexity and cannot turn the ASI174MM into a modern cooled deep-sky camera. It can be used for short-exposure imaging, guiding and some specialist applications, but solar, lunar and planetary video remain its natural strengths.
ZWO ASI174MM astronomy camera: Functionality
The sun through the ASICap software. (Image credit: Jamie Carter)
Captures good data
ZWO software works well
Little guidance available
The ASI174MM fits neatly into the established workflow for solar, lunar and planetary imaging: capture a high-speed video, identify the sharpest frames, align and stack them, then sharpen and process the image. Its fast USB 3.0 connection enables high data transfer rates, while region-of-interest controls allow the user to record only a selected portion of the sensor. Reducing the size of the recorded area can substantially increase the frame rate, which is particularly useful when imaging an individual sunspot.
USB 3.0 connectivity allows fast frame rates for lucky imaging. (Image credit: Jamie Carter)
Several free applications can control the camera and record these videos, including SharpCap and FireCapture. AutoStakkert! is widely used to analyze, align and stack solar, lunar and planetary frames, while programs such as ImPPG, RegiStax, Siril, Adobe Photoshop and GIMP can be used for sharpening, contrast adjustment and final processing. Windows users have the widest choice of third-party astronomy software.
However, ZWO also provides its own free ASIStudio software suite. For the ASI174MM, the most relevant applications are ASICap, which controls the camera and records lossless SER or AVI video, and ASIVideoStack, which analyses and stacks the resulting frames (and can also be used for post-processing). ASIStudio is available for both Windows and macOS.
A sunspot on the sun through the ASICap software. (Image credit: Jamie Carter)
The basic capture process is straightforward. After connecting the ASI174MM to ASICap, exposure time and gain are adjusted until the brightest areas of the sun or moon remain below saturation. Because this is a monochrome camera, the live view can be shown either in grayscale or with false color applied for easier viewing. A video containing around 1,000 to 3,000 frames is then recorded, though the ideal number depends on the target, seeing conditions and available storage.
Storage requirements are significant. Uncompressed high-frame-rate video from the full sensor can consume several gigabytes in a matter of seconds, so a fast computer, a USB 3.0 connection and plenty of free drive space are essential.
Stacking using the ASIVideoStack software. (Image credit: Jamie Carter)
Once a video is loaded into ASIVideoStack, the software can assess frame quality, align the image and combine a chosen percentage of the sharpest frames. The finished stack can be exported in formats including JPEG and FITS. JPEG is convenient for immediate sharing, but FITS preserves more of the original image data and is better suited to serious post-processing.
Image editing using the ASIVideoStack software. (Image credit: Jamie Carter)
The workflow is functional rather than polished. There is relatively little guidance for beginners and obtaining the best results requires experimentation with exposure, gain, frame rate, focus, stacking percentages and sharpening settings. It can take many attempts to determine which combination works best with a particular telescope and observing conditions. For that reason, it’s wise to archive the video files, which can be revisited and processed later as processing skills/software improves.
How we tested the ZWO ASI174MM
Its Sony IMX174 sensor gives a wider field than many smaller planetary cameras. (Image credit: Jamie Carter)
We tested the ZWO ASI174MM planetary camera for two weeks and used it in conjunction with the Skywatcher HelioStar 76mm solar telescope and Solar Quest mount to image the sun in H-Alpha (Hα).
Should I buy the ZWO ASI174MM?
Buy it if:
✅ You mainly image the sun or moon: The ZWO ASI174MM astro cam excels in solar, planetary and lunar imaging, so if these are your main astrophotography targets, it's the perfect choice.
✅ You have an H-Alpha telescope: If you have a solar telescope and want to move on from observation to start imaging the sun with it, you will need a monochrome astrocam like the ZWO ASI174MM.
Don't buy it if:
❌You want a dedicated deep-sky imaging camera: This model exhibits severe amp glow for exposures longer than a few seconds and lacks thermoelectric cooling (TEC) needed for noise reduction.
❌You need high megapixel resolution: The low resolution is another reason it fails as a deep-sky imaging camera as you would want a higher resolution model for detail in star clusters and galaxies.
Buy the ZWO ASI174MM if your main targets are the sun and moon, especially if you want a monochrome camera with a larger-than-average sensor, fast frame rates and a global shutter. It remains particularly suited for H-alpha solar imaging, where monochrome capture, speed and sensor area matter.
If this product isn’t for you
If you want a cheaper first planetary camera, a smaller-sensor ZWO ASI120-series-style camera may be enough for basic lunar, planetary and guiding use, though it will not offer the same field of view.
If you want a more modern planetary camera, look at newer monochrome planetary models like the ZWO ASI585MM with lower read noise, smaller pixels or higher resolution, depending on your telescope’s focal length.
If your goal is deep-sky imaging, a cooled astronomy camera is a better choice than the ASI174MM. We have reviewed the ZWO ASI533MC Pro and the ASI183MC Pro and gave both of them nothing less than four and a half stars for beautiful deep-sky astrophotography.
Power: 8x AA batteries (not supplied)/external 12V DC via adaptor panel
Mount head weight: 2.9 lbs/1.3kg
Total weight with optional tripod: 8.8 lbs/4.05kg
Tripod: 31.7-59.8 inches/80.5-152cm adjustable aluminum tripod with accessory tray, bubble level and 3/8-inch screw fitting
Finding the sun sounds easy, right? Many people think of the sun as big and bright, but it’s actually rather small in the sky — it’s got an angular diameter of just half a degree, in fact, the same as the moon. Put an all-important solar filter on a telescope, and you’re left with the challenge of finding a tiny orange or white circle in a sea of black. Even if you manage to find the sun, nudging a solar telescope back into position every few minutes to keep it in the field of view quickly gets irritating.
Dual-axis alt-az tracking keeps the sun in view during observing sessions. (Image credit: Jamie Carter)
Cue the Sky-Watcher SolarQuest mount, a simple grab-and-go product that exists to solve exactly that problem. Costing around $585/£259-£359 (the latter with a tripod), it is not a general Go-To astronomy mount and it is not trying to be one. It is best understood as a dedicated solar tracking platform for small solar telescopes. That could range from regular telescopes wearing solar filters, most likely during a solar eclipse, to dedicated solar telescopes such as white-light-filtered refractors and H-alpha (Hydrogen-alpha) telescopes designed specifically for viewing the sun.
Sky-Watcher SolarQuest mount head: Design
Its 8.8-lb payload suits compact white-light and H-alpha solar scopes. (Image credit: Jamie Carter)
Lightweight and compact mount head
Simple controls make it beginner-friendly
Vixen-style saddle suits small solar scopes
The SolarQuest mount head weighs just 2.9 lbs/1.3 kg, accepts standard 45mm Sky-Watcher/Vixen-style dovetails and can be fitted to a tripod using a 3/8-inch screw. Meanwhile, the optional tripod is lightweight and easily adjustable, with a bubble level and accessory tray. Whatever tripod you use, it’s imperative to get it stable before using the SolarQuest because its ability to track the sun successfully depends on it.
The Sky-Watcher SolarQuest comes with an optional sturdy tripod.Jamie CarterThe tripod comes with a handy accessory tray.Jamie CarterThe optional tripod includes grippers to keep the rig steady.Jamie Carter
With the optional aluminum tripod — which we used in our review — the total setup is still only around 9.9 lbs/4.05 kg, making it easy to set up inside and carry into the garden. Eclipse chasers travelling abroad will easily be able to store it in a carry-on camera bag.
HelioFind technology makes solar alignment fast and beginner-friendly. Jamie CarterA Vixen-style saddle accepts many small solar telescopes and spotting scopes. Jamie Carter
The mount itself has very few controls: A power button and an 8-way sliding switch. A long press of the power button finds the sun, with the second used to make manual adjustments. There are no menus and no alignment tasks.
Sky-Watcher SolarQuest mount head: Performance
Its job is simple: Find the sun and keep it centered. (Image credit: Jamie Carter)
Finds the sun automatically in clear conditions
Fine-tuning controls keep the sun centered
Works well with solar telescopes
At first glance, the promise of the Sky-Watcher SolarQuest mount head is so simple: you level the tripod using its built-in bubble or spirit level and point the attached telescope somewhere to the left of the sun. You then long-press the power button and step back. The built-in GPS calculates the date, time, and location, as well as the sun’s altitude and azimuth. The mount levels the telescope, pauses, then slews to the right altitude. Then its photodiode solar sensor (a small camera) hunts for the solar disc and locks on. In practice, the system gets impressively close to that ideal — but with some small caveats.
A colorized image of the sun taken with a ZWO planetary camera on an H-Alpha telescope mounted on the SolarQuest. (Image credit: Jamie Carter)
The sun needs to be in a clear sky, but it doesn’t have to be high. We reviewed the SolarQuest during a summer heatwave, when getting up very early was the only sensible way to observe the sun. Having got up early to take advantage of the cool morning air before the sun rose too high, we feared the SolarQuest would fail to find such a low sun. Luckily, there were no such issues, with SolarQuest taking just under 60 seconds to be perfectly aligned with the sun.
The solar sensor uses four photodiodes to lock onto the sun. (Image credit: Jamie Carter)
For visual observing, that’s transformative. Instead of spending the first part of a session aligning, shadow-aiming and nudging a scope into position, you can be looking at the sun within minutes. However, we did have to use the joypad on the SolarQuest to center the sun. Happily, the controls are very sensitive and move slowly, so we were able to have a perfect view of the sun in under two minutes from pressing the power-on button. That’s impressive.
Sky-Watcher SolarQuest mount head: Functionality
Built-in GPS calculates the sun’s position automatically. (Image credit: Jamie Carter)
Accurately tracks the sun
8x AA batteries are old-fashioned
Payload is a limiting factor
Tracking accuracy is very good, with a tiny adjustment on the joypad required perhaps every few hours. Since it largely follows the sun’s path through the sky, it should be suitable for a total or deep partial solar eclipse, when a crescent sun could confuse the sensor (to be sure, you could cover the sensor during totality so it doesn’t hunt for the sun and try to realign during an eclipsed crescent sun).
However accurate it is, this is an alt-az mount. It can track the sun well but it cannot remove field rotation during much longer imaging sessions. For visual use and almost all solar use — including casual video capture — that is not a major issue. However, for long-duration solar imaging and creating time-lapses, it’s a limitation to keep in mind.
The battery compartment takes eight AA batteries, though external power is available. (Image credit: Jamie Carter)
One practical complaint is the battery compartment. Pop open the door (which detaches and becomes easily lost) and inside is a small plastic cradle that takes eight AA batteries. As if needing to take a trip to a store before being able to use the SolarQuest wasn’t annoying enough, it occurred to me that if I was going to an eclipse, I would need to travel with at least eight more AA batteries as spares — and possibly another 16x for true peace of mind. Not a pleasant prospect. Should any gadget like this be AA battery-powered in the age of Lithium-ion and USB-C? A resounding no. The box includes a 12V DC connection but there’s no cable. It all seems poorly thought through and old-fashioned.
The mount head weighs just 2.9 lbs, making it easy to carry outside. (Image credit: Jamie Carter)
However, the main practical limitation of the SolarQuest is its 8.8 lbs (4 kg) payload, which sets it apart as an accessory for small solar telescopes. At its best when speed and simplicity matter, SolarQuest is a travel-friendly mount ideal for beginners and eclipse chasers seeking to remove a common frustration from solar observing — finding and tracking the sun — without adding complexity. It almost totally succeeds.
How we tested the Sky-Watcher SolarQuest mount head
We tested the Sky-Watcher SolarQuest mount with the Sky-Watcher Heliostar 76mm H-alpha solar telescope. (Image credit: Jamier Carter)
We tried the SolarQuest for about two weeks with both a Celestron Regal M2 spotting scope (with a solar filter attached) for white-light observations of the solar disk and a Skywatcher HelioStar 76mm solar telescope. The latter was used to get some images of the sun in H-Alpha (Hα), in conjunction with a ZWO ASI174MM planetary camera.
Should I buy the Sky-Watcher SolarQuest mount head?
Buy it if:
✅ You want to get into casual backyard solar observing: The SolarQuest mount is great for those who have a small solar telescope or a regular telescope with a solar filter and want to start observing the sun more.
✅ You want fast, automatic solar finding and tracking: The SolarQuest mount makes solar observation super easy and super quick so finding the sun isn't a chore and allows you to focus on observation.
Don't buy it if:
❌You want a mount for nighttime astronomy as well: It has one job, to find the sun, and doesn't work for finding any targets in the dark night sky.
❌You don’t want to travel with lots of spare AA batteries: The mount is powered by eight AA batteries and if you are carrying spares, this means a lot of extra weight to carry around when travelling to observation locations.
If you need something to support a solar or solar-filtered telescope under 8.8 lbs/4kg, the SolarQuest should be on your radar. It quickly finds the sun and tracks accurately, removing the need for manual alignment. It’s also really compact, operates quietly and has very simple controls.
The included instructions are poor, the way it’s battery-powered is far from ideal, and it’s limited by its payload capacity, but it’s so easy to use and quick to work that it’s hard to criticize the SolarQuest too harshly — it’s a slick and simple accessory.
If the Sky-Watcher SolarQuest mount head isn’t for you
There are very few dedicated solar trackers like the Sky-Watcher SolarQuest. However, some star trackers do have a mode where you can choose the sun as the star to track, including the Benro Polaris. Once you’ve entered the sun in the frame using the virtual joystick, the Polaris can automatically track it. Another alternative is an equatorial mount, which, when well aligned, can handle solar observing for longer periods and/or for making time-lapse sequences.